[ad_1]
I shared last week about how I was going to have to completely redo some of the electrical wiring in the studio, and how that would necessitate removing some of the drywall in order to access the electrical wires. If you missed that, you can read about it here.
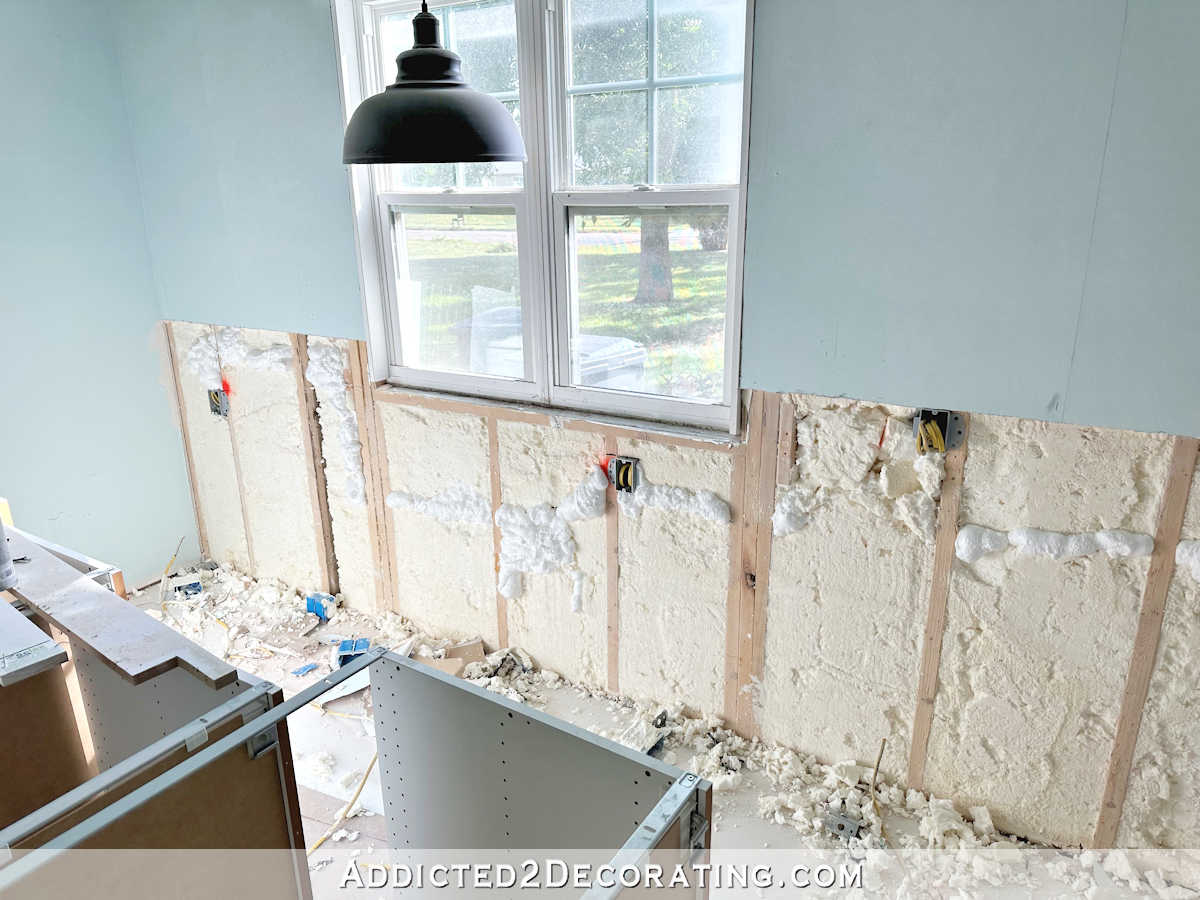
Well, the wiring is done. It doesn’t look pretty, but it doesn’t need to look pretty in order to work properly. I had to remove quite a bit of drywall on two separate walls in order to move the outlets that ended up being in the wrong spots when I changed my plans from making my cabinets to using IKEA cabinets. And after removing that drywall, I then had to cut out quite a bit of the spray foam insulation in order to remove the old boxes, place the new boxes, and run the new wires between the new boxes.
But it’s done, and about half of the areas where I had to dig out the foam insulation have now been filled in with new canned spray foam insulation. I didn’t buy nearly enough of the canned spray foam insulation, though. I thought it would go further than it did, so I need to buy several more cans to finish up.

Like I said, it doesn’t look pretty, but that won’t matter at all once the excess spray foam insulation is cut away to be flush with the front edges of the studs and the new drywall is installed.

In order to preserve as much of the original foam insulation as possible, I ran the new wires in the channels that I had cut out in order to remove the original wires. It looks ridiculous, and if this wall is opened up by someone else in the future, and they see this mess, they’ll probably wonder if the person who ran these wires was drunk on the job. ?

If I were placing the boxes and running the electrical wires in empty walls before the foam insulation was sprayed, it would have looked all nice and neat like this…

But because I didn’t want to cut additional channels through the insulation, and I also didn’t want to drill new, additional holes in the studs, my wiring ended up looking more like this. ?

It’s not pretty, and it took a little more electrical wire to do it this way, but at least I was able to preserve as much of my original foam insulation as possible.
The wall in the “office” area of the room behind my desk looks like a mess as well, and it hasn’t been filled in with the canned spray foam yet.


This wall now has four outlets that are in line with each other horizontally. If I were able to do this wiring in empty pre-foam insulation walls, it would have looked all nice and neat like this…

But you can see this crazy, nonsensical path that I took with the new wires through the original channels and the original holes in the studs. ?

But at least I was able to preserve most of the original insulation, and I didn’t have to drill new holes in the studs. And it’s done.
Now the challenge is finding someone to install drywall. I shared my frustration with finding a handyman to do small-ish jobs a couple of weeks ago, and things haven’t improved. I’ve tried three additional people since then. One seemed to be really on top of things and ready to take on the job. The reason that one didn’t work out was my fault because I couldn’t decide exactly how I wanted to handle the electrical outlet situation. When he came to look at the project and give me an estimate, I was still planning on moving all of these outlets up on the walls. That idea wasn’t feeling right to me, so I told him to hold off until I could make a decision, and to not hold the day open for me. So once I finally made a decision, he had scheduled someone else for the day he had planned to do this work. (And to be clear, I offered to pay him for the time he took to come to my house, look at the job, and give me an estimate. He declined.)
So then I contacted another one whose wife handles his schedule. I spoke with her on the phone, and she said she’d talk to her husband and call me back in five minutes. That was three days ago, and I never heard back.
And then a third person came and looked at the job. He seemed really nice, and told me he’d text me an estimate. I never heard back from him. I texted him to ask if he had a price for me, and my phone shows that he read my text within about four minutes of me sending it, but he never responded.
So I have no idea when this will ever be finished. I’ve all but given up on this room being finished by our 10-year anniversary in our home (which is August 17th, I think). I simply won’t do the drywall myself. I swore to myself several years ago that I’d never do drywall again, and I have no plans to change my mind on that. I’ll wait two months for someone else before I’ll ever consider doing it myself. So things are stalled until I can find a reliable drywall person.
In other, happier news, my fabric from Spoonflower came, and I love it! (If you missed how I’ll use this fabric, you can see that here.)

I was so curious to see how it compared to the wallpaper, so I got out a roll of the wallpaper and placed it on the fabric. The wallpaper is on the left, and the fabric is on the right. That’s a pretty good match!

You can tell that the colors on the wallpaper are just a touch more vibrant, but I think they’ll work perfectly together.

The difference is seen the most in these purple flowers. The wallpaper on the left is more vibrant than the fabric on the right. But seeing that the wallpaper and the fabric will be on opposite sides of the room, I think they’ll work perfectly together.


Addicted 2 Decorating is where I share my DIY and decorating journey as I remodel and decorate the 1948 fixer upper that my husband, Matt, and I bought in 2013. Matt has M.S. and is unable to do physical work, so I do the majority of the work on the house by myself. You can learn more about me here.
[ad_2]
Source link


