This week, I’ve been sharing a pictorial walk-through of our house, comparing the pictures that I took on the day we were handed the keys in August 2013, and showing what those views look like today. If you’ve missed those posts, you can find them here:
I hope to have Part 3 (the final post for now) up tomorrow if I can get all of my photos ready in time. If not, it may be Monday.
A recurring question that several of you have asked on these home tour 2013 vs. 2022 posts is, “When you bought the house, did you already envision what it is today?”
The short answer is, “No!” In fact, those of you who have been around here the longest will probably laugh at that question, as you’ve seen me struggle with ideas, test out different arrangements, and figure things out as I went along. It has definitely been a process.
The first time I walked through the house, I didn’t have any idea what I would do with it. But for some reason, I knew it could be beautiful. Everything about the house that looked awful was just cosmetic — the old drywall, carpet, polystyrene ceiling tiles, bathroom tiles, fixtures, cabinets. I knew those could all be stripped away and replaced with new and updated materials. I knew once all of that was done, it could and would be beautiful (to me).
What really drew me to this property was the one acre of land that the house sits on. It’s pretty uncommon to find a lot this large within the city limits, so when this opportunity came along, I wanted to jump on it. And my thought was, “The lot comes with this house, so I’ll just have to make the most of it.”
Even on the day that we closed on the house, and I was finally handed the keys, I had no idea what I’d do with the actual house. I still felt confident that I could do something with it, but I knew it would stretch my DIY skills far beyond what I knew myself to be capable of at that moment. That part terrified me and excited me at the same time.
But let’s face it. When the front of the house looks like this…
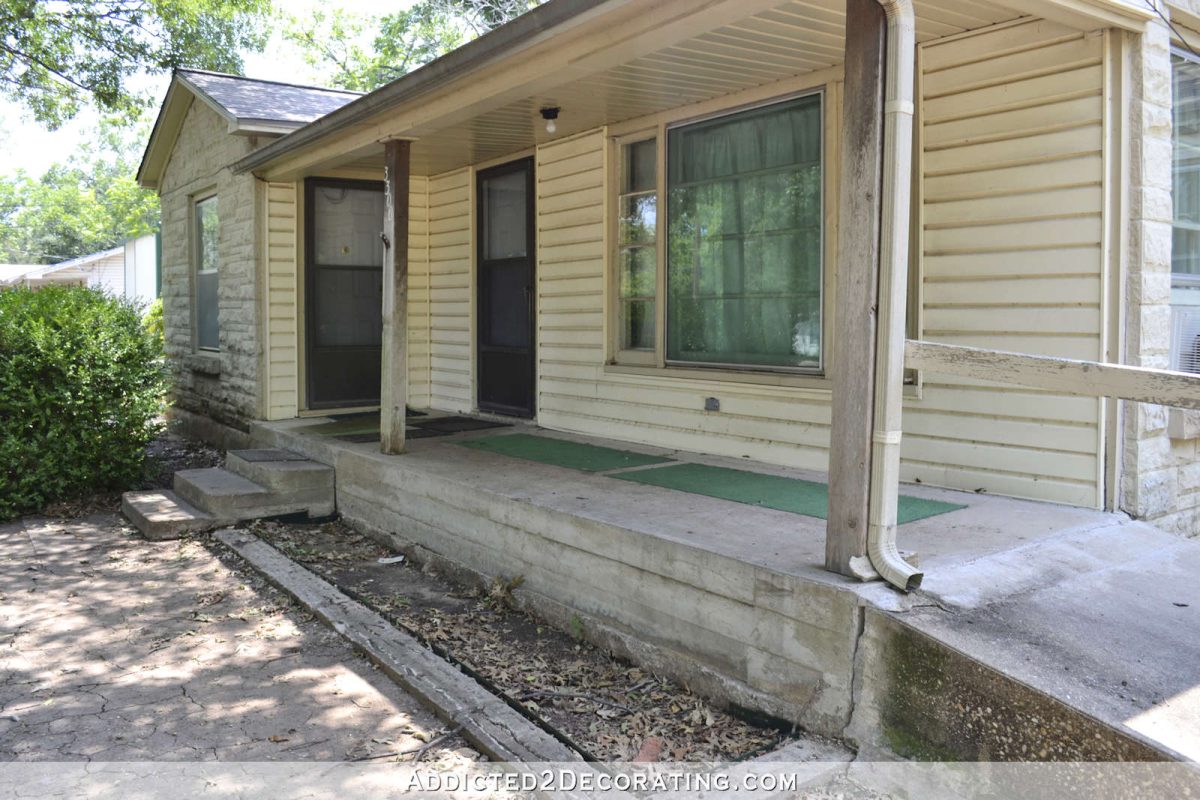
…that can be incredibly daunting to a DIYer whose most extensive project to date had been making some new cabinet doors for a bathroom makeover, using stock cabinets to turn into a living room bookcase, and installing butcherblock countertops in a tiny condo kitchen.
At the time, I had no idea what could be done with this front porch. Or the ramp. Or those concrete steps. Or the vinyl siding. Or the old windows. Or the two front doors. I figured that the only way to get the front exterior looking decent was to hire a contractor to completely redo the whole thing.
Some of you long-time readers may remember when I was contemplating different designs for the front of the house — designs that would definitely require the work of professionals to accomplish.
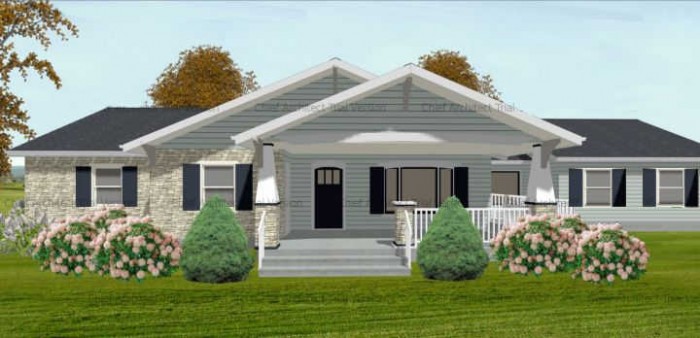
That still might be a possibility one day (I still love the way that looks), but in the meantime, my DIY skills and confidence great to the point that I knew I could make some significant changes to the front porch area to give it new life. I learned how to beef up the posts and make them look more like columns. I learned how to build the front steps. And I learned how to cover over a concrete porch with wood.

Hopefully at some point this spring or summer, I can learn how to finish installing a fake stone skirting to the rest of the concrete. ? That project has been partially finished for about three years now, so I guess it’s about time to revisit it and finish it. ?
Also, I had initially thought that we’d have to have a wheelchair ramp in the front for Matt, but I knew that the existing one was far too steep and dangerous. That plan for the perfect wheelchair ramp in the back, where there was plenty of room to make it long enough with the perfect (and safe) pitch, was only made possible when we decided to convert the garage into my studio.
When we bought the house, the idea of that conversion hadn’t even dawned on either of us. We naturally thought that the garage would remain the garage, possibly with one side being used as my workshop where I use my tools. I knew it would need some work, like wider garage doors and new concrete since the existing concrete was cracked and unlevel.
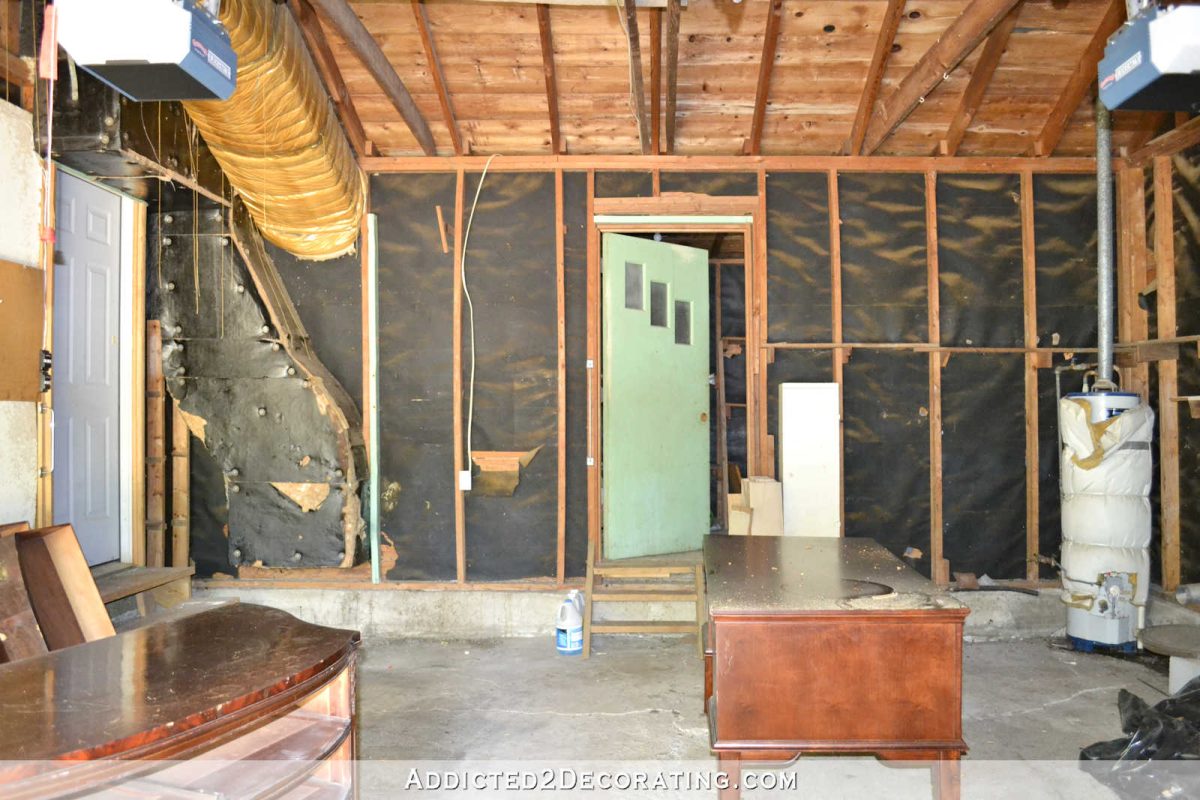
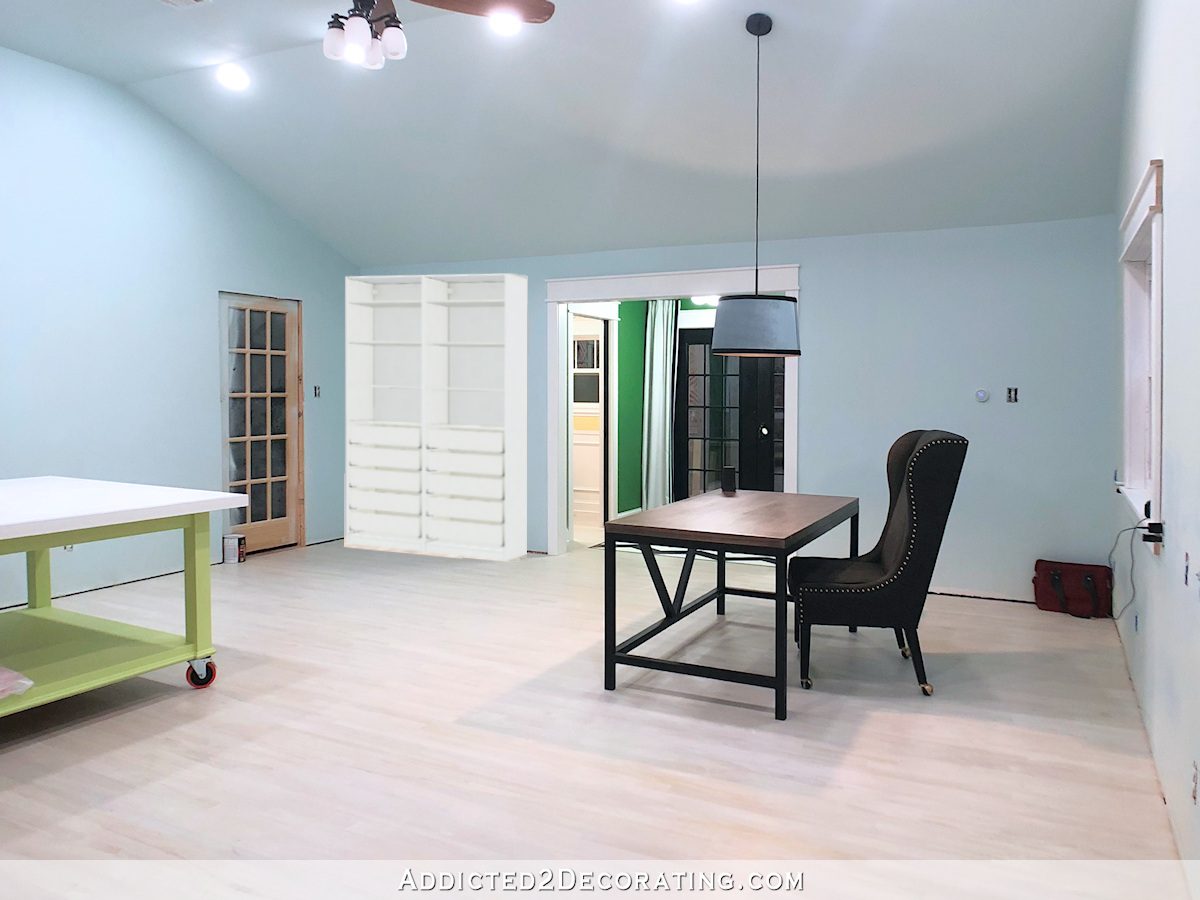
The idea of converting that garage into actual indoor space didn’t come along until four years after we bought the house. Now if I can just get all of those cabinets built, I can get my things out of boxes and have an efficient workspace. Hopefully this year I can get to work on all of the cabinets I have planned for this room.
The kitchen was the first room of the house that I remodeled (as in, tore down to the studs and rebuilt). And I took on that remodel in 2014, the year after we bought the house. But for that first year, I still thought that I could possibly reuse and rearrange the original cabinets.
This is one of many photos I took as I was testing out different arrangements in the kitchen.
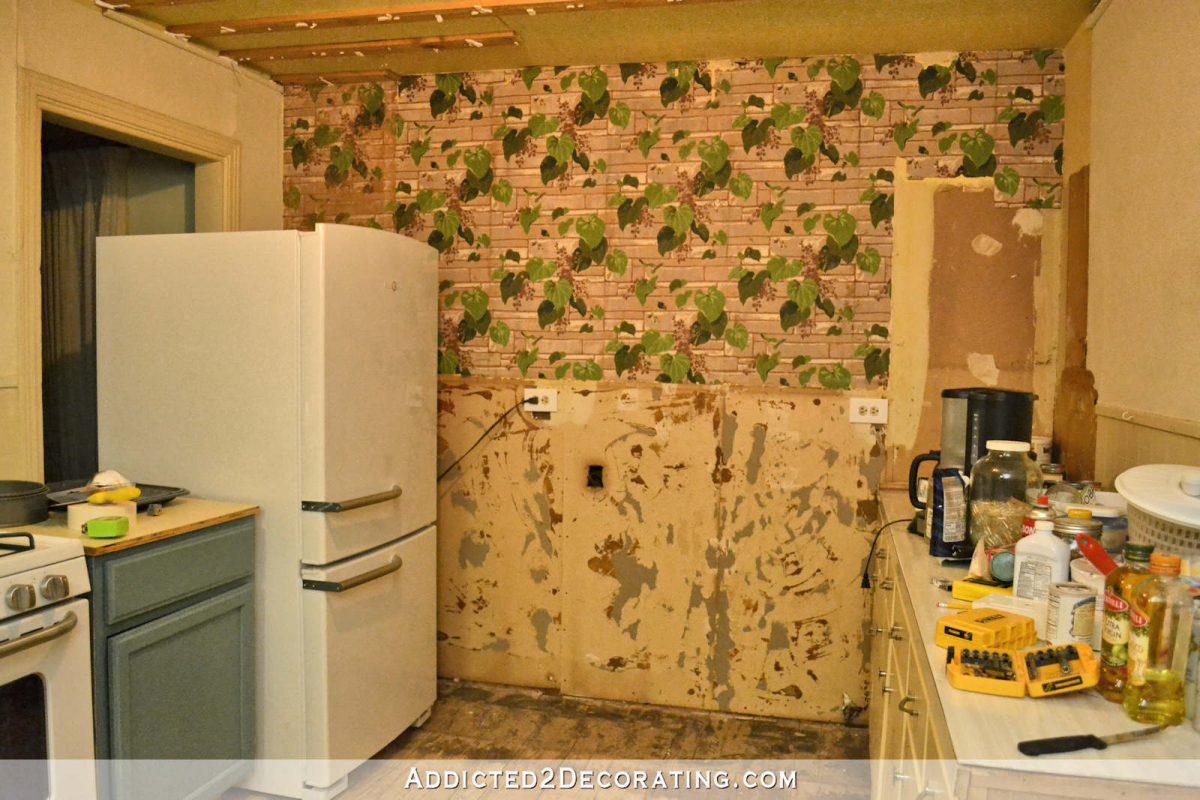
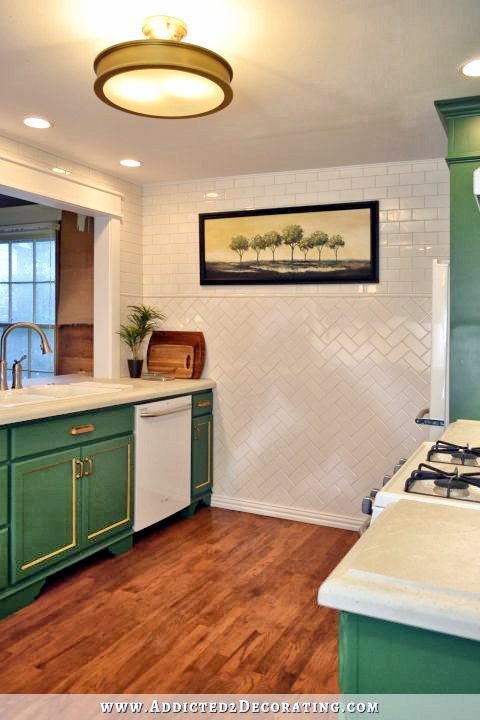
Do you even recognize that angle? ? If not, let me help you out. That looks like this today…
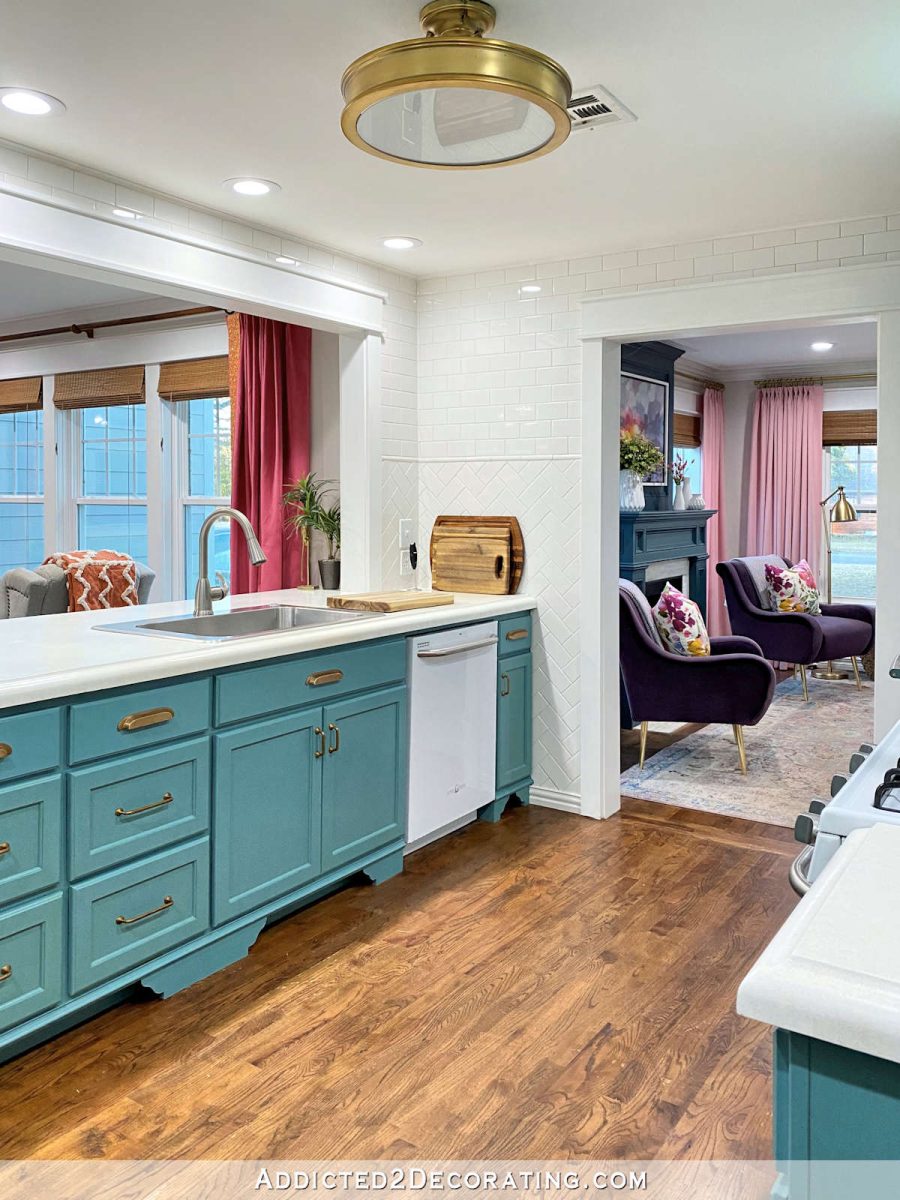
Yeah, I had no idea what I was doing at the time. ? I remember trying to salvage the drywall on the ceiling because I was afraid of taking it down. Yes…afraid. It wasn’t the drywall that I was afraid of. It was the attic. I have no idea why, but I had an actual fear of the attic, and the idea of having the attic exposed by removing drywall nearly brought me to tears.
Even during the original remodel, I hadn’t even considered opening up the kitchen to the living room. That was another idea that evolved over time. Here’s what that same view looked like after the original remodel…
And then who can forget the circa 2016 “living room to dining room and back to living room” fiasco? ? I had the not-so brilliant idea of turning the living room into a dining room, and proceeded to add a ton of picture frame molding to the room of our house that had the most doors and windows of any of the rooms. It’s was ill-conceived from beginning to end.
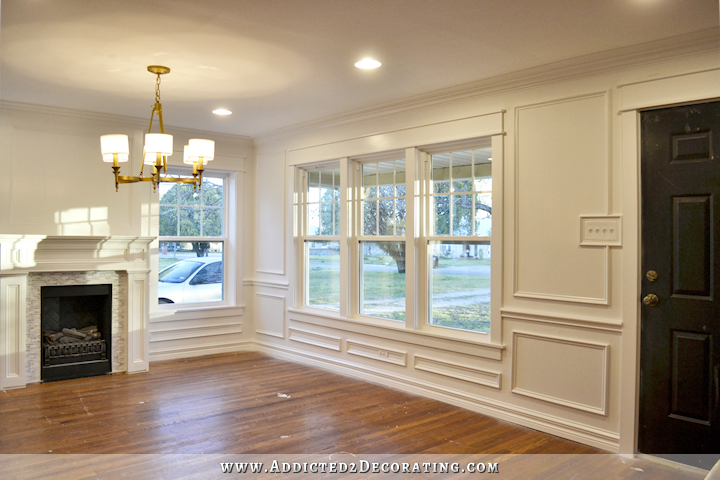
Thankfully, in November 2016, I finally gave up trying to shove a square peg into a round hole, and decided to turn it back into a living room. And my goodness, am I glad that I made that decision!

I’m sure I could go on and on with way more examples than you’d imagine, but needless to say, I had absolutely no idea what I wanted to do with this house when we were handed the keys. I had no vision for it, and I certainly could never have imagined what it would actually turn into. It has been something that has evolved over the years. And in a way, that’s good. As our needs have changed, our plans have changed. As my taste in decor has changed, my plans have changed. And there’s nothing at all wrong with that.
So if you’re buying a house, and you want to tackle a fixer upper, just know that it’s perfectly okay if you don’t have a complete vision for what it will look like when it’s done. You can let that evolve over time, as you live in the house and figure out what works for you, what doesn’t work for you, and how you want the house to look. That can take time, and that’s okay.
For the record, if I were to buy a fixer upper today, I would definitely have more vision from the get go about what the house could become. I’ve learned so much over the last eight years. I’ve grown tremendously in my DIY skills from where I was eight years ago. I’ve learned a ton of new information, worked with a great contractor on a couple of my own projects, grown in my knowledge about construction, and come to a better understanding of what the possibilities are when walking through a house that needs updating. Maybe I’ll get to tackle a fixer upper/flip someday in the future. That would be fun!

Addicted 2 Decorating is where I share my DIY and decorating journey as I remodel and decorate the 1948 fixer upper that my husband, Matt, and I bought in 2013. Matt has M.S. and is unable to do physical work, so I do the majority of the work on the house by myself. You can learn more about me here.
I hope you’ll join me on my DIY and decorating journey! If you want to follow my projects and progress, you can subscribe below and have each new post delivered to your email inbox. That way you’ll never miss a thing!

