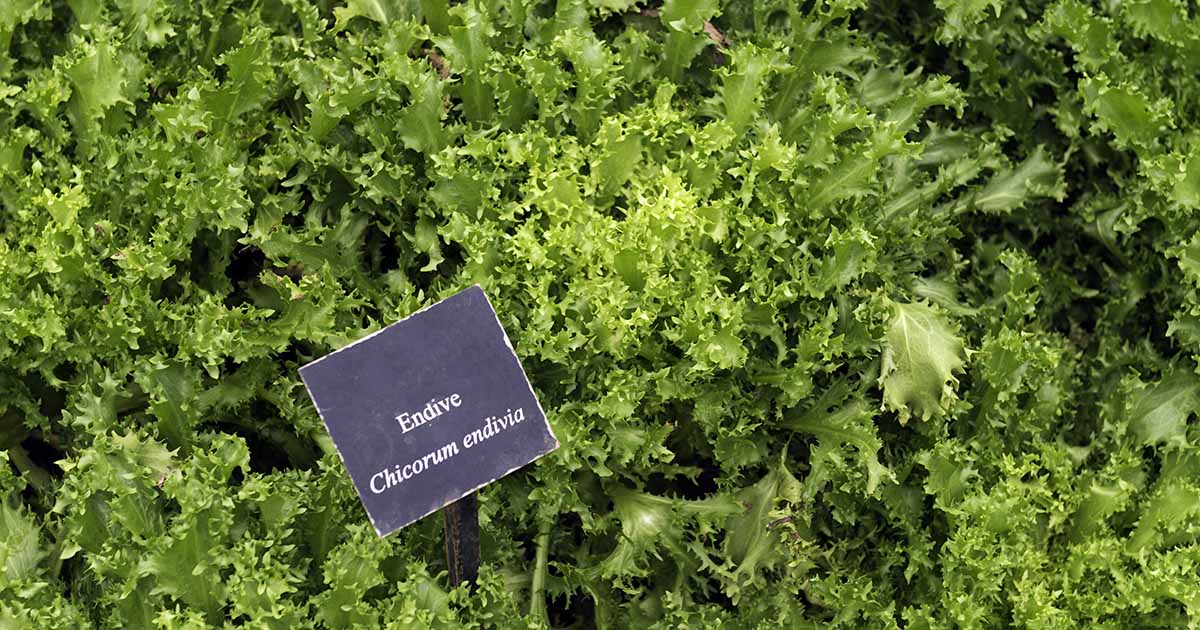
Cichorium endivia
Lately, I’ve been looking for a way to perk my salads up a bit.

Don’t get me wrong, I love a good salad, but there are days when I worry that if I have to stick my fork into another baby spinach and arugula mixture, my taste buds will fall asleep.
Can you relate?
Kale is super, but maybe you’re in search of something else that’s leafy and green, with a little extra crunch and a touch of bitterness. Something more delicate than radicchio, but less tough than cabbage.
Endive might be just the thing you’re looking for. It’s a little different, not too fussy, and fabulously flavorful.
Depending on the cultivar and growing conditions, this veg can range in flavor from subtly to boldly bitter, and it has a crisp, juicy texture – perfect if you want to mix things up a bit.
Endive (Cichorium endivia), sometimes called escarole or frisee, isn’t as well known as its lettuce friends, but you can often find it in trendy restaurant salads and specialty markets, where a head practically costs as much as a small SUV.
I kid, I kid. But once you figure out how to make it thrive in your garden, there’s no need to shell out the green or wait for a special occasion to get your fix.
Don’t confuse endive with Belgian endive (C. intybus var. foliosum). That’s a different species of plant in the Cichorium genus. It’s a light yellow or cream torpedo-shaped head of greens.
If you can grow lettuce (and if you haven’t tried it yet, trust me, you can), you can also grow endive.
To help you with your gardening goals, here’s everything we’ll cover:
What Is Endive?
Endive (pronounced in-dive or en-dive) is a cool-weather leafy green with slightly bitter leaves.
Part of the same genus as common chicory and Belgian endive (Cichorium), there are two types of cultivated endive in this species: curly and broad-leaved.
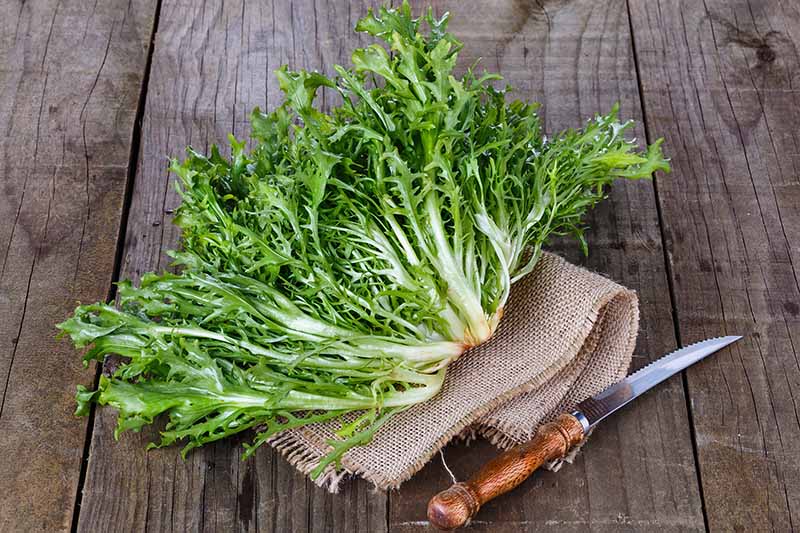
Curly (C. endivia var. crispum) is often called frisee, which means curly in French. It has narrow leaves with a distinct ruffly curl.
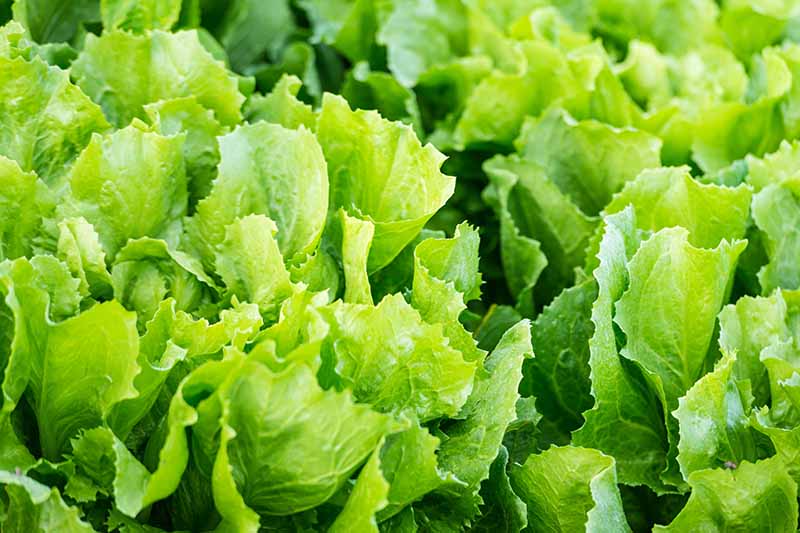
The broad-leafed type (C. endivia var. latifolia) is often called escarole.
It has wide leaves with a subtle wrinkle. This type tends to be less bitter than the curly type.
You may also see the plant called Batavia endive, grumolo (for the flat-leaf type), or scarola (also for the escarole type).
The name “Batavia” comes from an area of what is now Holland that was inhabited by the Batavi, a Germanic tribe, from the first century BC to the third century AD.
Endive is also related to wild chicory and radicchio.
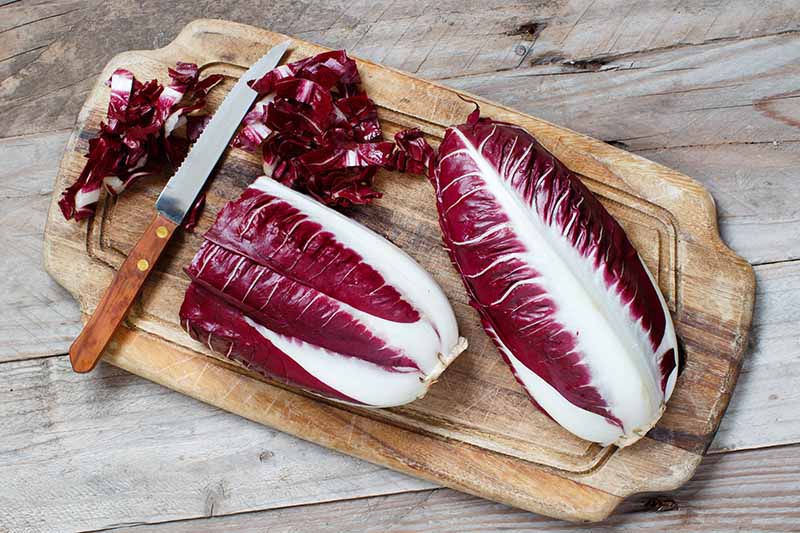
The plant is naturally a biennial (unless it bolts in the first year), but it’s grown as an annual in USDA Hardiness Zones 4-9.
Like its chicory relatives, it typically blossoms in the second summer of its life. The blue flowers open in the morning and gradually wither throughout the day.
Plants in the Cichorium genus have what is known as an inflorescence rather than a single flower.
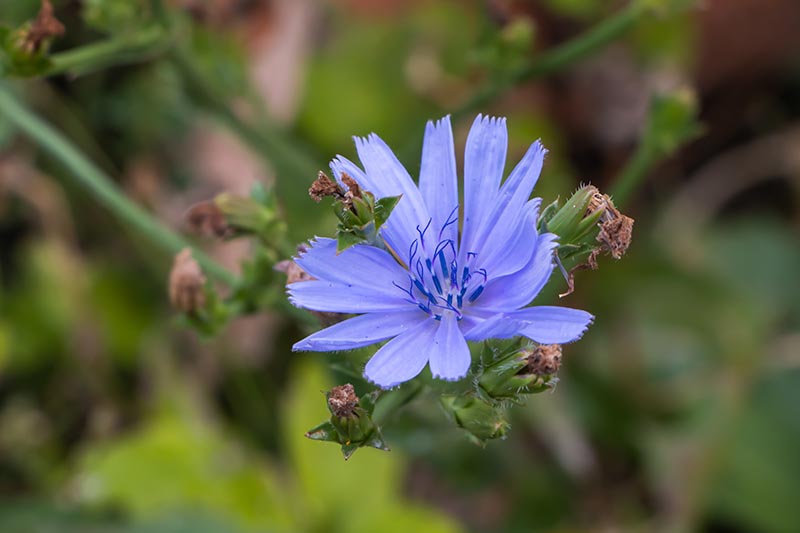
An inflorescence is a collection of individual florets that combine to form a whole. Dandelions, which are in the same family, have the same thing.
Once the flowers form, the leaves become incredibly bitter and tough, and the plant dies back.
The leaves take anywhere from 50 to over 95 days to mature, though you may harvest them at any point after they emerge from the ground.
Some people opt to blanch the inner leaves of the head during the final phases of growth before harvest in order to produce less bitter leaves. We’ll talk about how to do this later on, but just be aware that it’s an option if you prefer a less bitter veggie.
They have high levels of vitamins C and K, and the flavonoid kaempferol, which may play a role in reducing the risk of chronic diseases, including cancer.
Cultivation and History
Endive was likely first cultivated in the Mediterranean, northern Africa, and India.
Escarole was grown by ancient Egyptians and Greeks for use in salads. Frisee wasn’t cultivated until after the 1500s, when central Europeans started to grow the plant.
Today, both are popular greens in France, Belgium, and Holland, and more and more commercial growers are cultivating the plant in North America as well.
Propagation
As long as the temperatures are right, you can put endive in the ground any time of year.
Many people sow seeds in the early spring, but you can also plant in the early fall or winter if you have enough good growing days between the first and last average frost date and the heat of summer.
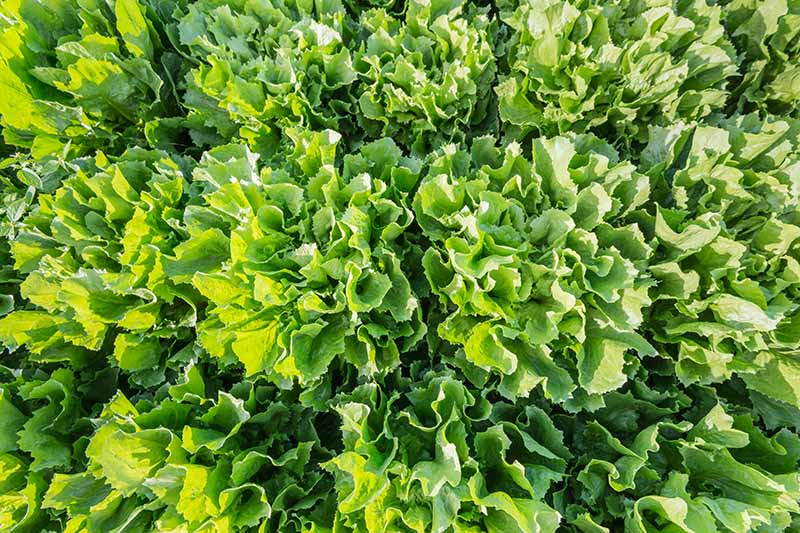
You’ll need about 45-100 growing days, depending on the cultivar.
The ideal average air temps for growing are between 60 and 65°F, though they can handle a broader range than that. A light frost won’t hurt them and can even improve the flavor of the leaves, but a hard freeze will kill off most cultivars.
Like lettuce, if endive gets too much heat, the leaves become bitter and tough, and the plant bolts.
That said, particularly curly varieties, are more resistant to bolting in the heat than lettuce, surviving temps into the mid-80s with some shade during the hottest part of the day.
Just to give you an idea of growing options, in states like Florida and Arizona, it’s grown September through April.
In cooler areas like northern Minnesota, it’s possible to grow endive during most of the summer. In the UK and the Pacific Northwest, gardeners may grow endive from February through October.
Now that you know when to plant, it’s time to prep the soil.
Endive needs well-draining, water-retentive soil that is rich and loamy, with a pH between 6.5 and 7.8.
Test your soil before planting to figure out if you need to add any nutrients or adjust the pH. To amend sandy soil, add well-rotted manure or compost. To loosen clay soil, add compost or rotted leaf mulch.
From Seed
Put seeds in the ground outdoors on a date when you have enough time for the plants to reach maturity, and when temperatures will be in the right range.
For many people, this means planting as soon as the last frost has passed in the spring, or 45-90 days before the first frost in the fall.
Seeds won’t germinate when temperatures are over about 80°F or below 35°F. Temperatures in the 60s are ideal for germination.
If you don’t have enough ideal growing days in your area, you can start plants indoors and then transplant them when the weather is right.
Start seeds about six weeks before the estimated last frost date in your area and transplant outdoors after the last frost date.
For fall planting, start them indoors 45-90 days before the average first frost date in your area.
Sow seeds outdoors 1/4 inch deep every few inches or so, in rows 18 inches apart. Thin the seedlings to 12 inches apart once they’ve emerged.
Adjust this recommendation based on the specific cultivar you choose, as some will need more or less space to grow.
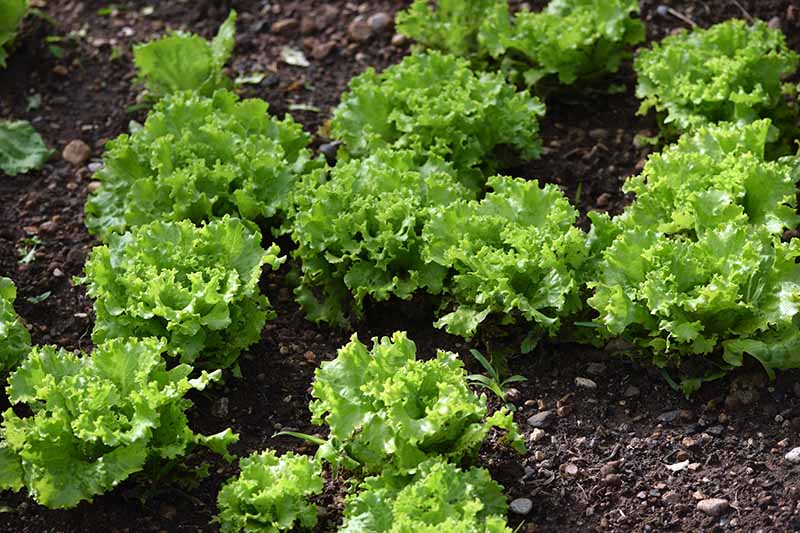
Some cultivars are self-blanching (we’ll talk more about this in a bit). If you choose one of these, thin your endive to about eight inches apart to encourage self-blanching.
I’ll let you in on a little secret, though. Even plants that aren’t self-blanching can be made to be so.
All you need to do is put the plants four to five inches apart in the garden. As they grow, the heads mash up against each other, and the leaves in the center are naturally forced closed.
Planting this close could encourage pests and diseases to take hold, however, so you’ll need to be extra careful to use good gardening practices to prevent problems.
That means watering at the soil level rather than on the leaves, keeping weeds out, fertilizing appropriately, and checking plants every day for signs of problems.
Regardless of spacing, keep the soil moist but not wet as the seeds germinate and grow.
Indoors, sow in 3/4-inch plug trays filled with a seed starting mix. Keep the growing medium moist and put the trays in a cool area.
Give them 12-16 hours under a grow light per day rather than relying on the natural light from a window to help prevent damping off.
You should see the plants beginning to emerge after about seven days.
Harden them off so that they’re ready to go outdoors once they’ve reached a few inches tall, by reducing the amount that you water and setting them outside in a protected spot for an hour or so.
The next day, put them out for two hours. Do three hours on the third day and so on, until they can sit outside all day hours.
Then, plant as you would a transplant.
From Seedlings or Transplants
You may be able to purchase transplants at your local nursery or garden center, which is ideal if you want to get a head-start on getting these in the ground, or you want the flexibility to plant them a little later.
To transplant, dig a hole in prepared soil that is the same size as the container it was growing in.
Gently remove the plant from its growing container and lower it in place in the hole. Tamp the soil around it to secure it in position. Give the plant plenty of water to help it settle.
How to Grow
The soil needs to stay moist but not wet to keep these plants tasting their best. Dry soil causes the leaves to turn bitter.
The plants also taste less bitter when they mature quickly, and water is essential to make that happen.
Endive has shallow roots, so you may find that you need to water several times a week.
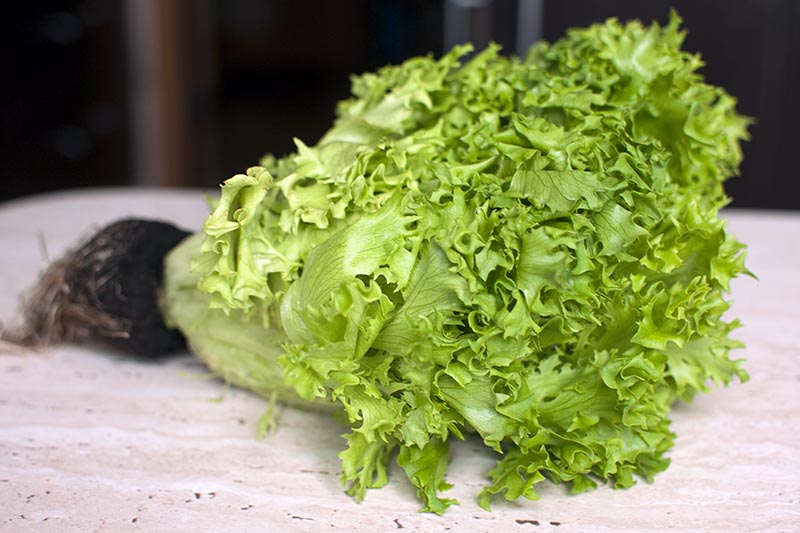
The easiest way to tell if it’s time to water is to stick your finger into the soil.
Does it feel like a well-wrung-out sponge? Then you nailed it! If it feels wetter, hold off on the water for a bit. Feel dry? Get to watering.
When temperatures climb above 75°F, endive needs some shade.
It’s fine to plant in full sun if temperatures stay below this threshold during your growing season, but select a location with partial shade to protect plants during the warmest period of the day if you live somewhere warmer.
Fertilize with a nitrogen-heavy mixture after plants are about three inches tall. Alternately, use a balanced fertilizer and work some blood meal into the soil simultaneously, for added nitrogen.
I’m a fan of the Down to Earth brand. They make natural fertilizers that I feel good about using in my garden. If you want to purchase their blood meal, Arbico Organics has you covered.
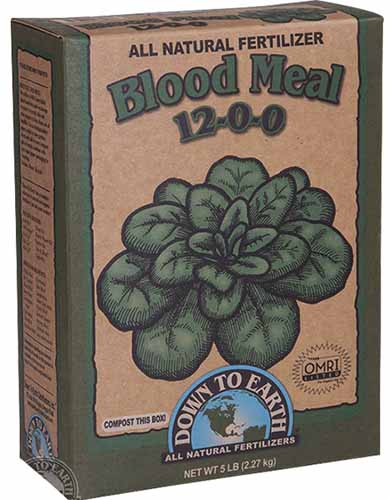
Down to Earth Blood Meal
Follow the manufacturer’s directions for timing and amounts.
Don’t use a fertilizer that contains weed killer, because it might kill off your endive along with any other broadleaf weeds.
Be aware that plants may bolt if the weather is too wet, too hot, or too cold. If that happens, pull them and give the leaves a nibble.
They may still be edible chopped finely and added to a salad. If they’re too tough and bitter, toss them into the compost pile.
Container Growing
Endive lends itself nicely to container growing, and this is a great option if you have unpredictable weather, because you can move the container to shade or even indoors if you have a surprise heatwave or cold snap.
Plus, this is an excellent option for apartment dwellers to have their own homegrown veggies.
Use a one-gallon container to grow three or four heads. Fill it with a container-specific potting mix.
The challenge here is going to be keeping the soil moist, since containers tend to dry out more quickly than the soil in the ground. You might want to use a drip irrigation system or a self-watering container to ensure good results.
Blanching
Blanching makes harvests less bitter because it reduces the amount of chlorophyll in the leaves. Some cultivars are self-blanching, and you can skip this step if you choose these.
As mentioned above, you can opt to put your plants closer together to encourage them to self-blanch. Doing so may encourage fungal diseases, however, so if you decide to keep them more spaced apart, you’ll need to manually blanch them.
There are several ways to go about blanching your plant. The most common is to pull the outer leaves over the center of the plant and secure them in place with some string, tied around the head about a third of the way down.
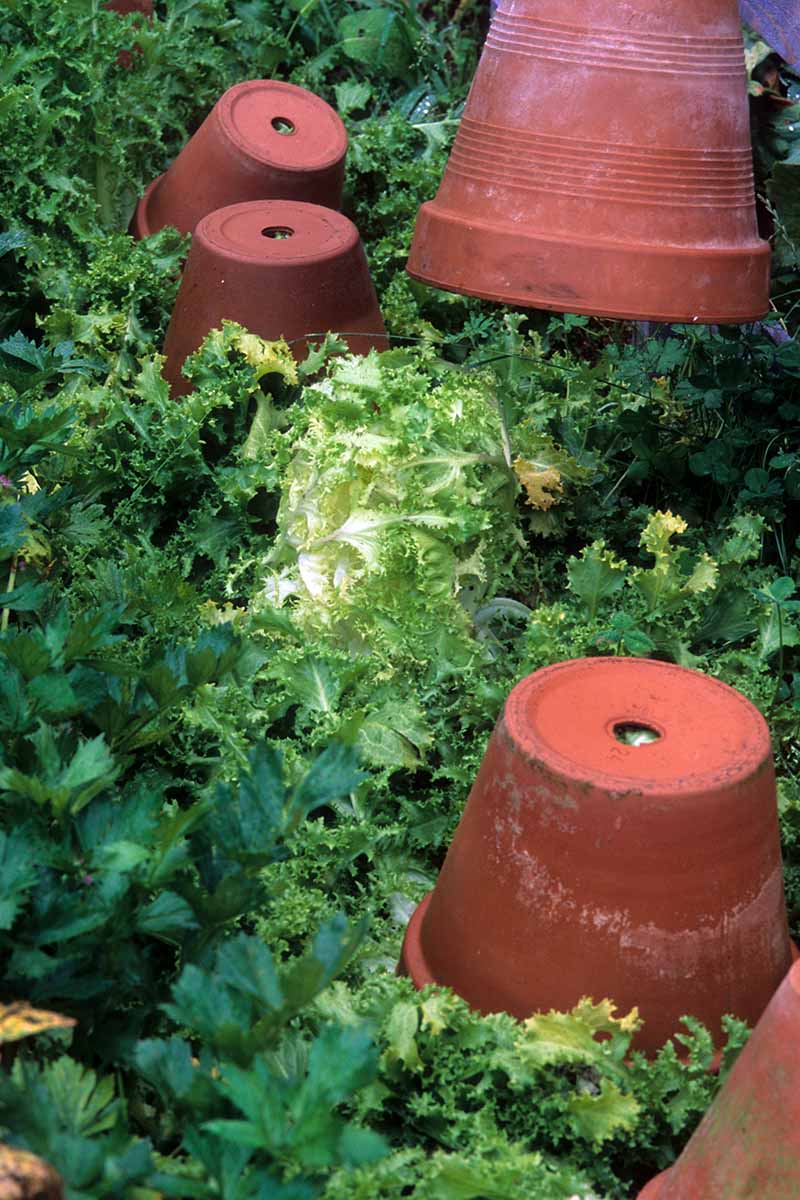
Alternately, place a bowl, planter, or cardboard box over the entire plant, but be sure to cover any drainage holes in your planter, or seams or holes in the cardboard. Absolutely no light should get through.
Whichever method you choose, make sure the leaves are completely dry before covering or tying them up to avoid rot.
You’ll need to blanch for about two to three, so start this process about a few weeks before the seed packet says the plant will reach maturity.
It’s fine to lift the cover or untie the leaves to check and see if the plant has blanched to your liking. The inside of the heads should be creamy white when they’re ready to harvest.
Growing Tips
- Keep the soil regularly moist.
- Fertilize with a nitrogen-dominant mixture.
- Blanch plants to get a less bitter heart.
Cultivars to Select
You’ll often see the plants and seeds sold under a generic name.
For instance, Eden Brothers carries a “frisee” endive.
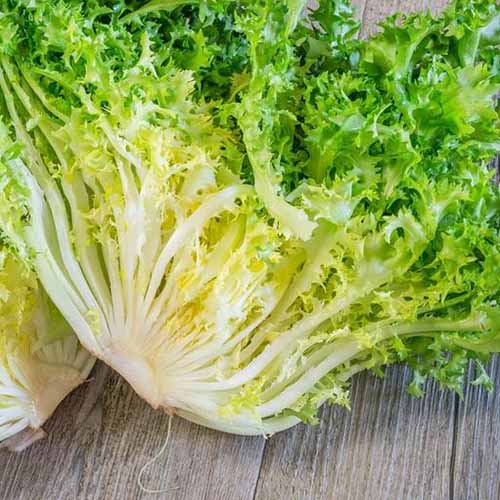
Frisee Endive
However, there are some fantastic named cultivars out there that are worth seeking out in addition to the true species variants.
Broadleaf Batavian
Ready to harvest in 85 days, ‘Broadleaf Batavian’ is a broadleaf type (obviously) with 12-inch-wide heads.
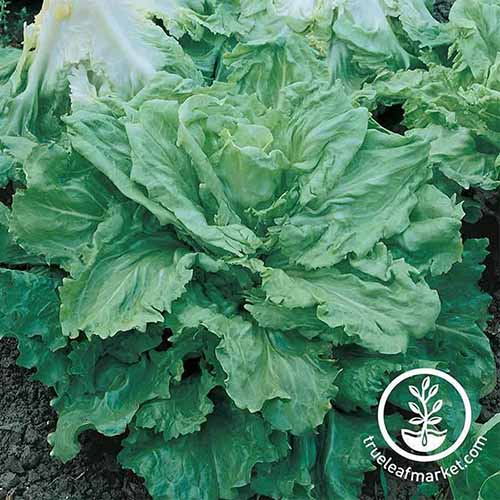
‘Broadleaf Batavian’
This stunning variety has dark green leaves on the exterior and gradually fades to creamy white at the center. The leaves have a slight twist to them.
You can find seeds available in a variety of package sizes from True Leaf Market.
De Louviers
This is my personal favorite. ‘De Louviers’ has frilly, deeply notched, finely curled leaves and a 12-inch head.
The heart self-blanches and the heart is finely curled and yellow when mature. It looks positively stunning on the plate and growing in the garden.
The flavor is mildly bitter and the leaves have a crisp, refreshing crunch. It matures in 80 days.
Full Heart Batavian
The 12-inch heads of this broadleaf type feature mild, dark green leaves.
Iowa State University’s Home Garden Management guide recommends this cultivar for home gardeners. It was also an All-America Selections winner for the edible vegetable category in 1934.
Part of what makes this such a good option is that it produces a large number of leaves and is easy to blanch, because of its compact growth habit and large leaves. It can also handle a bit more heat than other cultivars without turning bitter.
This one matures in 85 days and is one of the most common broadleaf types available.
Galia Frisee
‘Galia Frisee’ is the perfect endive for the impatient gardener. It’s ready for your table in anywhere from 40 to 70 days, which is half the time of some other varieties.
I think it also does double duty as an ornamental in the garden because it has beautiful dark blue-green leaves on the exterior that contrast dramatically with the creamy yellow center.
The leaves are long, narrow, and elegantly ruffled. It almost looks like green lace in the garden.
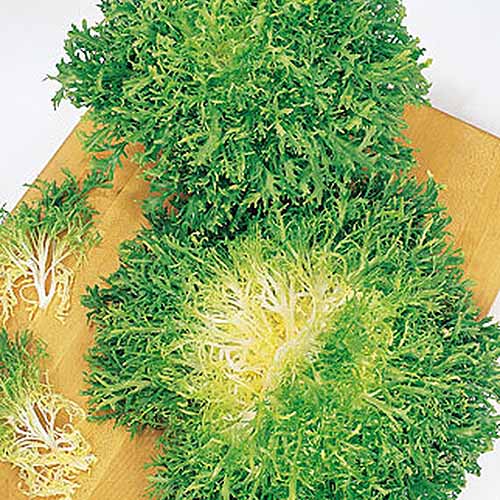
‘Galia Frisee’
It grows to be about six inches to a foot across when mature.
You can find packets of 950 seeds available at Burpee.
Green Curled Ruffec
This curly variety is ready to eat in 95 days and tolerates both a freeze or two and wet weather without bolting. It’s large and grows to be about 15 inches wide.
The loose heads are more compact in the center, so it lends itself nicely to blanching. All you need to do is tie up the outer leaves two or three weeks before harvest for a picture-perfect blanched head.
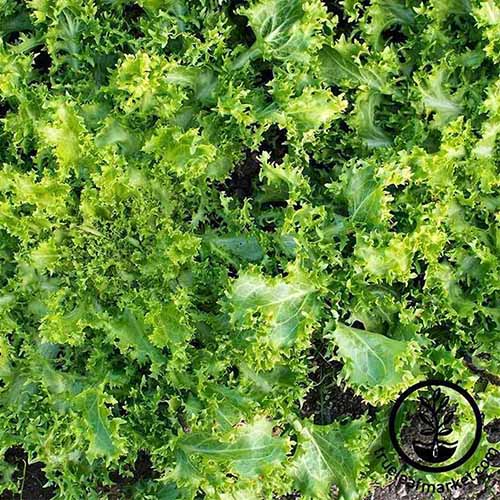
‘Green Curled Ruffec’
If you want to give this beauty a try, you can find seeds in a variety of packet sizes available at True Leaf Market.
Grosse Boucle
This broadleaf variety has a tight, curly heart that self blanches. It is less prone to bolting than many others, so it’s ideal for growers in warmer or wetter areas.
It produces large, thick leaves that are crisp and juicy.
Harvest after the leaves have matured for about 85 days.
Rhodos
‘Rhodos’ is ready for harvest quickly, after just 50 days. Also known as ‘Tres Fine Maraîchère,’ each head reaches about 12 inches wide at maturity.

‘Rhodos’
The leaves are tightly packed, so the heart self-blanches.
If you want to try out this particular cultivar, you can find seeds available from David’s Garden Seeds via Amazon.
Salad King
This cultivar has long, curled leaves with a pale green midrib and dark green blades, making it not only tasty in your salad, but a feast for the eyes.
‘Salad King’ is less prone to bolting than some other varieties. Let it go through a frost and the process of blanching to reduce bitterness. The result is a mild, sweeter leaf. This one of the most common curly varieties.
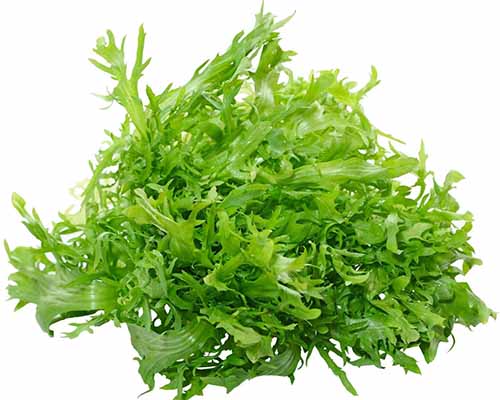
‘Salad King’
The heads grow quite large – about 24 inches wide at maturity and are ready to harvest in around 70 days.
Add this endive fit for a king to your garden by heading to True Leaf Market to find seeds.
Managing Pests and Disease
You have to watch out for several herbivores that find endive as tasty as humans do. There are also a few pests and diseases that may plague these plants.
Keep reading to learn what to keep an eye out for, and how to prevent and treat problems.
Herbivores
I love endive, so I can hardly blame the local wildlife for feeling the same way. Still, I’m not going to all this trouble just to feed them my precious veggies.
Deer, rabbits, and voles will all make a meal of the heads, so here’s how to prevent them from enjoying a fresh salad before you can.
Deer
Not only do deer love endive, but chicory is sometimes grown intentionally to feed livestock and deer. If you have marauding ungulates in your neck of the woods, you’ll need to protect your plants.
Our guide to protecting the garden from deer will set you on the right path to dealing with the problem.
Motion sensors, spray repellents, and fencing will all help you to keep the deer where you want them, and out of where you don’t.
Rabbits
You’ve probably seen pictures of a rabbit contentedly munching on a leaf of lettuce. Well, endive is not much different, and a rabbit will leap at the chance to chow down on your carefully tended leaves.
We have a whole guide just for helping you keep rabbits at bay, including how to use raised beds and fencing.
Voles
Don’t even get me started on voles. I went out to my yard to check on my endive patch one day and noticed that several of my plants appeared wilted and sad. I gave them some water, but saw no improvement.
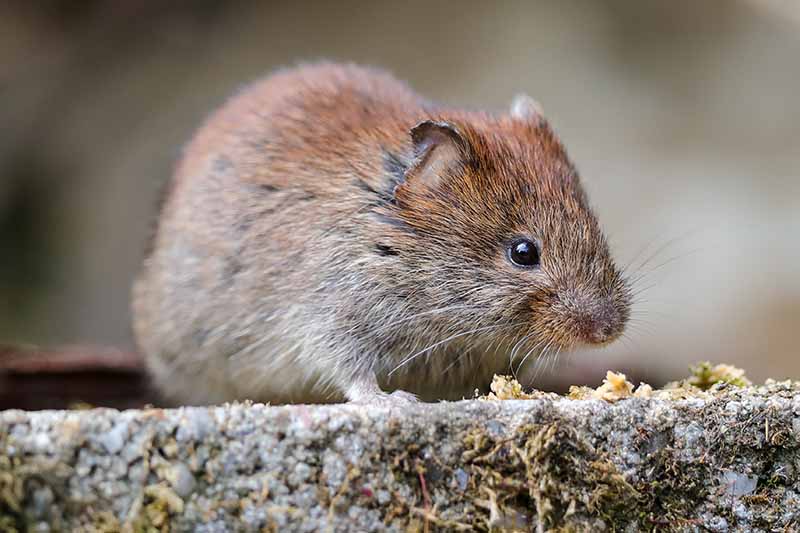
Though I couldn’t tell at first glance, when I kneeled down to check the plants more closely, I noticed the hearts and roots had been gnawed away by a vole.
I lost half of my endive crop that year because I didn’t realize I had a problem until it was too late.
Voles are brown and about the size of a golf ball, but you’ll probably notice their snaking, two-inch-wide tunnels first. If you spot either, take action right away.
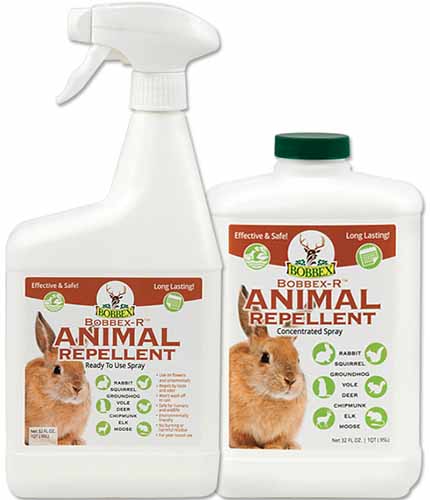
Bobbex-R Animal Repellent
I find a good repellent works wonders on voles. Bobbex-R, available through Arbico Organics, is a smart option.
Rather than spraying it on your plants, you spray it around the garden in areas where voles like to hang out, such as the base of trees and shrubs or along their runways.
Then, spray your edible plants with a repellent like Bonide Repels-All, also available from Arbico Organics.

Bonide Repels-All
I don’t find Bonide to be strong enough when it’s used alone, but a two-pronged approach gets the job done.
Insects
Bugs suck because not only can they destroy a plant that you’ve been counting down the days to harvest, they can also spread diseases throughout your garden. Nobody wants that! Let’s take a look at a few common pests.
Aphids
Ah, aphids. If you haven’t encountered them yet in your experience as a gardener, don’t worry. You will.
Aphids are extremely common, tiny, soft-bodied insects that suck the sap of plants. They might be black, gray, brown, red, green, yellow, or pink.
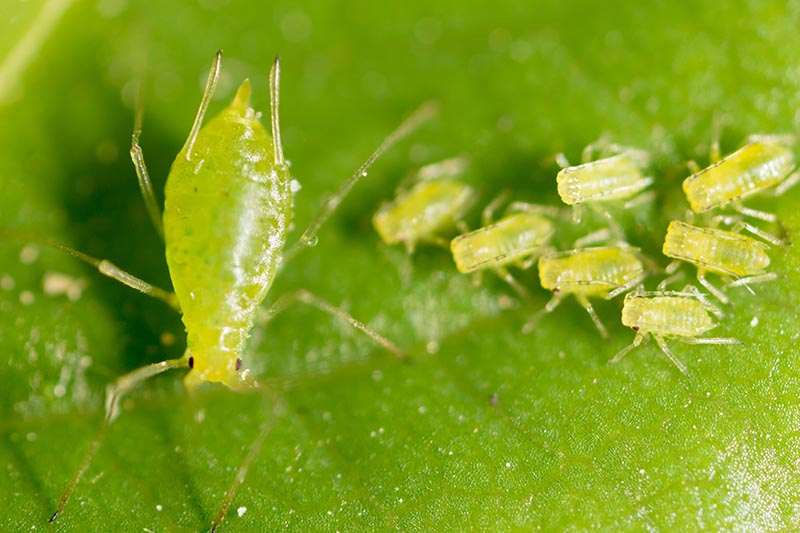
Endive is attacked by green peach aphids (Myzus perisicae), lettuce aphids (Nasonovia ribisnigri), and plum aphids (Brachycaudus helichrysi), in particular.
When you have an infestation, the leaves on your endive will turn yellow, or you may see dark or yellow spots. Young plants may be stunted.
On top of that, as they chew through leaves and stems, they leave behind a sticky substance called honeydew, which attracts ants and a fungus called sooty mold.
Aphids aren’t too difficult to control, which is fortunate, since they’re so common. Try spraying your plants with a blast of water from the hose to knock the little insects loose.
You may have to do this a few times every four or five days, until you see improvement.
If they persist, the next step is neem oil or insecticidal soap. You can learn more in our guide on dealing with aphids.
Slugs and Snails
Like aphids, slugs and snails are common garden pests. They love leafy greens, and who can blame them?
We have a whole article on how to eradicate slugs and snails from the garden.
Thrips
Thrips are another common garden pest, and western flower thrips (Frankliniella occidentalis) and onion thrips (Thrips tabaci) are the ones you’ll most often see on endive.
In small numbers, they aren’t too big of a deal. But they reproduce quickly, and a large infestation can cause leaves to be distorted or stunted.
Look closely at the foliage for small black specks (frass, or insect waste) and silvery stippling.
The insects themselves are tiny, about 1.5 millimeters long, and pale yellow to light brown.
They transmit a range of viruses, including the dreaded tomato spotted wilt virus, which impacts hundreds of different species of plants.
Using aluminum reflective mulch is an effective way to reduce populations because it repels the adults, discouraging them from landing on your plants. Put it down at the same time you plant your crops.
Also, avoid planting near any type of alliums, including chives, leeks, ornamental alliums, garlic, or onions, since thrips flock to these plants.
They also breed and increase their numbers on cereal plants in the spring, so don’t plant near cereals like barley, rye, oats, wheat, rice, or millet.
Disease
Here are the most common diseases that you should watch out for.
Anthracnose
Anthracnose is a disease that attacks many types of plants, including leafy lettuce-like greens like endive. It’s caused by the fungal pathogen Microdochium panttonianum.
It ruins the foliage, causing straw-colored sunken lesions. As the spots age, the lesions turn brown.
The centers may fall out, making the leaves look like Swiss cheese, which is why this disease is sometimes called ringspot or shot-hole disease.
There is no cure, so prevention is key. Since the disease overwinters on debris, be sure to remove all plants and weeds in the fall.
It also likes moist conditions, so you should also make sure your plants are well-spaced to ensure good airflow, and be sure the soil has good drainage.
Rotate your crops so you only plant something in the Cichorium genus in the same spot once every three years.
Bottom Rot
Bottom rot is caused by a fungus called Rhizoctonia solani. It thrives in moist, warm weather.
This disease causes the outer leaves to wilt, and you may notice water soaked areas at the base of the leaves or on the midribs, which may ooze an amber liquid. The water soaked areas eventually rot and collapse.
In moist climates, you may also see a brown web of fungus over the entire head, or small brown lumpy spots forming.
First things first, be sure to rotate your crops. That means not planting anything in the Cichorium genus in the same place more than once every three years.
Planning to rotate is a good rule of thumb to keep in mind with most crops.
Once again, make sure your soil is well-draining and that your plants are spaced appropriately. When watering, do so at the soil level rather than overhead on the leaves, and keep weeds out of your garden.
Damping Off
Damping off is disheartening. You plant your seeds and start to see the green seedlings emerge, only to have them droop, wither, and die.
Or maybe your seedlings never emerge at all, and you’re left wondering what the heck you did wrong.
Unfortunately, damping off is a common problem when you start plants from seed. It’s less common in warmer, drier areas because it thrives in cool, wet weather.
Damping off is caused by several different types of fungi, but escarole and frisee are usually plagued by Fusarium spp., Pythium spp. or Rhizoctonia solani.
Regardless of which type of fungi has caused the infection, seeds either won’t germinate, or the seedlings that emerge are thin, especially at the base, and they’ll eventually collapse and die.
There’s no cure, but with a bit of planning, you can often avoid it.
First, always use fresh soil if you’re planting in a container, and be sure to soak all your tools and containers in a 1:10 bleach and water solution for 30 minutes before using them.
Make sure the soil is well-draining and thin your seedlings early on to encourage good air circulation.
If you’re starting seeds indoors, provide 12-16 hours of light from a grow bulb rather than relying on natural light from a window.
Downy Mildew
Downy mildew is caused by the water mold (also known as an oomycete) Bremia lactucae. Watch for young leaves that start wilting or drying out. Older leaves might have white mold on the undersides.
This disease thrives in cool (40-60°F), moist conditions – the same conditions that endive thrives in. It may be spread via weeds that serve as hosts, or plant debris in the soil.
That’s why it’s important to clean your garden and remove any weeds throughout the growing season.
Treatment depends on the level of severity. A minor infection, or one that’s just starting, can be treated with neem oil.
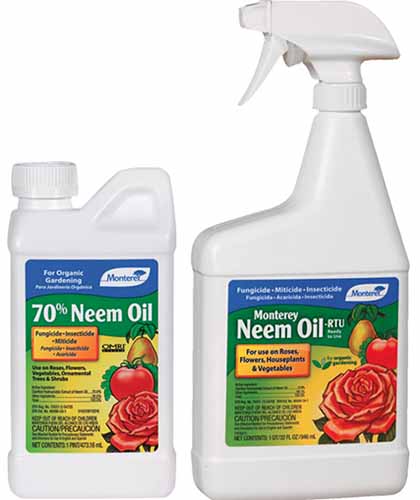
Monterey Neem Oil
Spray the plant with a neem oil-based spray like this one made by Monterey, available at Arbico Organics, once a week, until symptoms are gone.
Neem oil is handy to have around for treating a number of different pests and diseases that impact a variety of plants.
If the infection has progressed to the point where you see white mildew on the underside of the leaves, try a copper-based spray like the one recommended to treat anthracnose above.
If over half of the leaves are infected and the plant is looking decidedly sad, you might just want to pull out the whole thing and dispose of it (it’s not worth eating).
Don’t throw it in the compost, to avoid spreading the disease further around your garden.
Harvesting
Endive leaves can be cut as needed, or you may harvest the whole plant at once when you’re ready to use it.
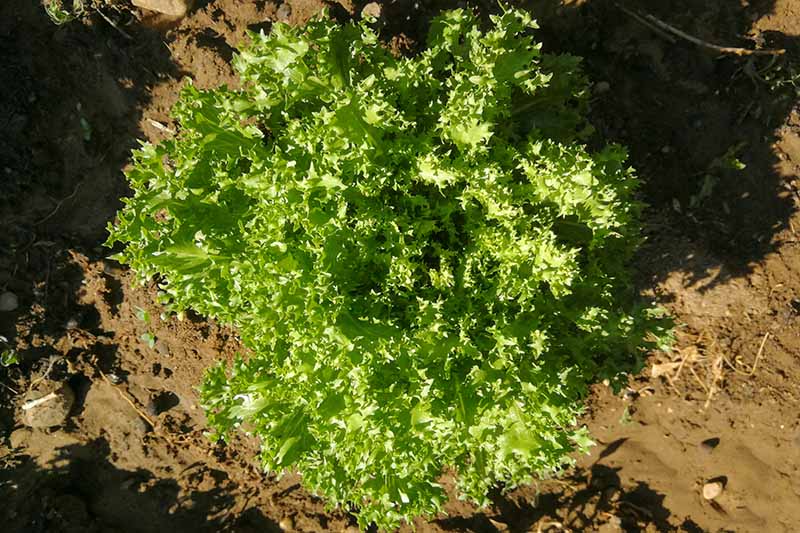
If there is a hard freeze or air temperatures above 90°F are in the forecast, harvest the entire plant. And if it starts to send out flowers (known as bolting), you should get it out of the ground right away. The leaves will turn bitter when the plant bolts.
To harvest, remove any blanching tools like pots or twine. Gently lift up the leaves and slice the plant off at the base with a knife or a pair of clippers, near the soil level.
If you blanched the head, remove the outer leaves with a pair of scissors, and toss them in the compost pile (the leaves, not the scissors!).
Wrap in paper towels or a cotton cloth and place in a plastic bag. Store in the refrigerator for up to five days. Wash when ready to eat, not before.
Recipes and Cooking Ideas
Use endive as you would any type of lettuce in salads.
As a cool season crop, I think it pairs perfectly with other fall flavors like persimmons, pomegranates, and winter squash.
I like to toss frisee and Belgian endive leaves with pomegranate arils, thinly-sliced persimmon, roasted squash, walnuts or sunflower seeds, goat cheese, and a mustardy vinaigrette.
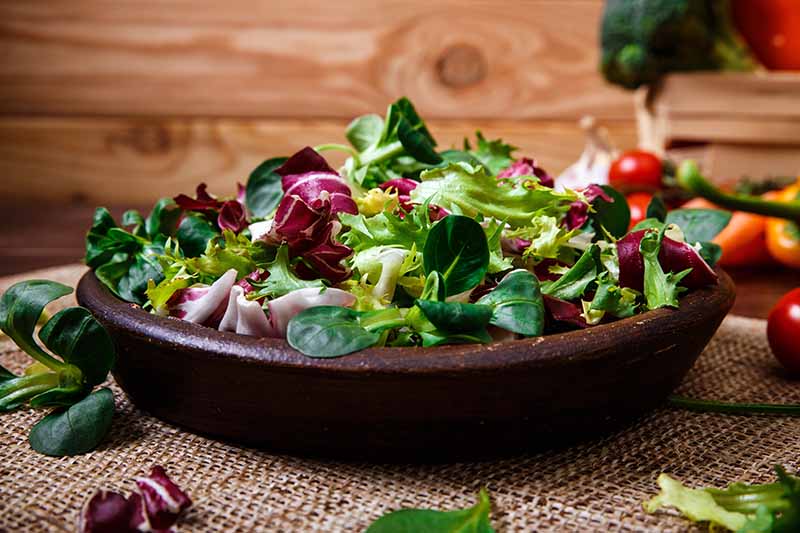
Try escarole leaves to make wraps to hold fillings like blue cheese, goat cheese, pears, apples, beets, or anything else you can dream up.
It’s also fabulous added to Italian soup. Try this excellent recipe for Italian-style beans and greens from our sister site Foodal.
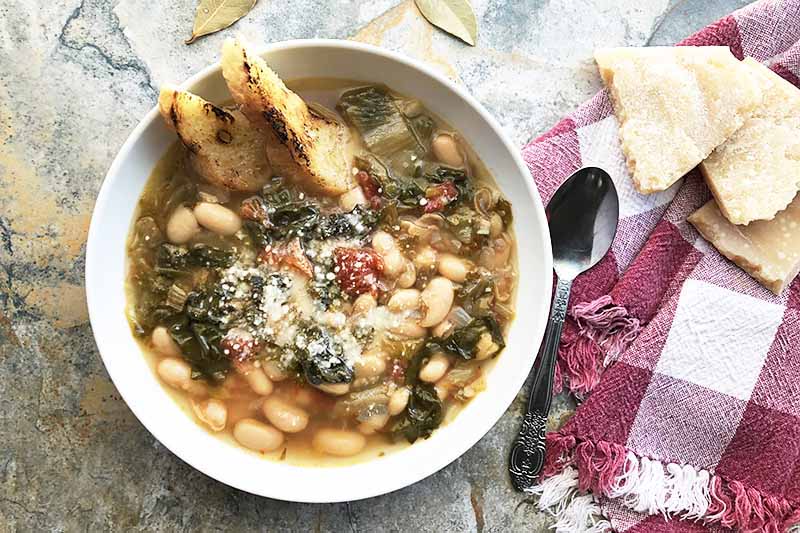
I love to make lettuce soup using endive leaves. I know it sounds unusual, but try it.
Chop the leaves from two heads and put them in a pan with two cups of vegetable stock. Simmer on low heat until they wilt. This should take only a minute or two. Don’t let them simmer too long or they’ll turn bitter.
Add a cup of canned or fresh peas and cook for two more minutes. Blend until smooth, and add a cup of cream and a cup of whole milk. Add a pinch of nutmeg, a pinch of cayenne powder (optional), and salt and pepper to taste. Bring to a simmer, then turn off the heat. Top with a dollop of sour cream and chopped fresh chives before serving.
If your plant grows any flowers, you can eat those, too. Don’t be afraid to eat the sprouts, as well. When you thin out your seedlings, you can use the sprouts to top sandwiches, fish, or salads.
A quick note: You’ll often see recipes online that call for endive. Be sure that they’re talking about C. endivia and not Belgian endive, (C. intybus var. foliosum).
While Belgian endive can be pickled, steamed, or roasted, frisee is best enjoyed fresh.
Escarole, with its thicker leaves, can be used like spinach in cooked dishes or enjoyed fresh. You can braise, steam, or boil the leaves, just remember – if you boil them too long they turn bitter.
Quick Reference Growing Guide
| Plant Type: | Biennial leafy green vegetable | Maintenance: | Low |
| Native To: | Mediterranean, north Africa, India | Tolerance | Frost |
| Hardiness (USDA Zone): | 4-9 | Soil Type: | Organically rich loam |
| Season: | Spring, fall | Soil pH: | 6.5-7.8 |
| Exposure: | Full sun, part shade | Soil Drainage: | Well-draining |
| Time to Maturity: | 40-100 days, depending on cultivar | Companion Planting: | Leafy greens like Belgian endive, lettuce, radicchio |
| Spacing: | 12 inches | Avoid Planting With: | Cereals, chives, garlic, leeks, onions, shallots |
| Planting Depth: | 1/4 inch (seeds) | Family: | Asteraceae |
| Height: | Up to 2 feet | Genus: | Cichorium |
| Spread: | Up to 2 feet | Species: | endivia |
| Water Needs: | Moderate | Variety: | crispum and latifolia |
| Pests & Diseases: | Deer, rabbits, voles; Aphids, slugs, snails, thrips; Anthracnose, bottom rot, damping off, downy mildew |
Add Exciting Endive to Your Greens Garden
That’s all there is to growing endive – not too hard, right?
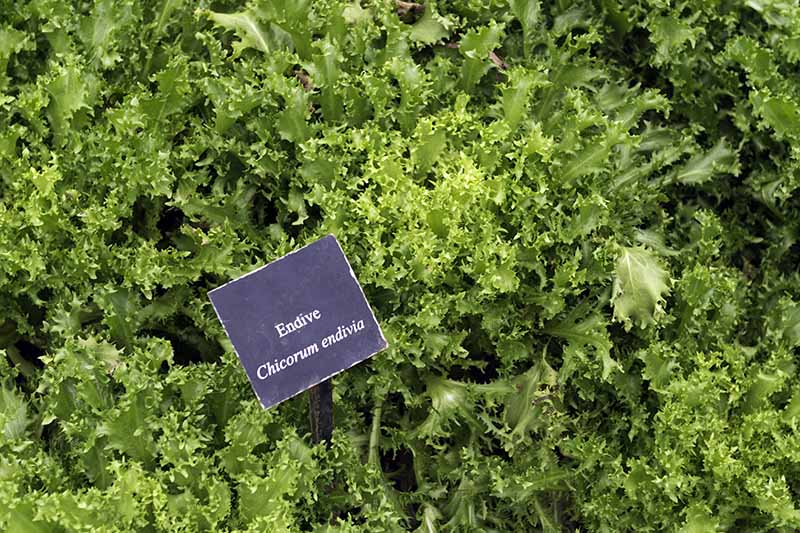
I can’t wait to hear how you get on with it. While it may not be as common in the home garden as lettuce, I can’t imagine a growing season without endive.
Are you growing endive? Which type is your favorite? Let us know in the comments section below!
And for more information about growing other types of chicory in your garden, check out these guides next:
Photo by Fanny Slater © Ask the Experts, LLC. ALL RIGHTS RESERVED. See our TOS for more details. Product photos via Arbico Organics, Bonide, Burpee, David’s Garden Seeds, Eden Brothers, and True Leaf Market. Uncredited photos: Shutterstock.
About Kristine Lofgren
Kristine Lofgren is a writer, photographer, reader, and gardening lover from outside Portland, Oregon. She was raised in the Utah desert, and made her way to the rainforests of the Pacific Northwest with her husband and two dogs in 2018. Her passion is focused these days on growing ornamental edibles, and foraging for food in the urban and suburban landscape.

