[ad_1]
The music room is finished! This room took just as long as the living room (which I showed you a few days ago), but it didn’t go through nearly as many changes as the living room over the years. But it has been “in process” for years now, so it feels amazing to finally have this room finished.
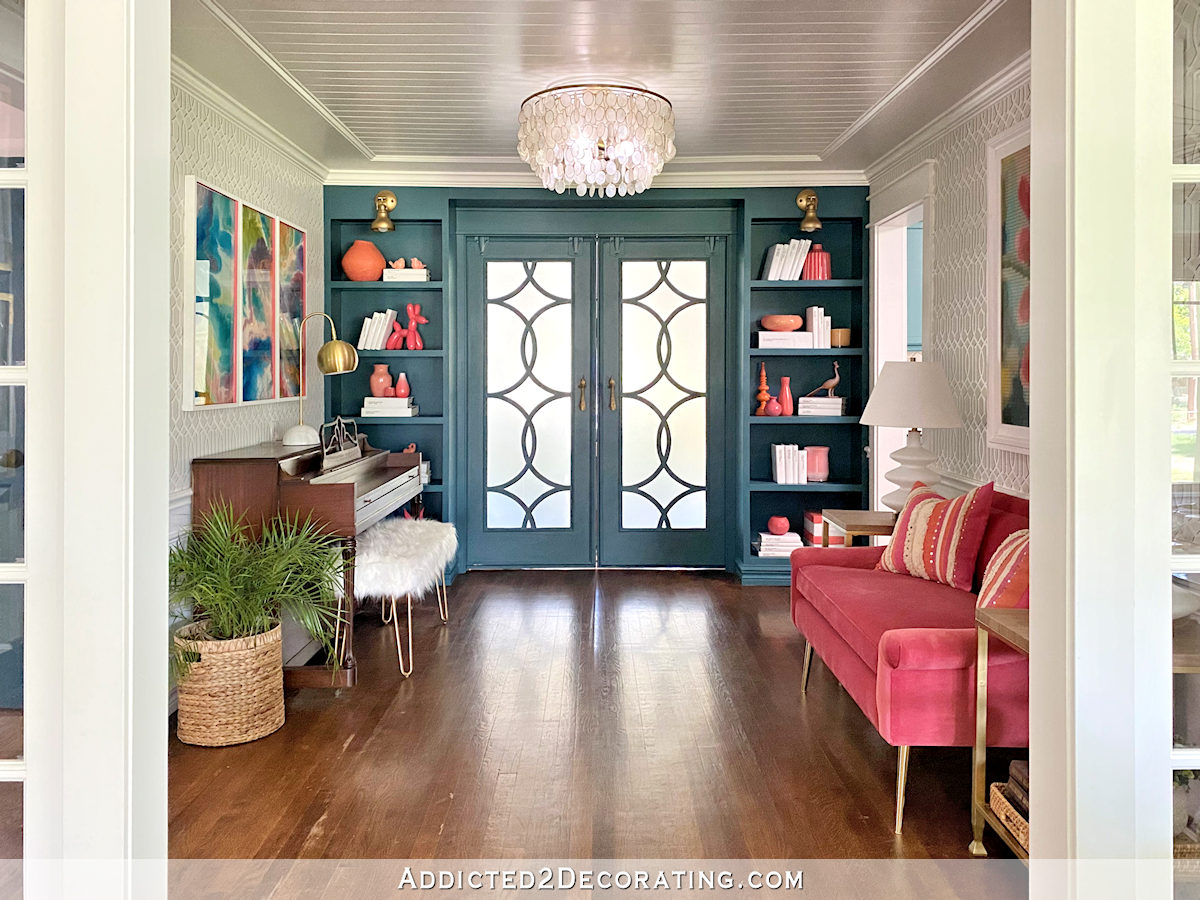
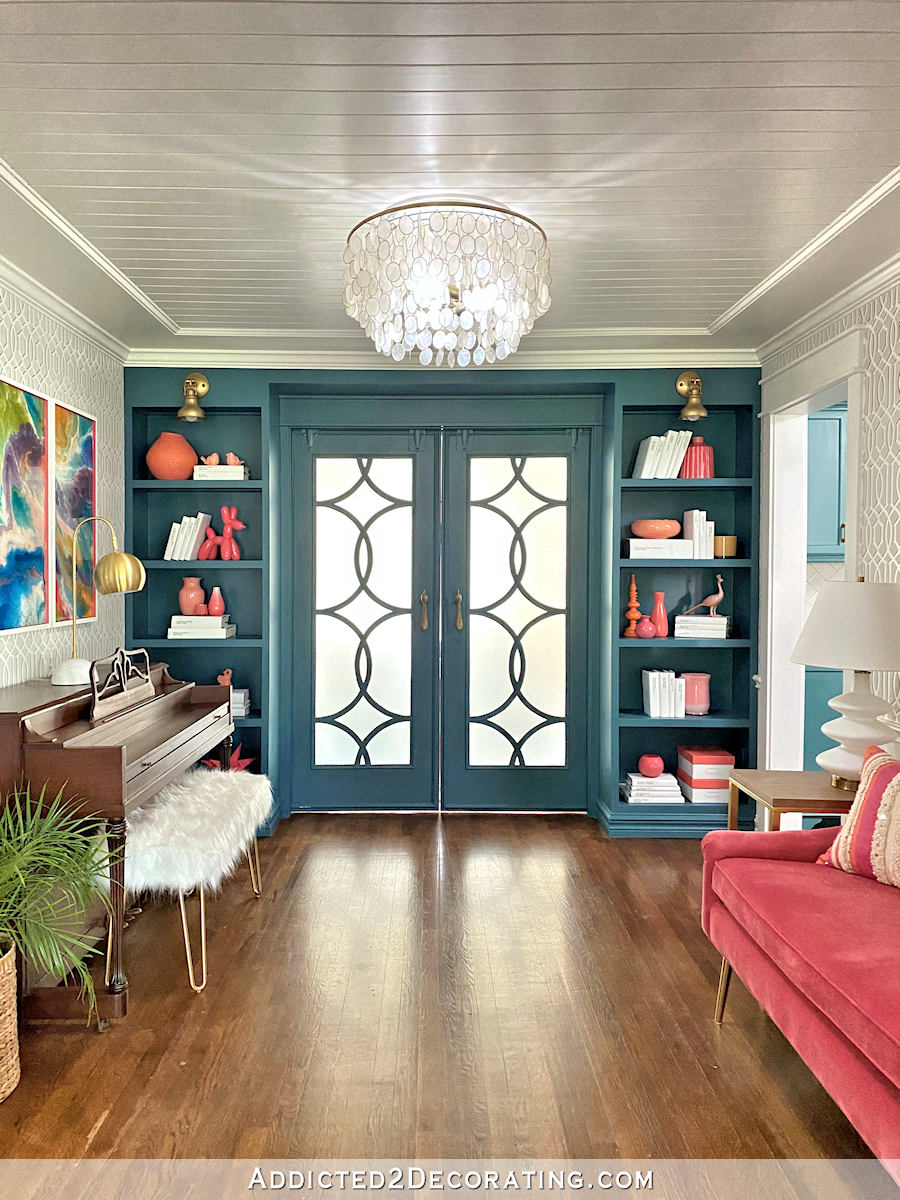
When you walk through the front door of our house, this is the room you see straight ahead.

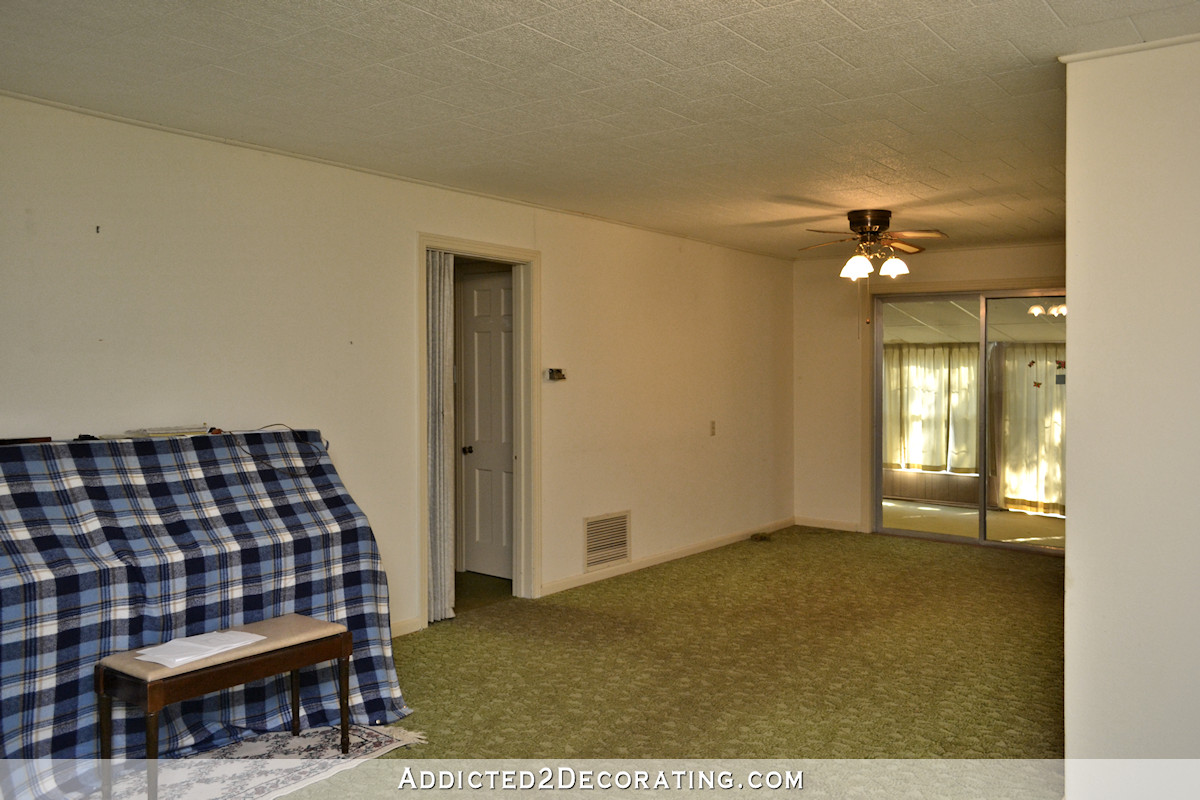
And if we travel back 7.5 years, this is what it looked like the day we were handed the keys to the house…
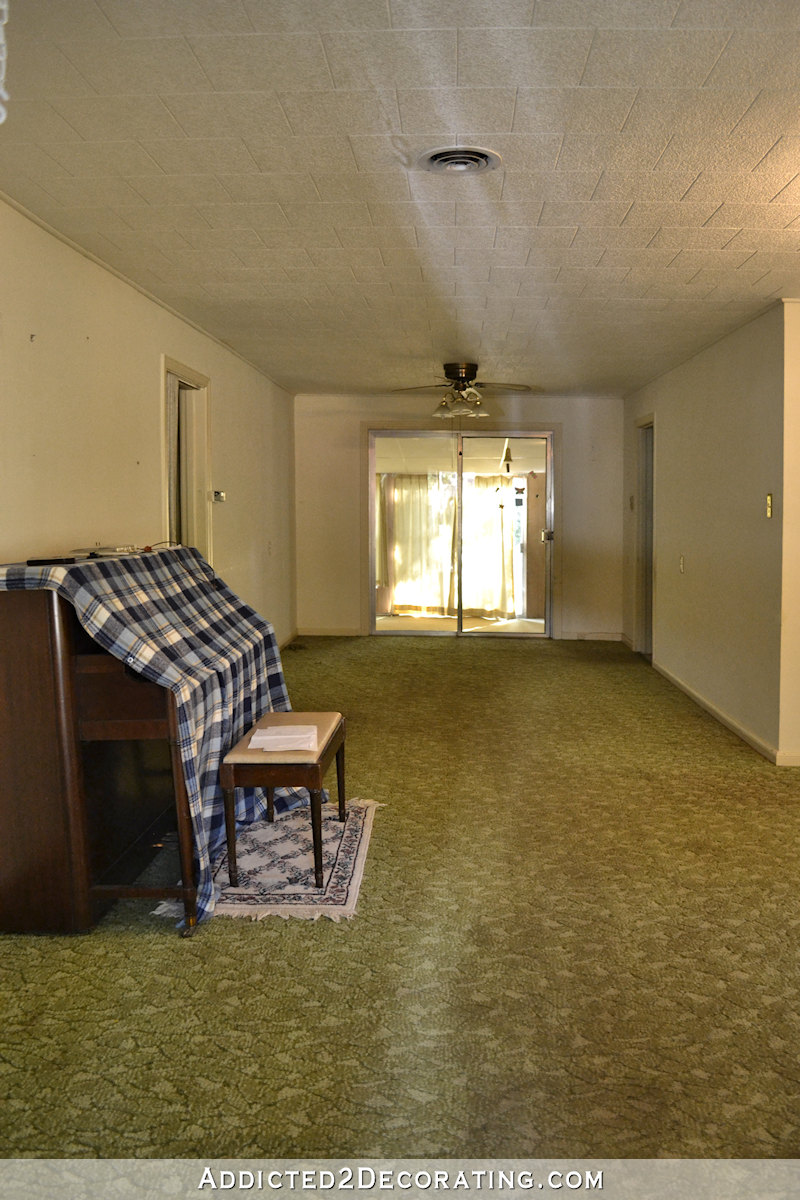
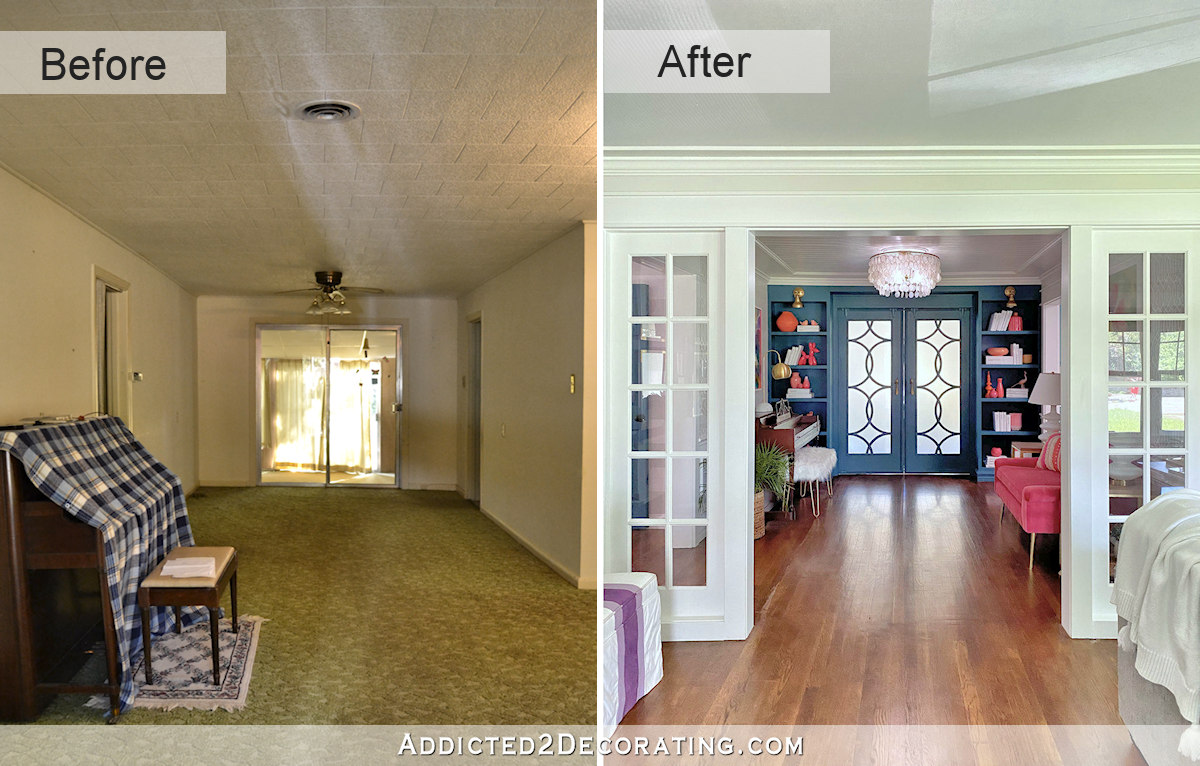
This room had the same green carpet, old cracked drywall, ivory walls, and polystyrene ceiling tiles as most of the rest of the house.

And just like the rest of the house, this room got stripped down to the studs, ceiling joists, and original hardwood floor that was hidden under and protected by that green carpet.
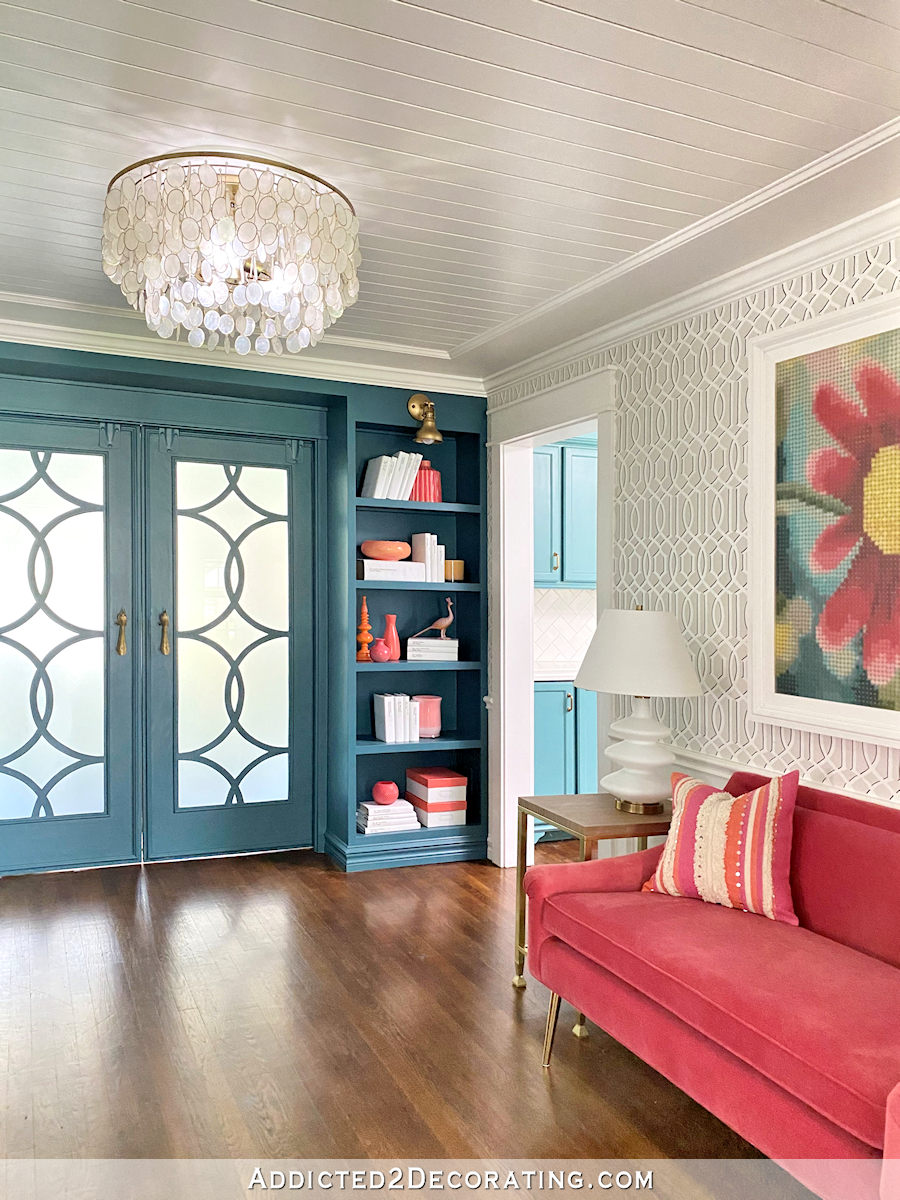
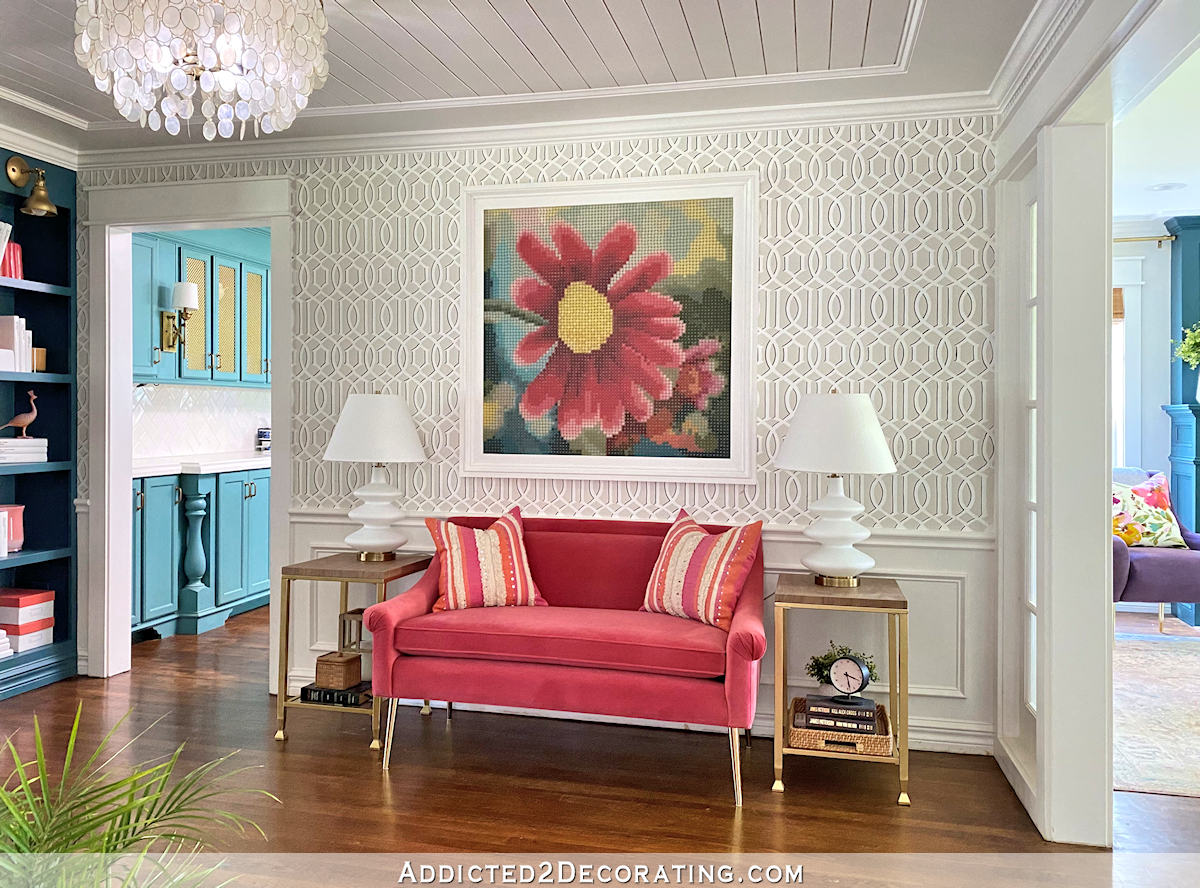
This room also got some extra attention, like a stenciled wall design, picture frame molding and a chair rail, built-in sidelights (from unfinished French doors) to separate this room from the living room/entryway area, and a wood slat ceiling.
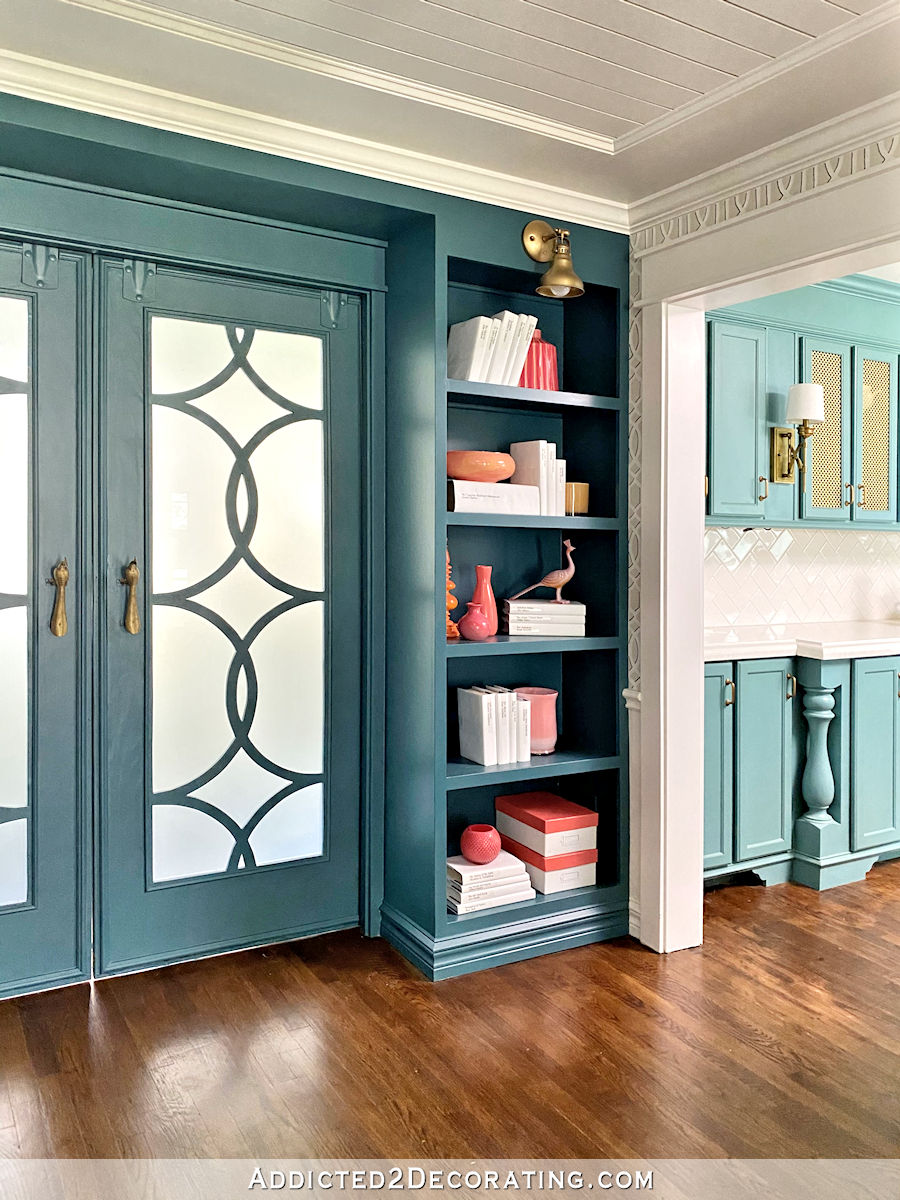
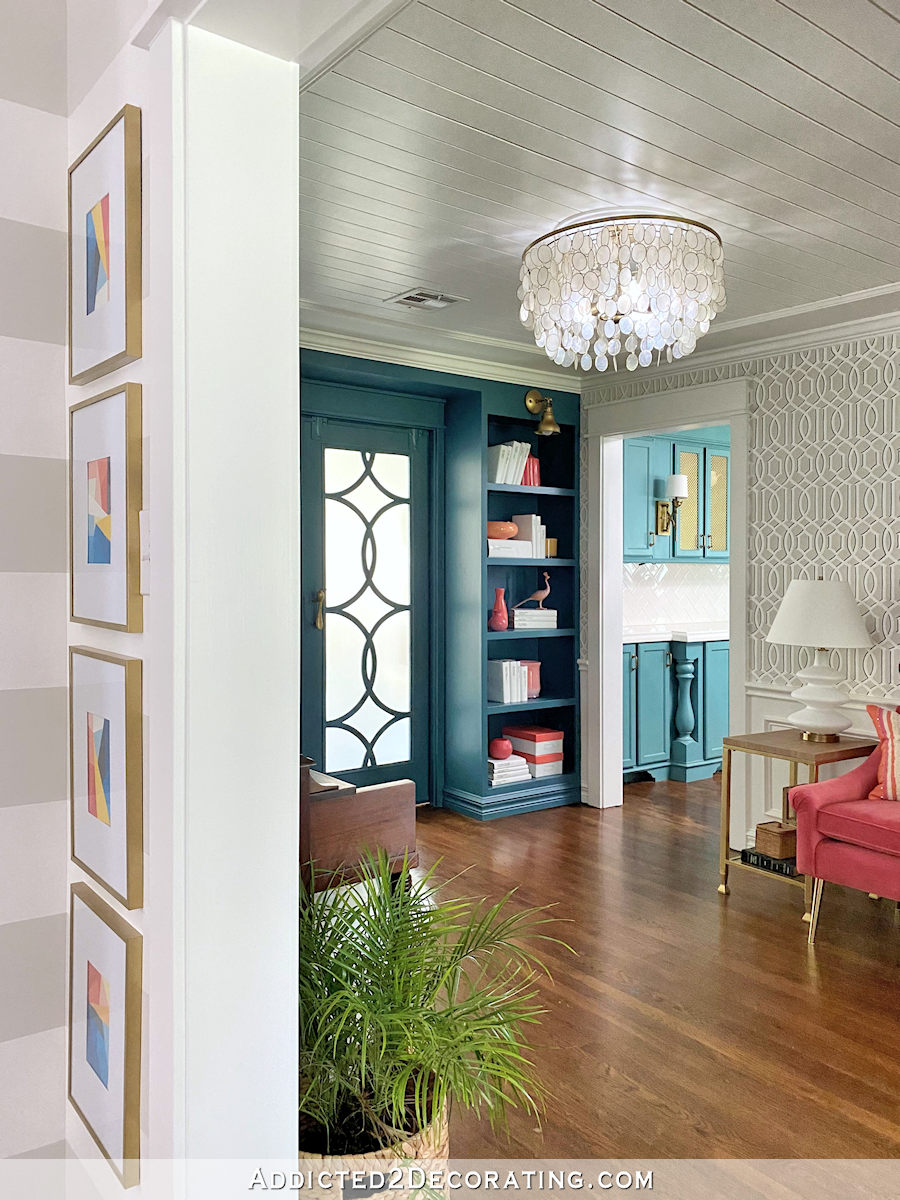
And to replace the original sliding glass door at the back of the room, I made some custom doors (which I made out of two original solid wood doors that I removed from other areas of the house) which are hung on real barn door hardware, and then I built bookcases in front so that the doors would act as pocket doors. They look like and work like pocket doors, except instead of opening into space inside the wall, they open into space behind the bookcases.

On the left side of the room, the original opening between this room and the hallway was very narrow and had an accordion room separator in the doorway.
I widened that opening by about 20 inches and removed the hallway closets just inside the hallway (there was a closet on both sides, making the hallway feel very cramped and cave-like), so now this whole area feels so much more open and airy.

Unfortunately, I never got a “before” picture of this side of the room showing the opening from the music room into the kitchen…
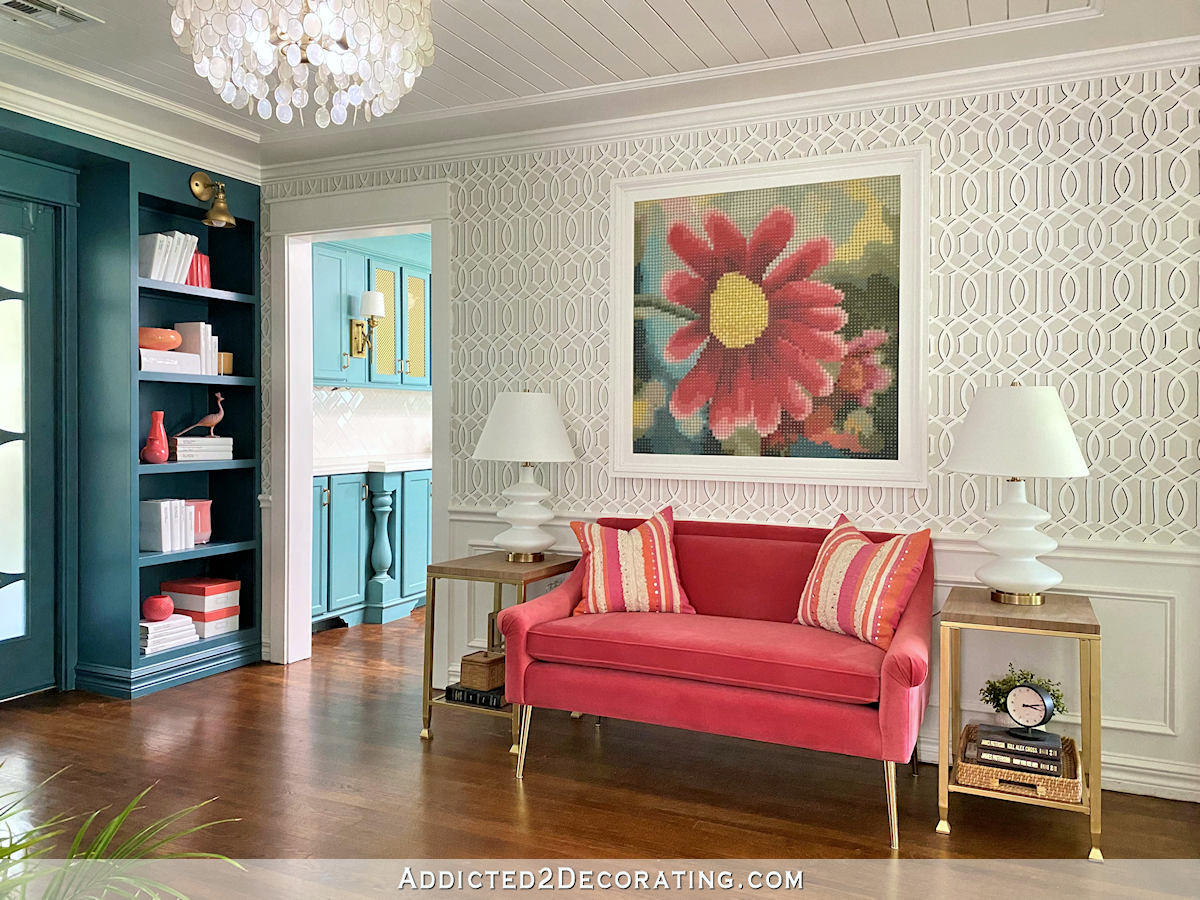
So you’ll just have to imagine seeing this wall of cabinets through that opening. In this photo, the opening to the music room is on the wall to the left of these cabinets. The area you see through the opening to the right of the cabinets is now the pantry.

Evidently, this room was intended by the builder of the house to be a dining room. But with a person living in the house who relies on a wheelchair for mobility, using this room as a dining room never would have worked for us.
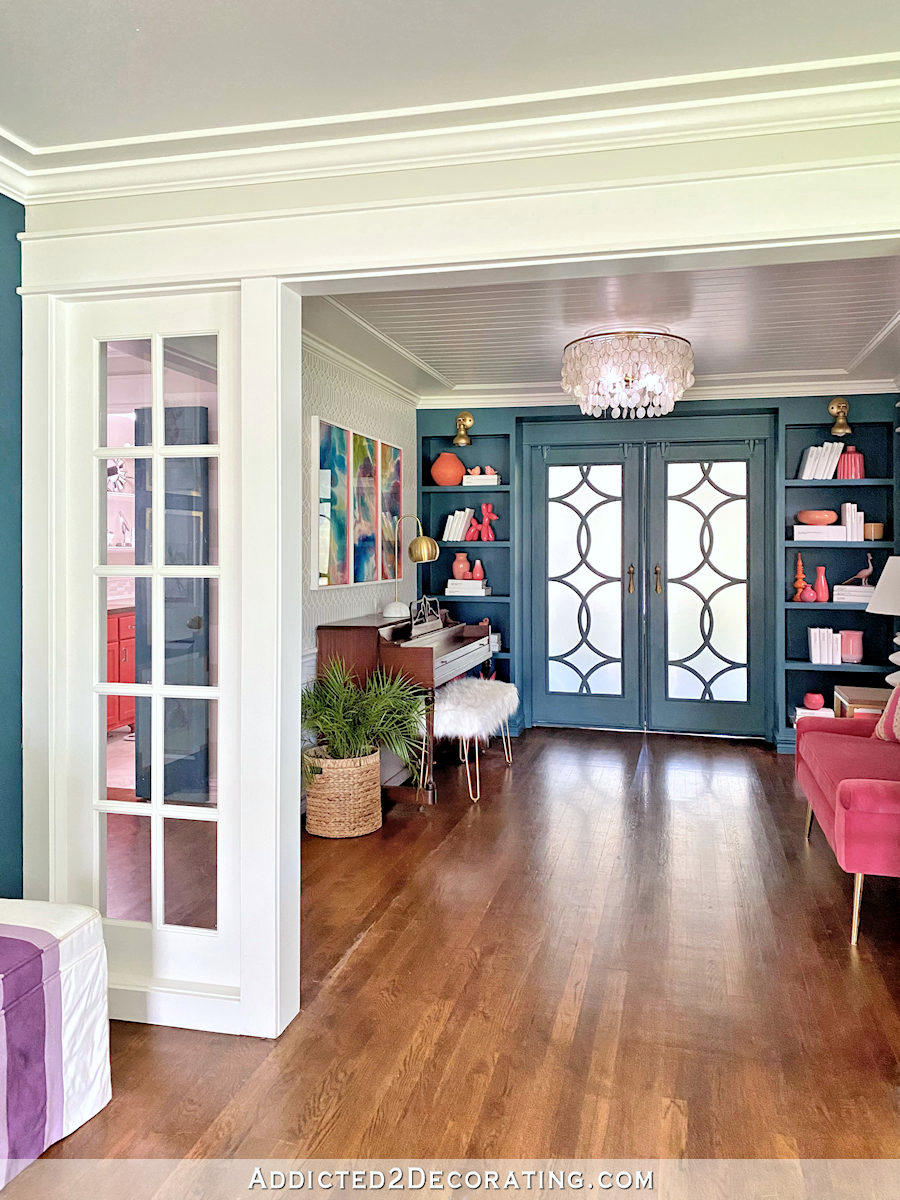
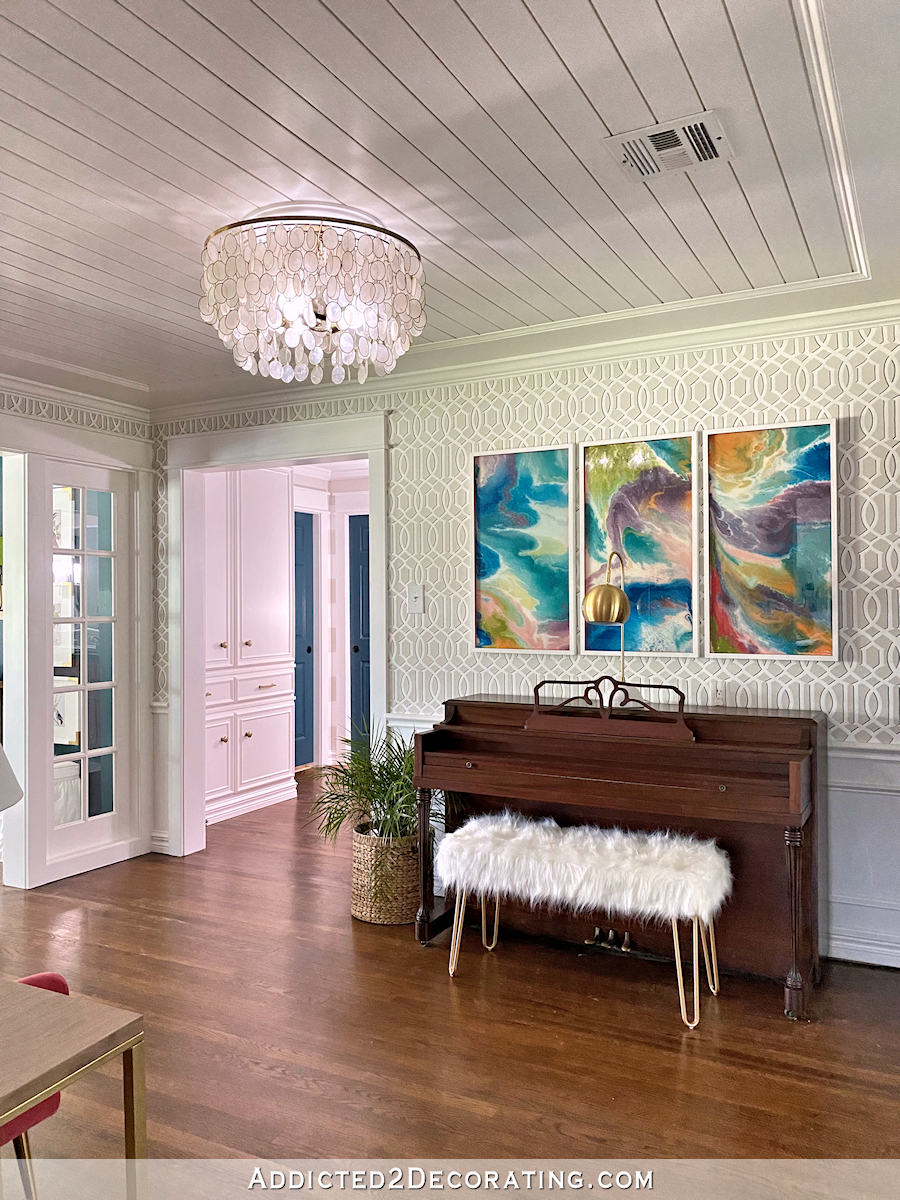
So I had to find a use for the room that would allow the room to be open enough for Matt to get through easily, while also giving the room a purpose. It seemed like the perfect place to put my piano that had been in storage for years. This is the piano that my mom learned to play on when she was a teenager, and it’s the piano that I learned to play on when I was a young girl. I’ve always wanted to make a place for it in our home, and this worked out perfectly. When I was finally able to get it out of storage, I completely refinished the piano.
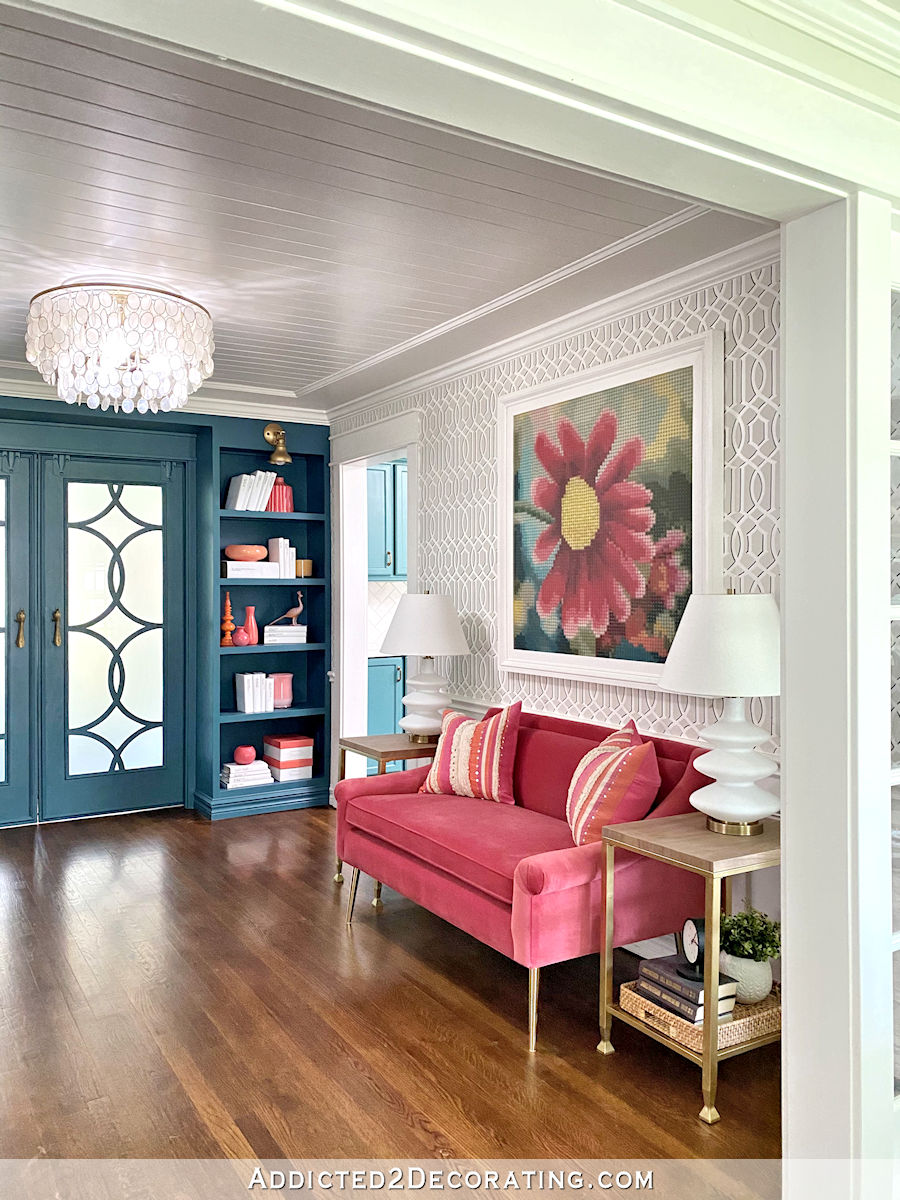
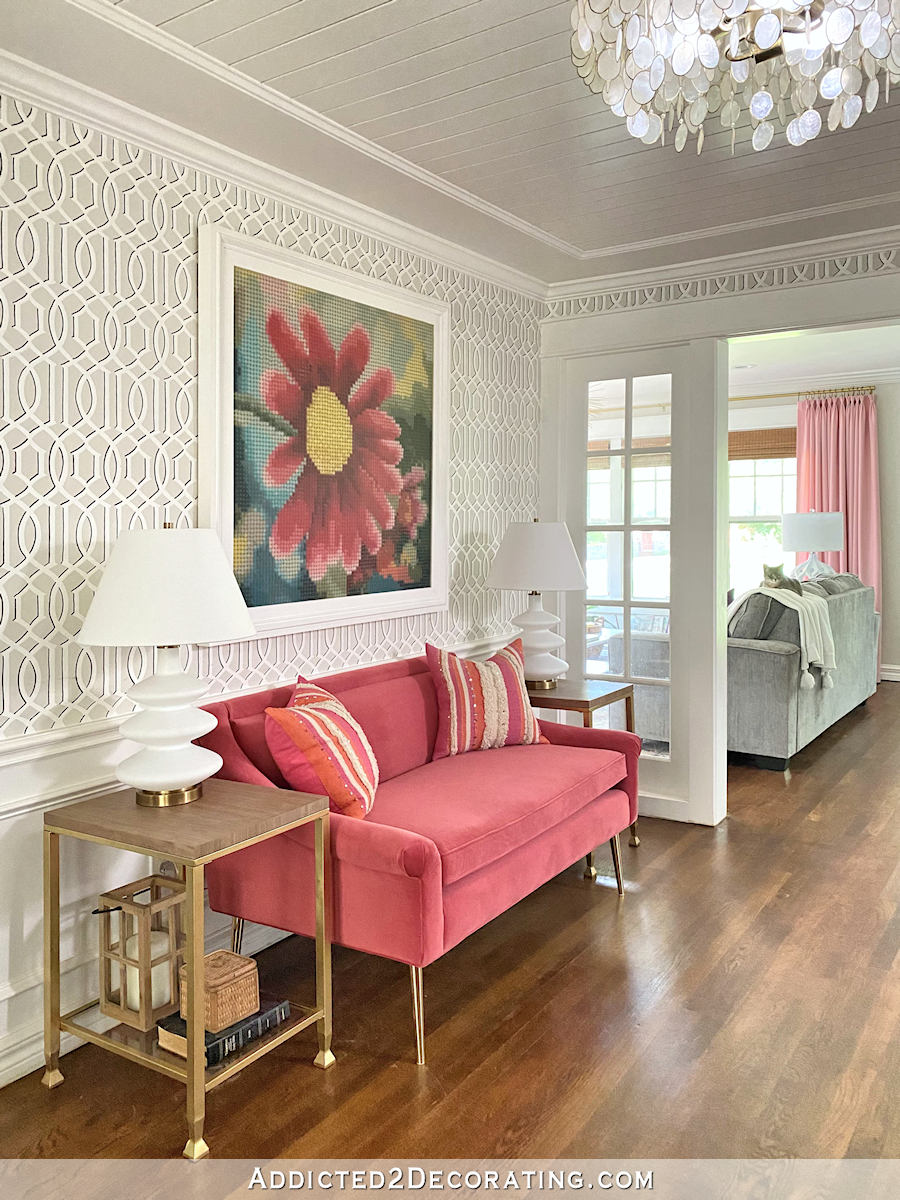
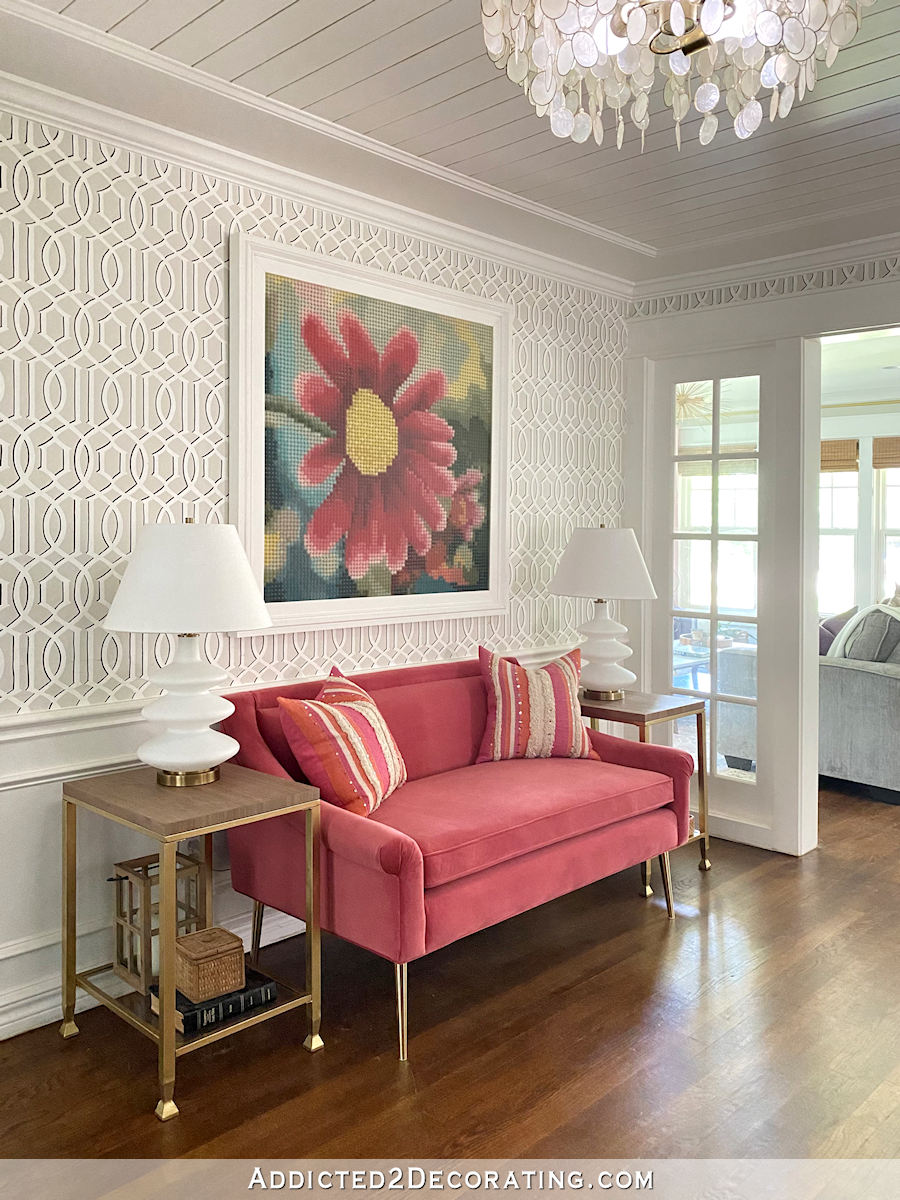
While I love the piano, my favorite thing in this whole room is the settee. I struggled with what to put on this wall for years, and had planned to reupholster two chairs that I have in storage. But when I found this settee, I felt like I had struck gold. The color, the fabric, the size — everything about it was just right for this room.
I ended up completely redoing the bookcases since the last time I showed y’all the finished and styled teal bookcases (which used to be white). This is how I had originally decorated the shelves…
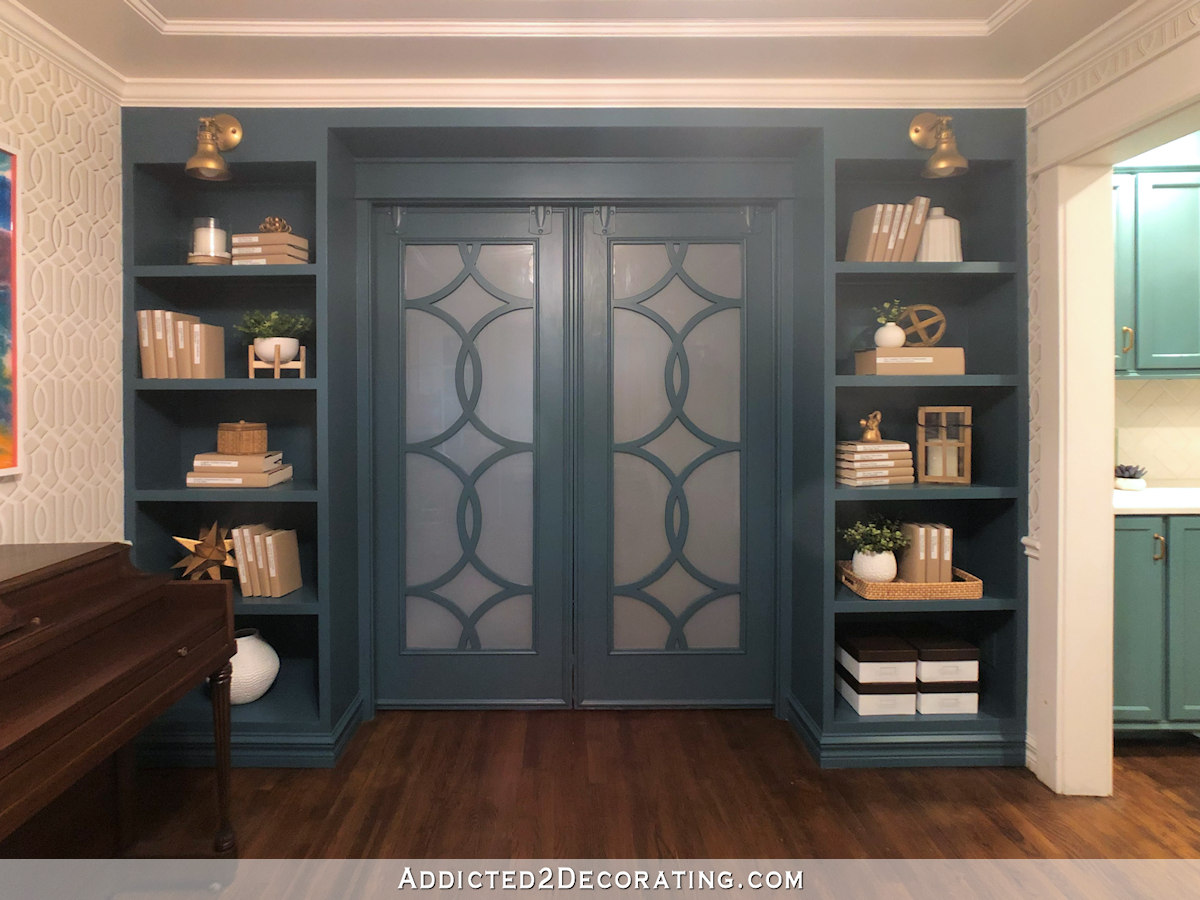
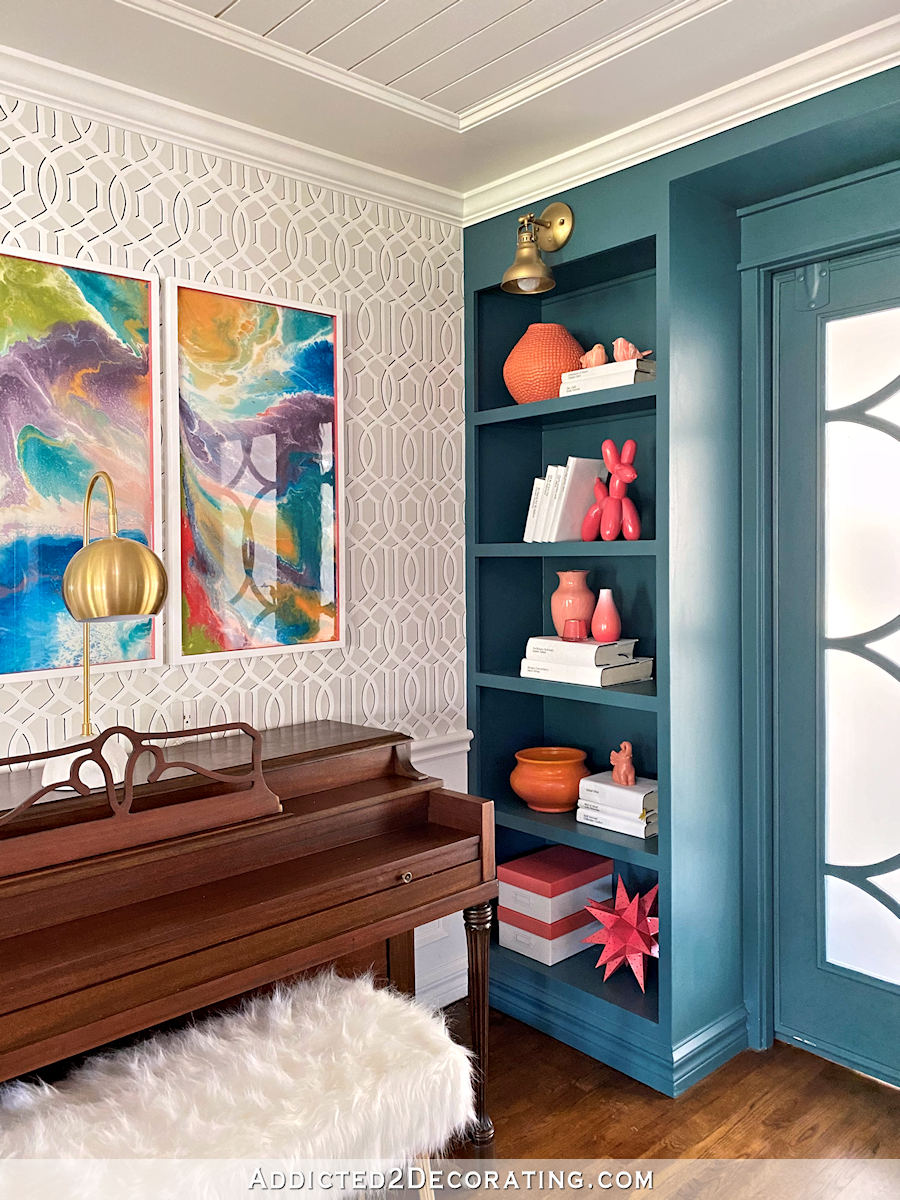
But all of that brown just wasn’t me. The shelves had a very country/farmhouse look to me, and I wanted bright, bold, and colorful. So I recovered all of the books in solid white, and then added items that were all in coral, pink, and orange. A lot of spray painting went into that makeover, but these restyled bookcases are much more my style now.

All of the pieces of artwork in the room are Kristi Linauer originals. ? This huge flower is what I call pixel artwork.
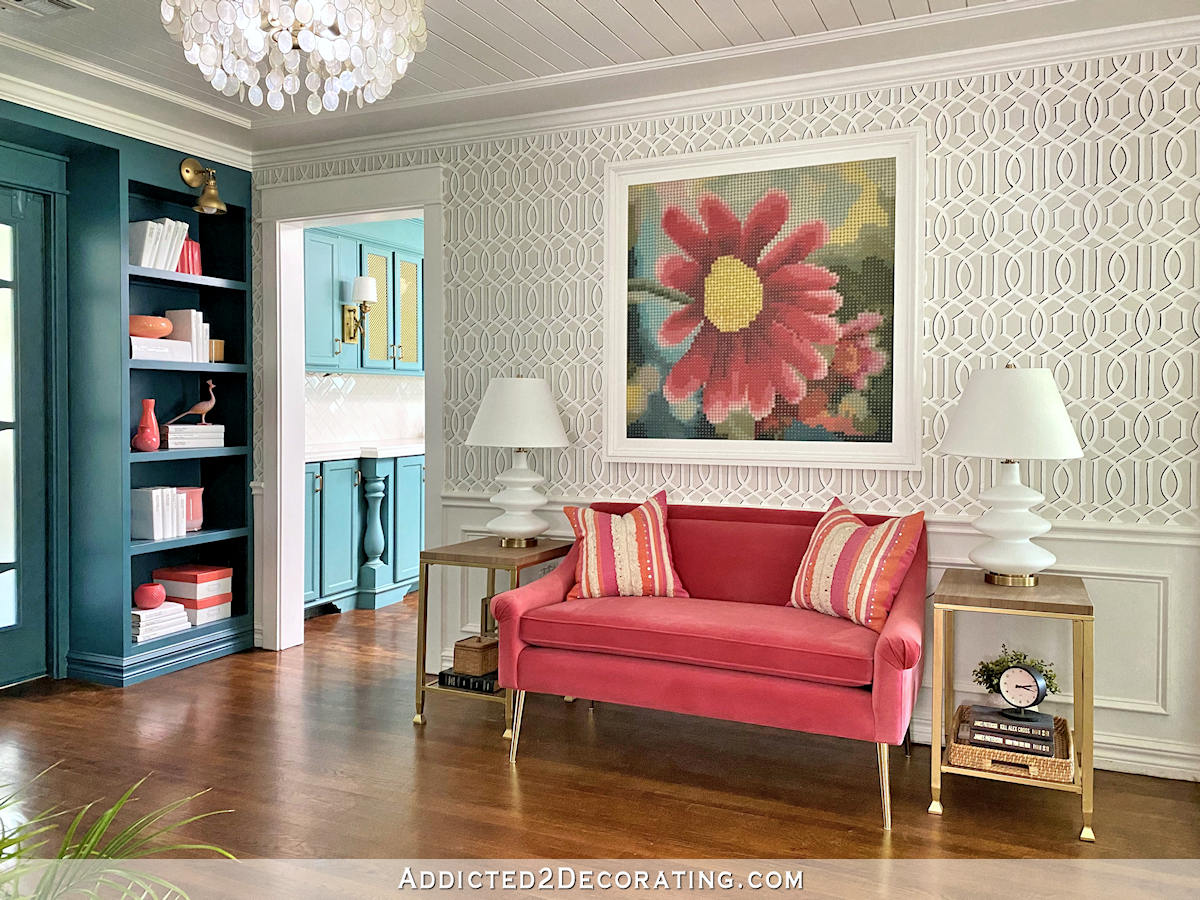
It’s made of 6400 round wood “buttons” (those mushroom wood pieces that are used to fill screw holes in wood furniture). Each one is painted a different color to form a “pixel”, and 6400 “pixels” created this flower. The entire thing is coated with about 1/2″ of resin.
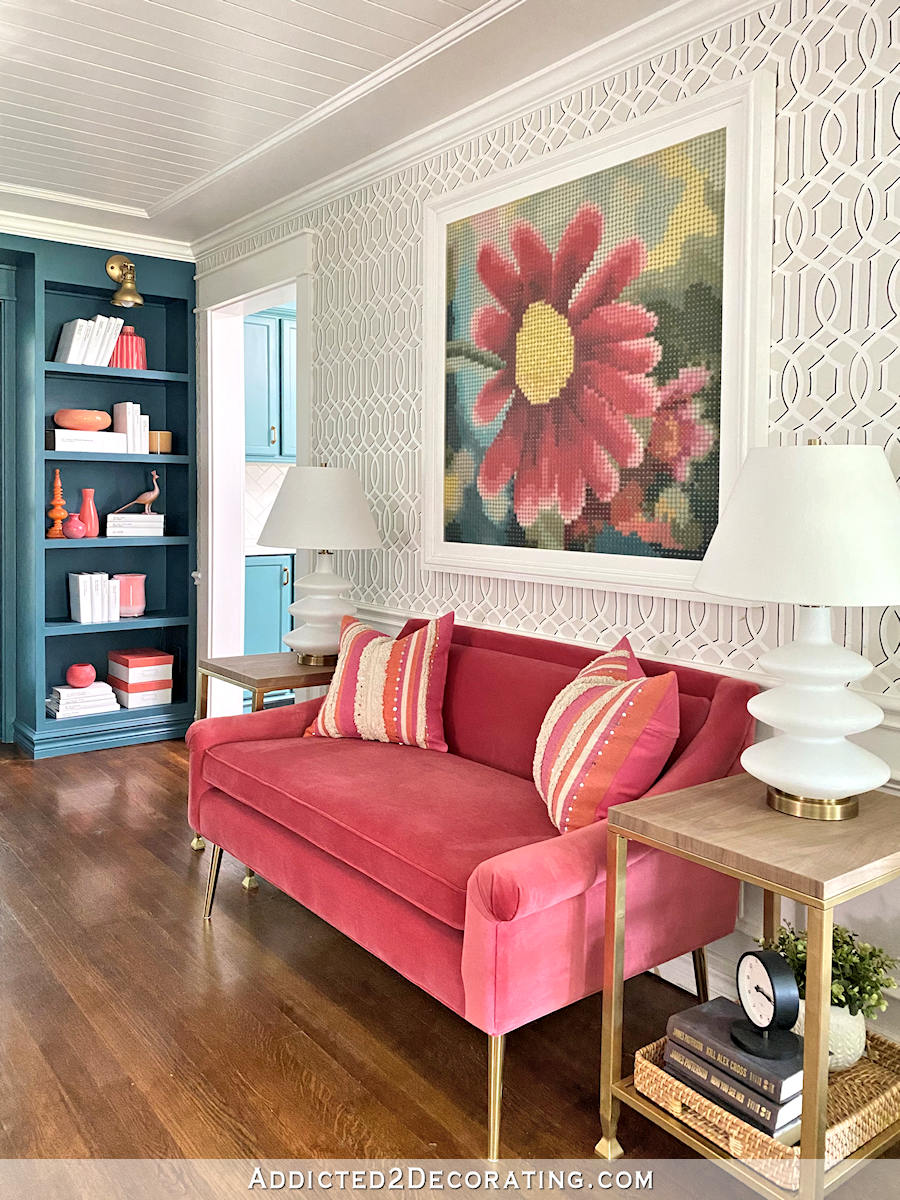
Interestingly, that pixel flower is Matt’s favorite piece of artwork that I’ve ever made. He says something about it almost every week. ?
The triptych over the piano is an acrylic pour using several different colors. It’s also coated in resin which makes it very difficult to photograph since it’s so shiny and reflective, but this is a pretty clear view of it.
I was so disappointed to find that I didn’t take many “before” photos of this room at all. In fact, I don’t have a single photo of the original view looking from the back sliding door to the front door. Lesson learned. If you’re buying a house that you plan to remodel, always take way more “before” photos than you think you need. You’ll love looking back at every angle of the original house and seeing the progress you’ve made.
Sadly, this is the only “before” picture I got looking in that direction…
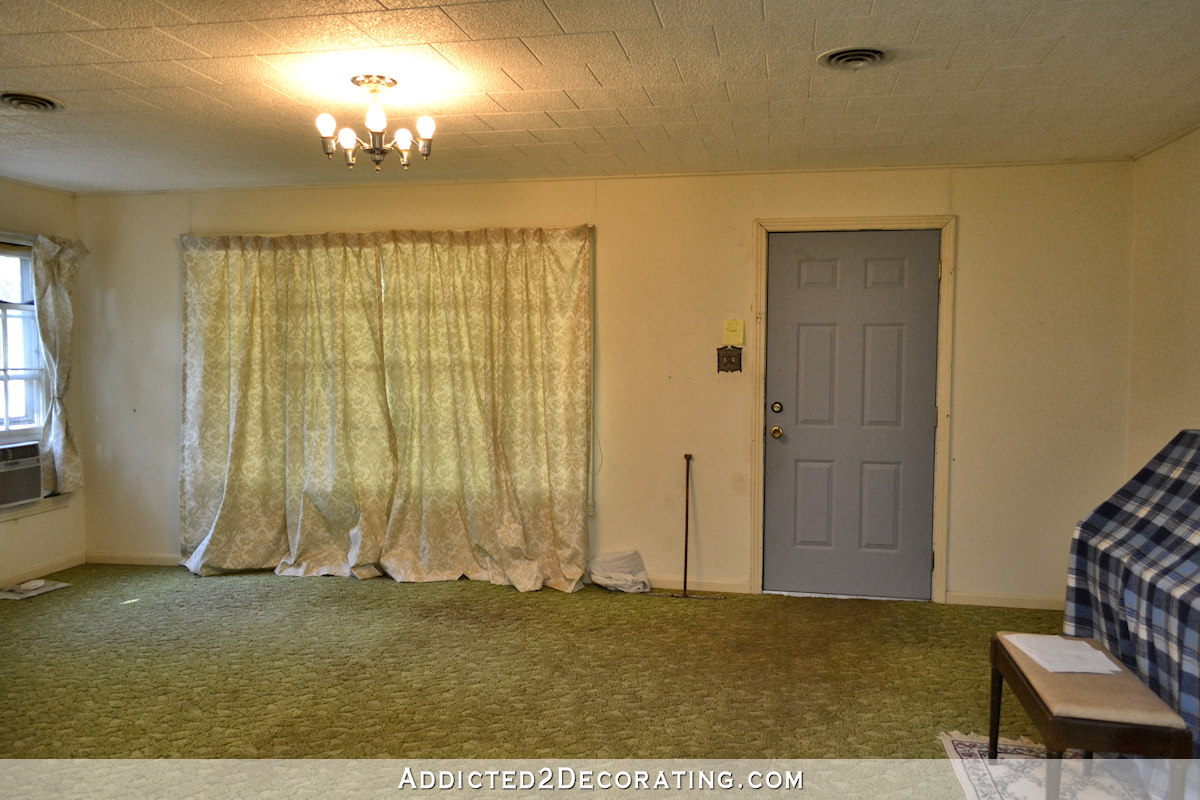
But between that view looking towards the front door, and this view looking through the music room towards the back sliding glass doors, there’s very little question about what the view looked like from those back sliding glass doors to the front door.

And here’s how that view looks now with the music room and entryway/living room separated with the sidelights, the solid door replaced with a glass door, and the opening into the hallway widened.
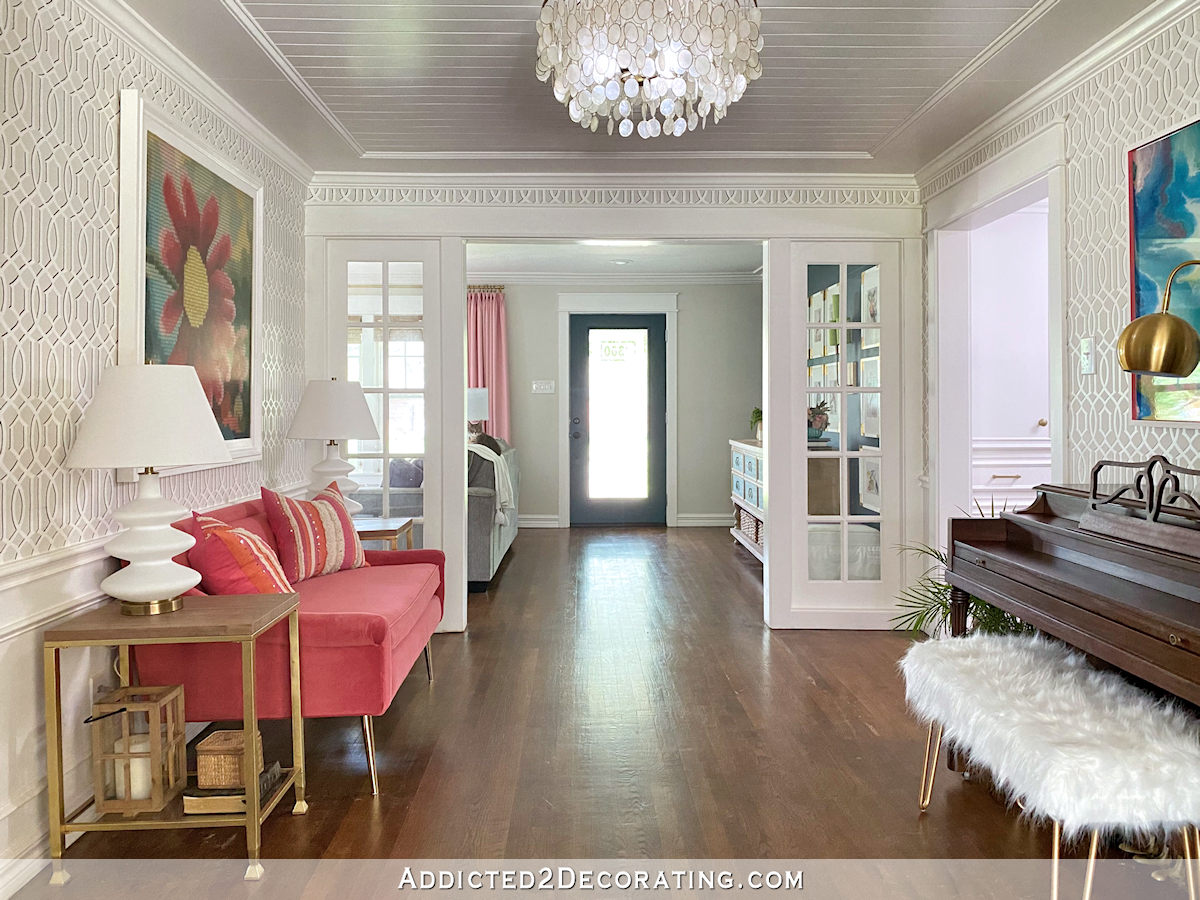
I think that pretty much covers it! It’s been quite the journey with this room, and I absolutely love having all of these main areas of the house finished now. I also love that this small room is loaded with color, detail, and personality. I’m definitely not one of those people who thinks you have to play it safe in small rooms. ?
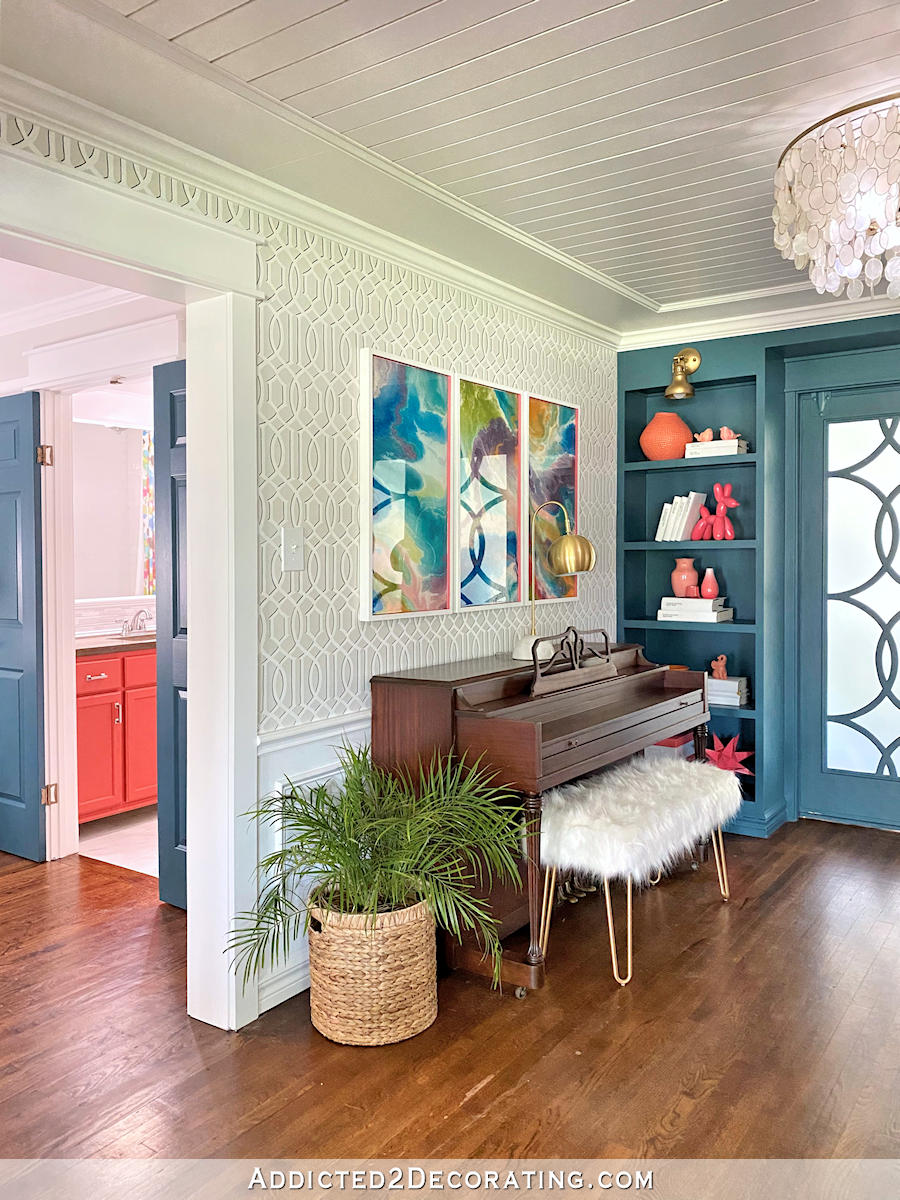

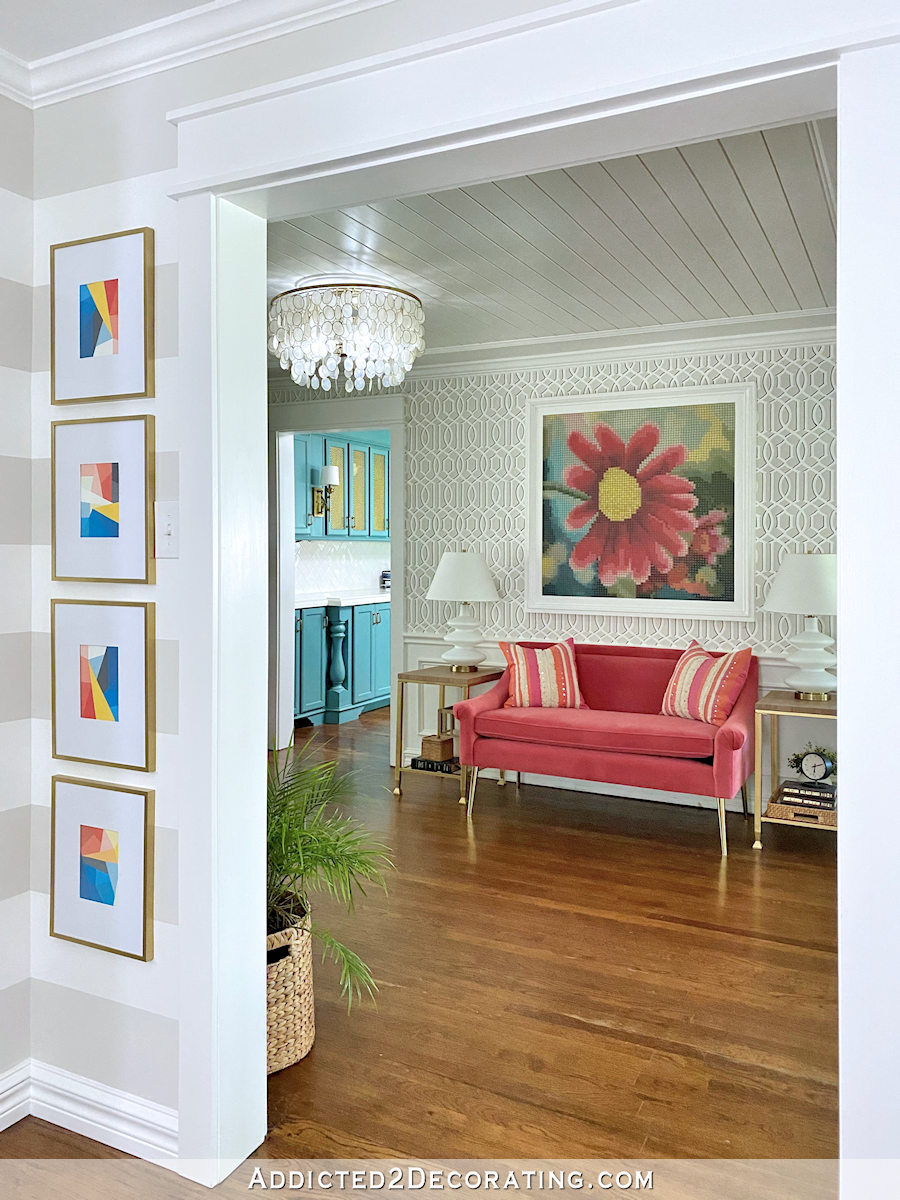
And while I didn’t use my wide angle lens this time, you can get a glimpse in the photos below of how the rooms flow together, with the kitchen on the left, and the fireplace wall of the living room showing on the right.
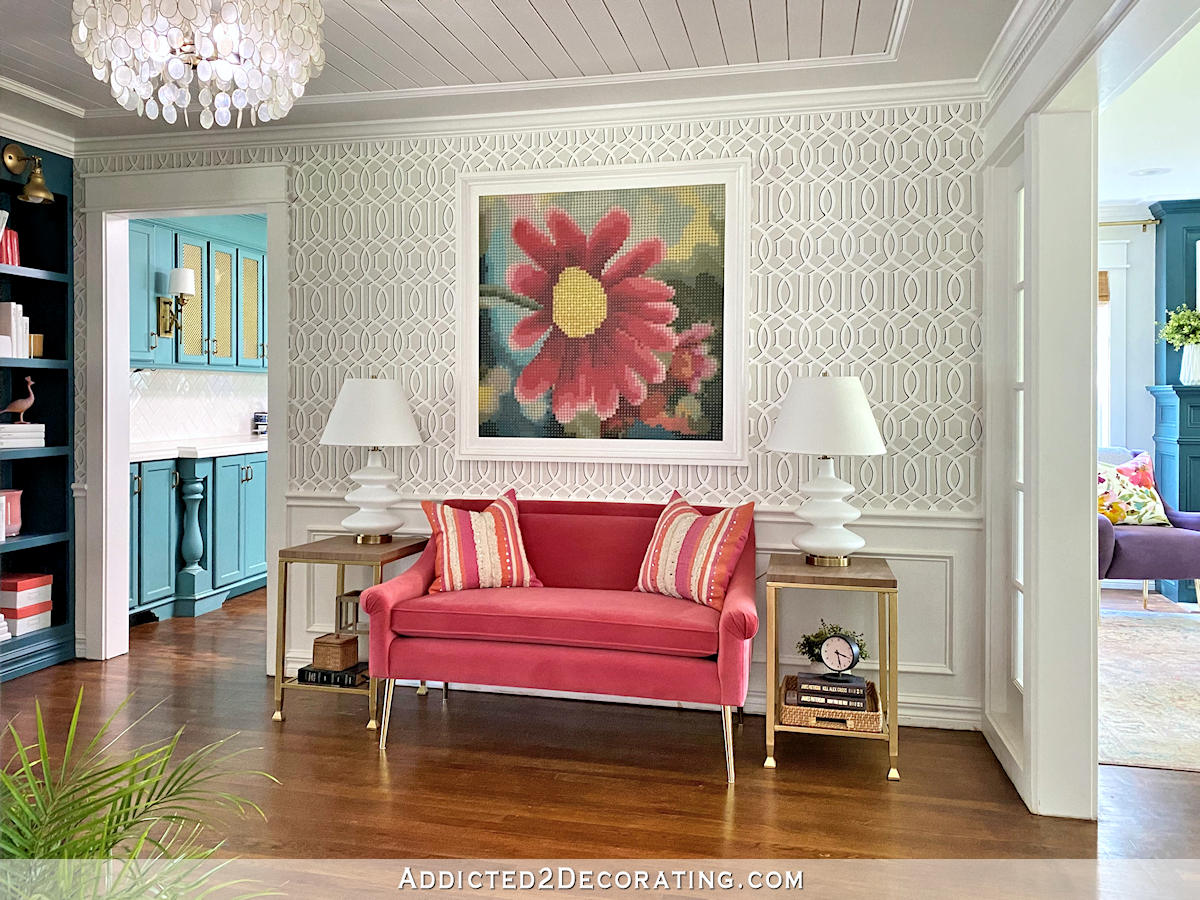
And while I’ve shown you this just recently, here’s another look at the view from the hallway towards the music room and kitchen.
And here’s the view further around the corner in the hallway showing the view to the bookcase/sliding door wall of the music room.
And finally, here’s the settee wall of the music room and the front window wall of the living room.
I think that should give you an idea of how these areas flow together, but as soon as I finish up with the new sitting room (i.e., breakfast room) and share how that turned out, I plan to do a whole walkthrough of these areas complete with wide angle views that should clear up any remaining questions about the layout and how it feels to go from one room to the other.
But for now, I’ll leave you with a few more random photos of the music room…


If you’re looking for paint colors, sources, or projects, you can find all of that here. (Note, the bookcases are painted
The Paint Colors


The Product Sources
The DIY Projects
Note: Not all of these DIY projects made the final cut for the room, but I’ve kept them here in case you want to revisit them.
[ad_2]
Source link


