I feel like I’ve been on a bit of a buying frenzy lately, but I have quite a few projects that I’m trying to plan for at the same time. In addition to the new sofa that I purchased (you can see that here if you missed it), I’ve also been planning for projects in the bathroom, the home gym, and the kitchen.
Bathroom remodel update:
We’ll start with the master bathroom remodel. I made headway this week by applying the clear coat to the Modern Masters Venetian Plaster wall finish, and then I started trimming out the window. Since I have all of my tools out to cut and install trim, I’m going to trim out the windows in the home gym at the same time. I’m hoping to get that finished this weekend.
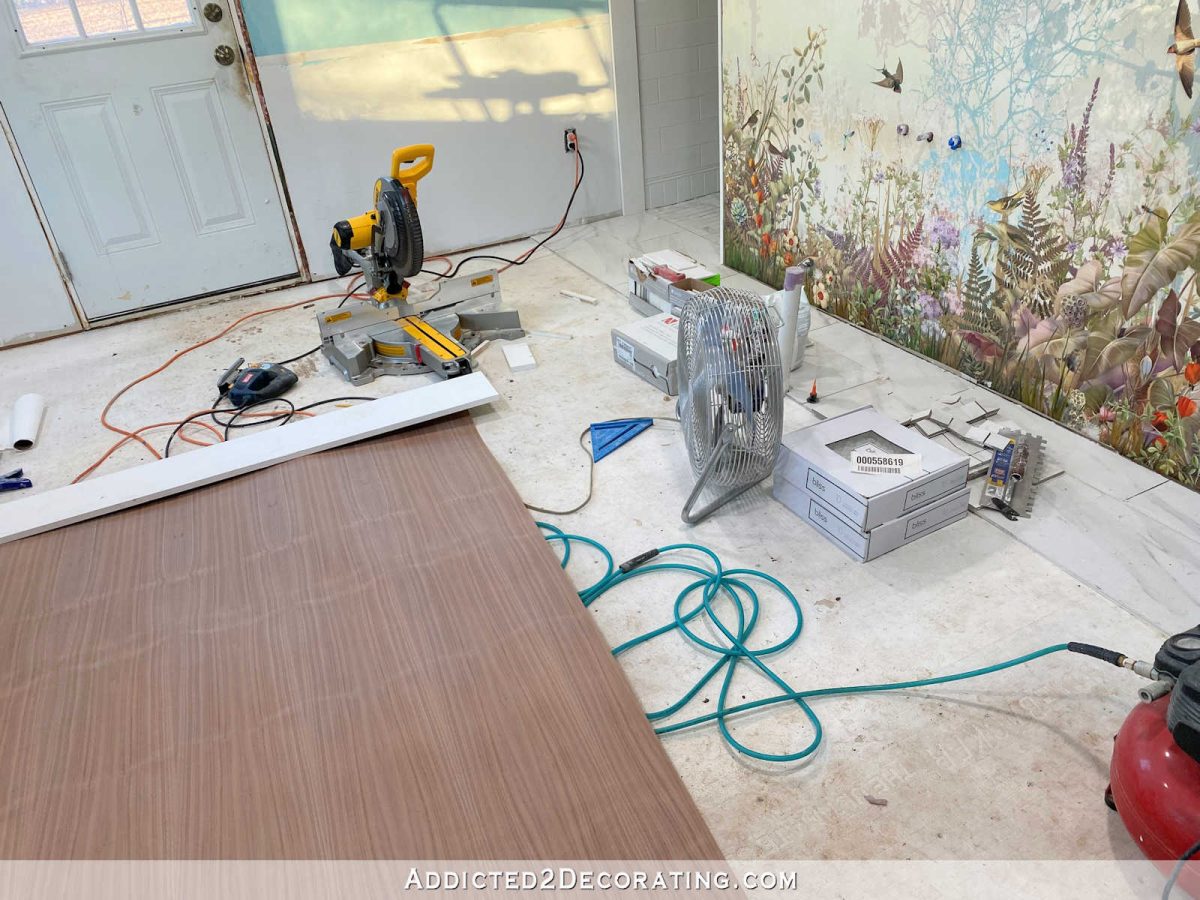
But this was the exciting delivery that came this week for the bathroom — the walnut wood veneer for the vanities. I ordered this from Oakwood Veneer Company, and after being overwhelmed with the options and doing lots of research, I ended up getting the Quarter Sawn Walnut Veneer 4′ x 8′ sheets in the 22.2 mil BFV (bubble free veneer). I didn’t want the kind with the adhesive on the back, because some people complained about having trouble getting it to stick properly. (I’ve had that trouble as well with the peel-and-stick wood veneer, so I’d rather be in control of the adhesive.) Isn’t it pretty?! I got two sheets for two vanities and the window seat in the middle.
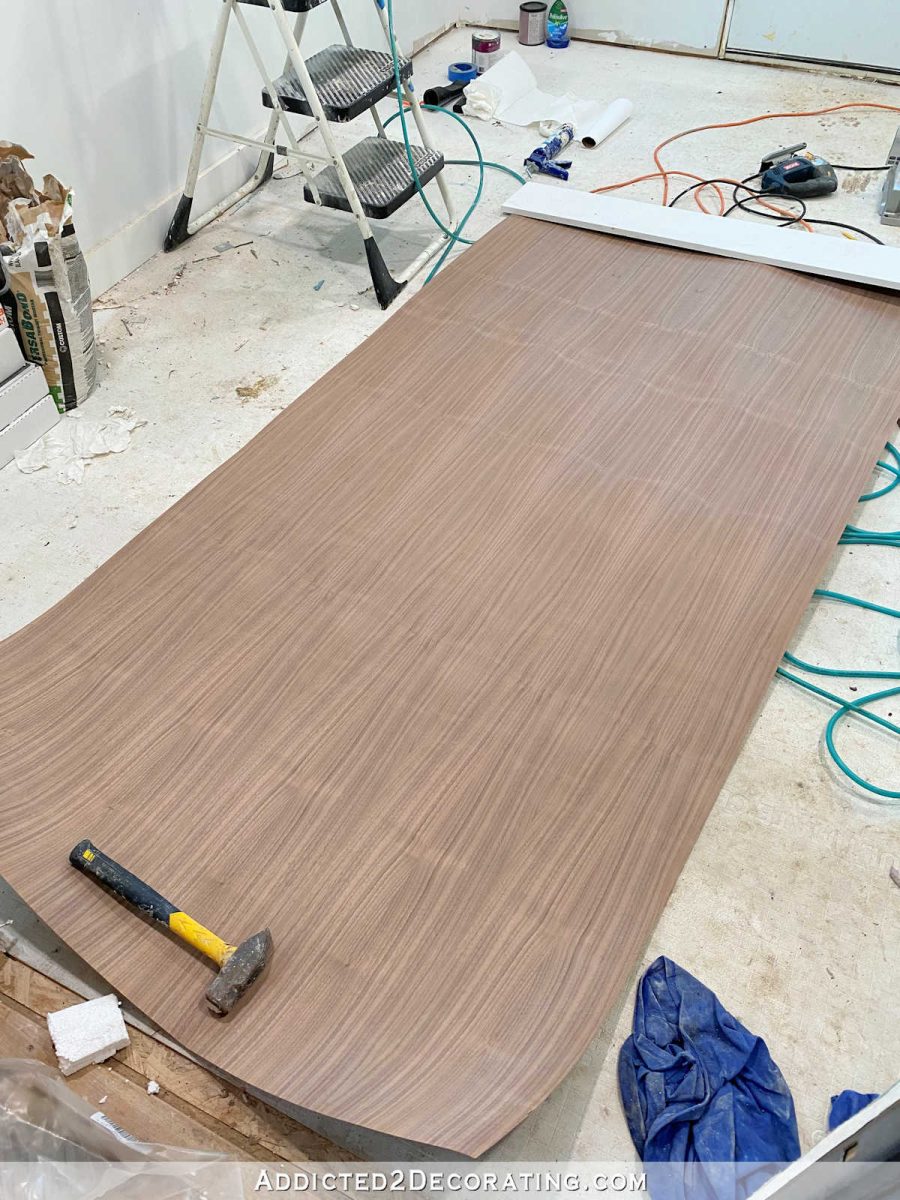
The BFV (bubble-free veneer) was important to me because I’ve also had trouble in the past with veneer bubbling when I put a clear protective coat on the wood veneer. It’s like the protective clear coat penetrates the wood and affects the adhesive in areas. To prevent that, BFV is made with a layer of melamine or resin acrylic between the wood veneer and the paper backing. That way the clear coat can’t penetrate all the way through and affect the adhesive. And I also like that 22.2 mil is pretty thick. This stuff is much thicker than the veneer I bought on Amazon and used on the side tables in the music room.
Anyway, I’m still finalizing the design of the vanities in my mind, but I almost have it. I still need to finish up the floor before I can install vanities, so I have a little while before I have to start cutting into this veneer. I can’t wait, though! I think it looks so pretty with the mural.
Home Gym Update:
I’ve been back and forth on what kind of window treatments I want to use in the home gym, and a couple of weeks ago, I finally decided that I want to use simple sheer curtains on the windows. I love the idea of something white, light, and breezy being on those windows with the colorful walls as a backdrop. I may still add some window shades or blinds, but I’ll hold off on that for now.
Sheers are something that I absolutely will not sew myself (I hate working with lightweight, crawly fabrics), so I went on the hunt for some ready-made sheers. I didn’t have much hope that I’d find anything of quality, but I looked at lots of options, and bought the ones I thought would be the best of those options.
Y’all! I’m so incredibly impressed with these sheer curtains that I got! I found them on Amazon, and they come in different lengths and different colors. I bought the 52″w x 96″l in off white. It’s a very soft, creamy white, but not dreary at all. I tend to like my whites very white, and this is light and bright enough for me. The fabric is a woven, gauzy-type fabric, but it’s substantial and doesn’t feel cheap and thin like some gauzy-type fabrics I’ve seen in the past.

And they come pleated. So the 52-inch width is the finished width (i.e., the width that it will cover with the pleats). The actual width of the fabric is just over 100 inches, so the fullness of the curtain really nice. Each panel has 13 pleats.
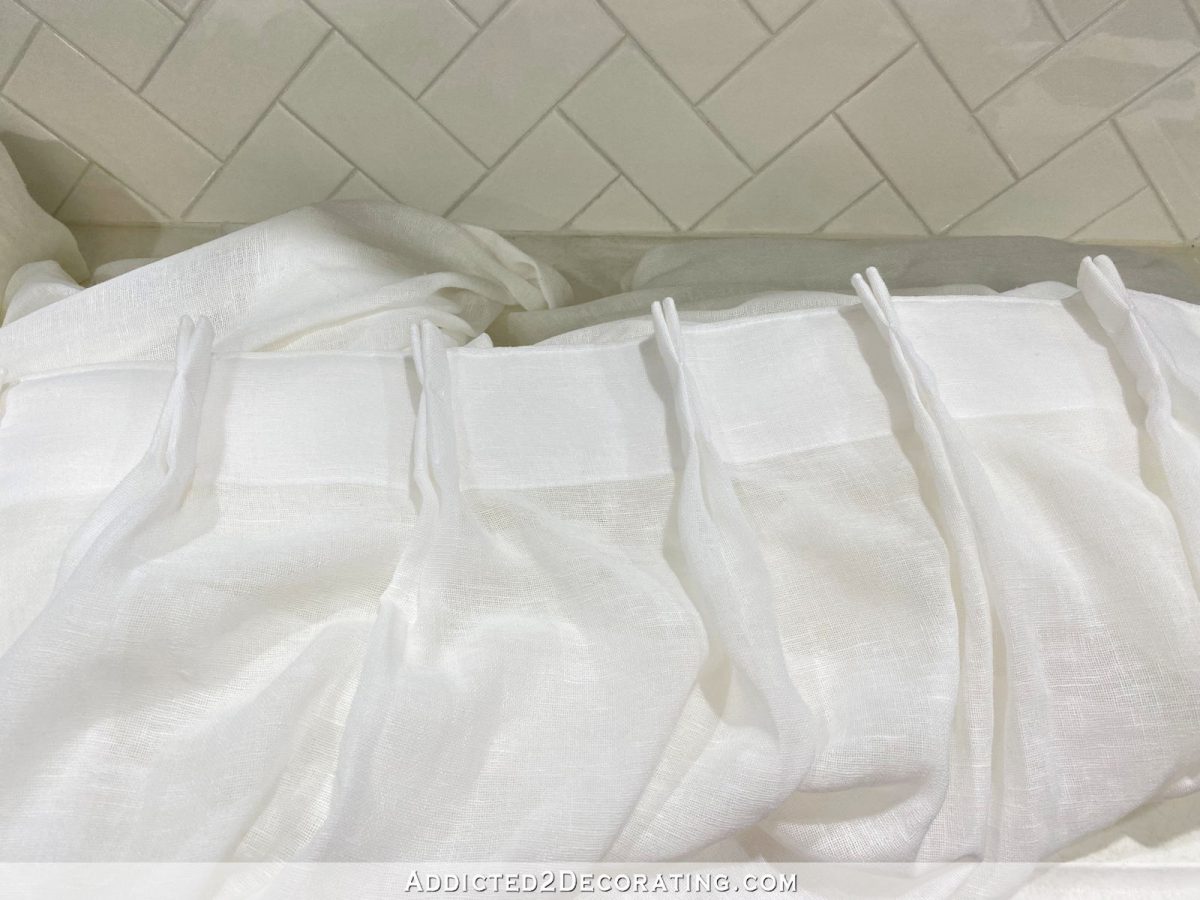
I’m also very pleased with the header tape that is used on these. It’s very substantial and keeps its shape. I can’t stand a droopy header on curtains and draperies, but this will hold up very nicely. And they also come with drapery pins.
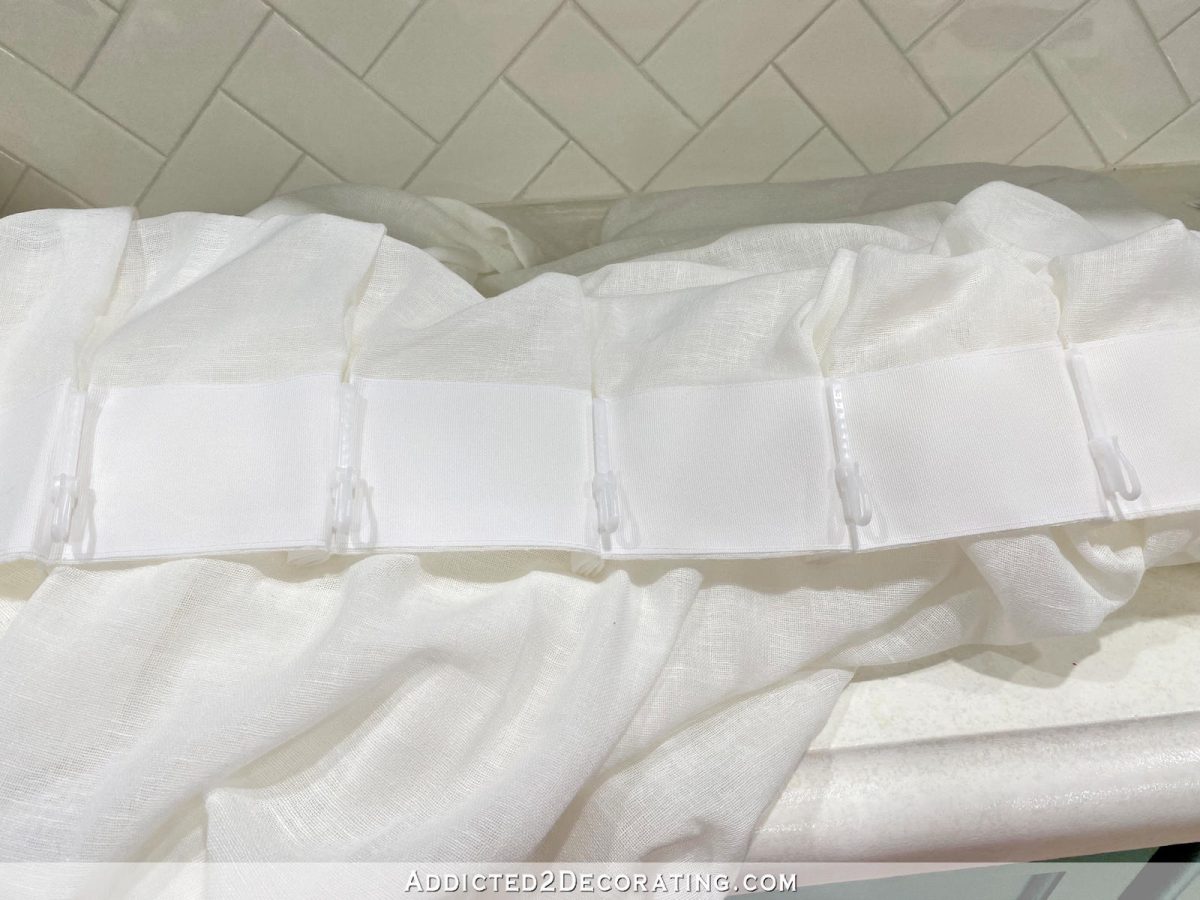
When I saw them on the Amazon listing, I thought for sure I’d be switching out the plastic drapery hooks for the nice metal ones I generally use. But no, these things are awesome. They’re very durable.
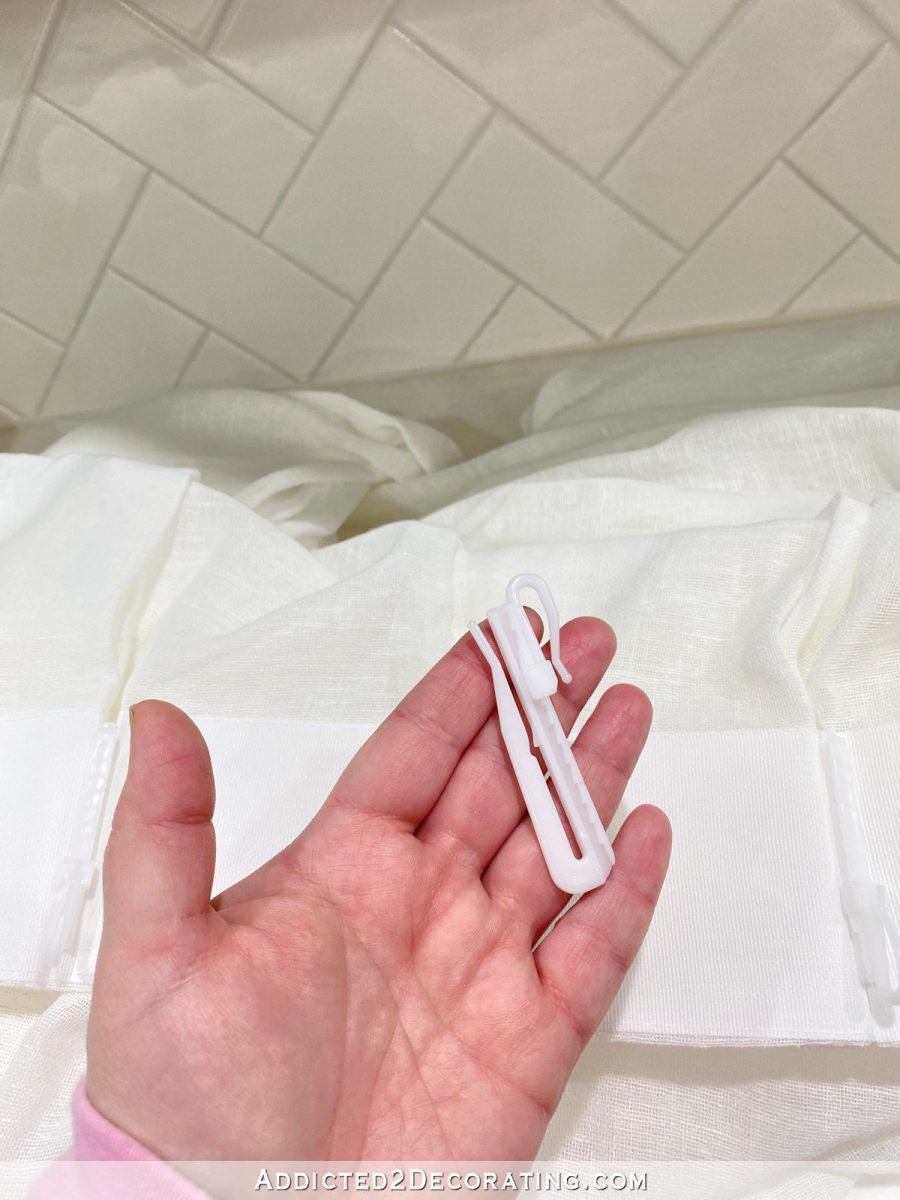
But the coolest thing is that they’re also adjustable! I’ve never seen these before, but now I want to know where to buy them! There’s about 1.5 to 2 inches of adjustability in these hooks. I love that feature!

And finally, they actually have drapery weights at the bottom.
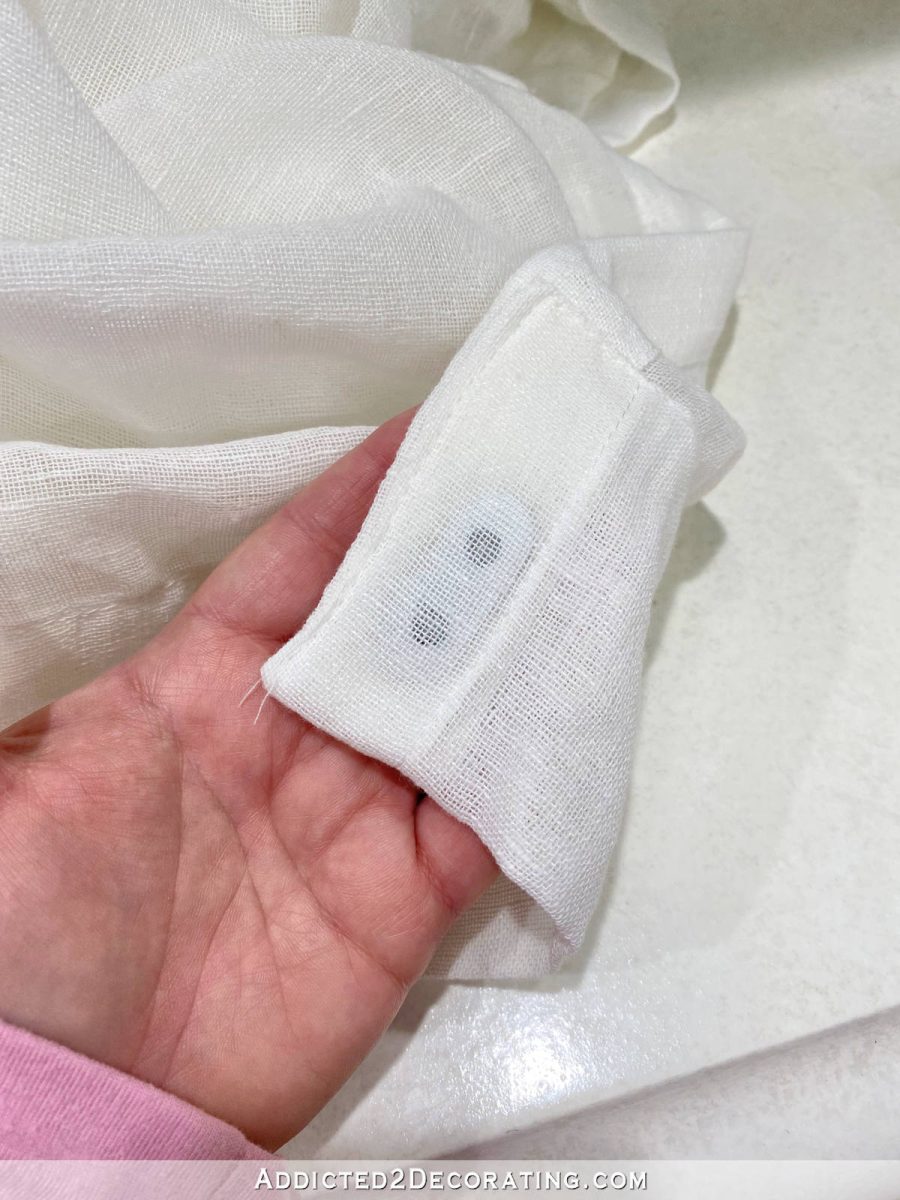
I mean, I just can’t say enough good things about these. I CAN’T WAIT to get those windows trimmed out and get the crown molding installed so that I can hang these curtains. I don’t think I’ve ever been so excited about ready-made curtains in my entire life. ? I really hope they look as nice once they’re hanging as I think they will.
I searched locally for curtain rods, and couldn’t find anything. I wanted black, and all I could find was either black rods with crazy finials (big swirly spheres or Texas stars — not quite my thing ? ), or rods in not-quite-black antique bronze. Ugh.
So I got online to search for simple black curtain rods, and look at these that I found (and ordered). They have over 8,000 customer reviews and a 4.8 star rating (out of 5 stars)! Wow! So those will be here next week. I will be anxious to hang my curtains as soon as they get here, so I had better stay focused and not slack off this weekend and get all of those windows trimmed out!!
Kitchen C.O.P. progress:
My C.O.P. (cleaning, organizing, purging) progress has moved forward just a bit in the kitchen this last week. I’ve spent a little bit of time this past week on taking inventory of my kitchen cabinets and drawers and determining what organization systems I want to put into place.
One of them was incredibly easy. My plastic bag drawer used to be stuffed with boxes of plastic bags — boxes of varying sizes that would get jammed in there and were difficult to access.
So I found this storage bag organizer on Amazon, and it happens to fit perfectly into my drawer (which is exactly 13 inches wide). I love this thing way more than I should. ? There’s just something so satisfying about opening a drawer and seeing that everything is organized and in its place. And I’m not ashamed to admit that on several occasions, I’ve gone into my kitchen just to open the drawer and stare at the organization inside.

I also bought the organizer for plastic wrap, wax paper, and foil.

Unfortunately, I don’t have a drawer that this fits perfectly into right now, but I do have a plan for where I’ll use it. It’ll require a bit more work than the storage bag holder, which required nothing more than we opening a drawer, pulling out the boxes of storage bags, and placing the organizer inside the drawer. ? That’s my kind of quick and easy organizing project!!
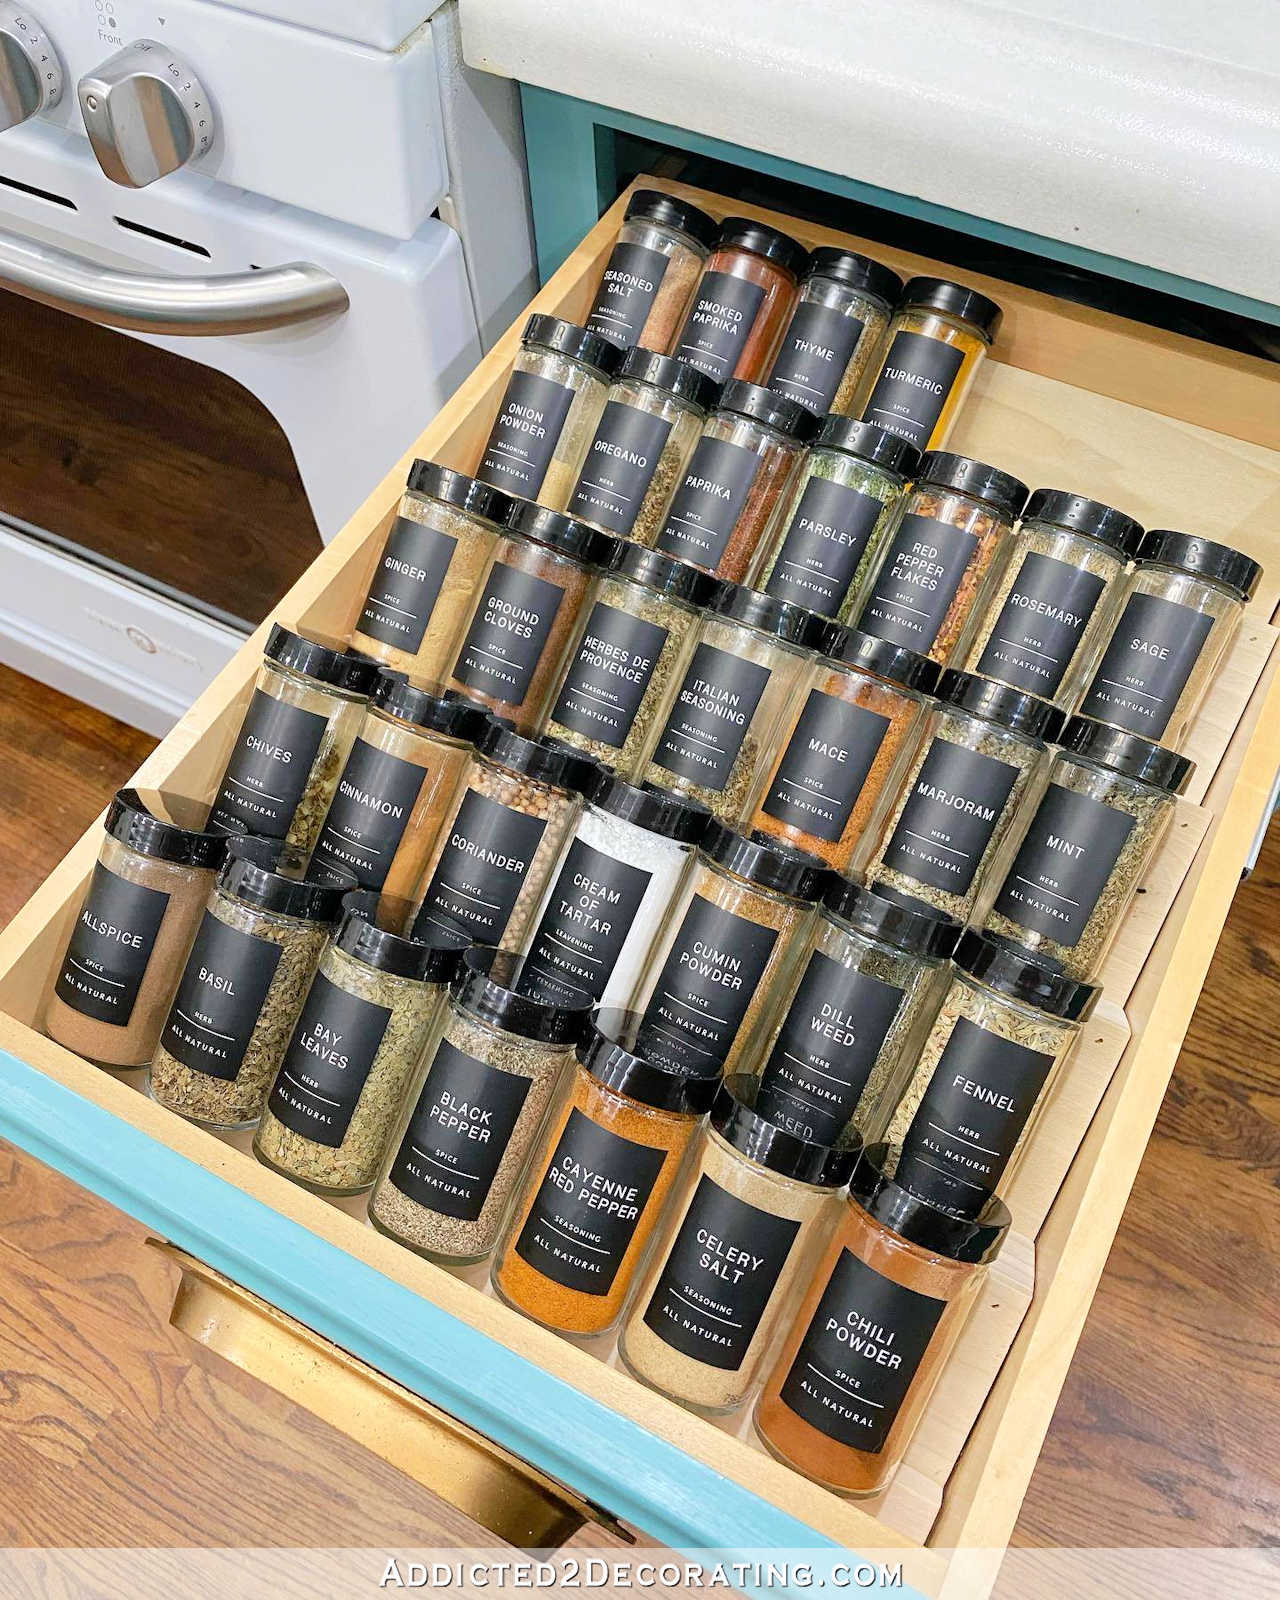
I also got my spice drawer updated. The labels that I had used previously were handwritten labels. I used a paint pen (the oil-based kind), and the labels on my most-used spices had smeared. I guess I had oil on my hands when I picked them up, and oil dissolves oil.

Can you tell that smoked paprika is my favorite spice? ?

So I found some pretty labels on Etsy at a shop called Quart + Pint. I got 140 labels for $12,95, and they’re so nice!
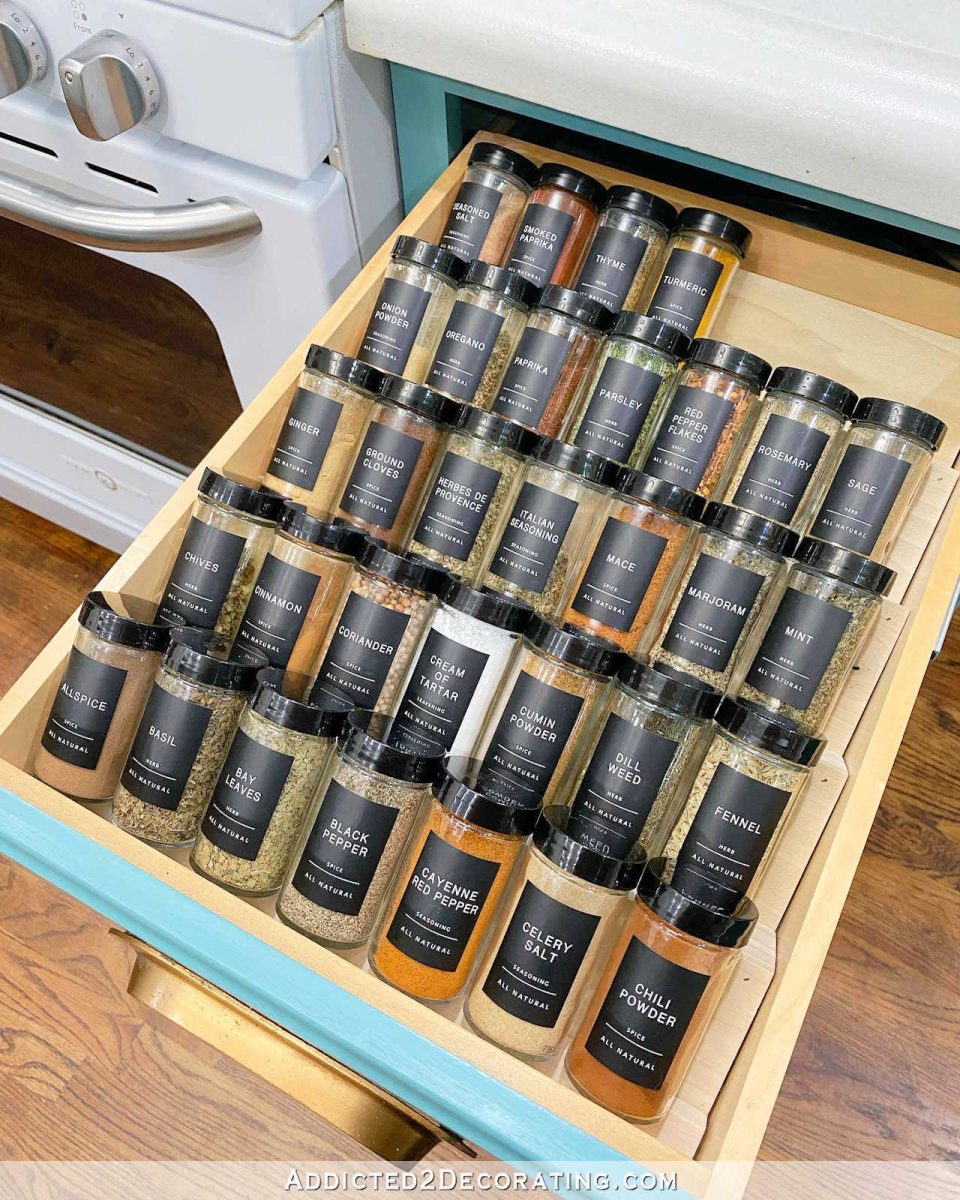
Out of all of my spices, there was only one for which there was no label among the 140 that I got, and that was one called pizza seasoning. No big deal. My pizza seasoning can live in the cabinet. I don’t use it that much anyway. The drawer insert to hold spice jars was a quick and easy DIY project which you can find here.
And finally, an organization project that I need to tackle ASAP is my fridge and freezer. Those have gotten so out of control that they’ve now also fallen victim to my open-and-shove method of storage. So I stocked up on some clear containers — the small ones from Walmart and the large ones (14″ x 10″ x 4″) from Amazon — that I’ll be using very soon to wrangle the mess.
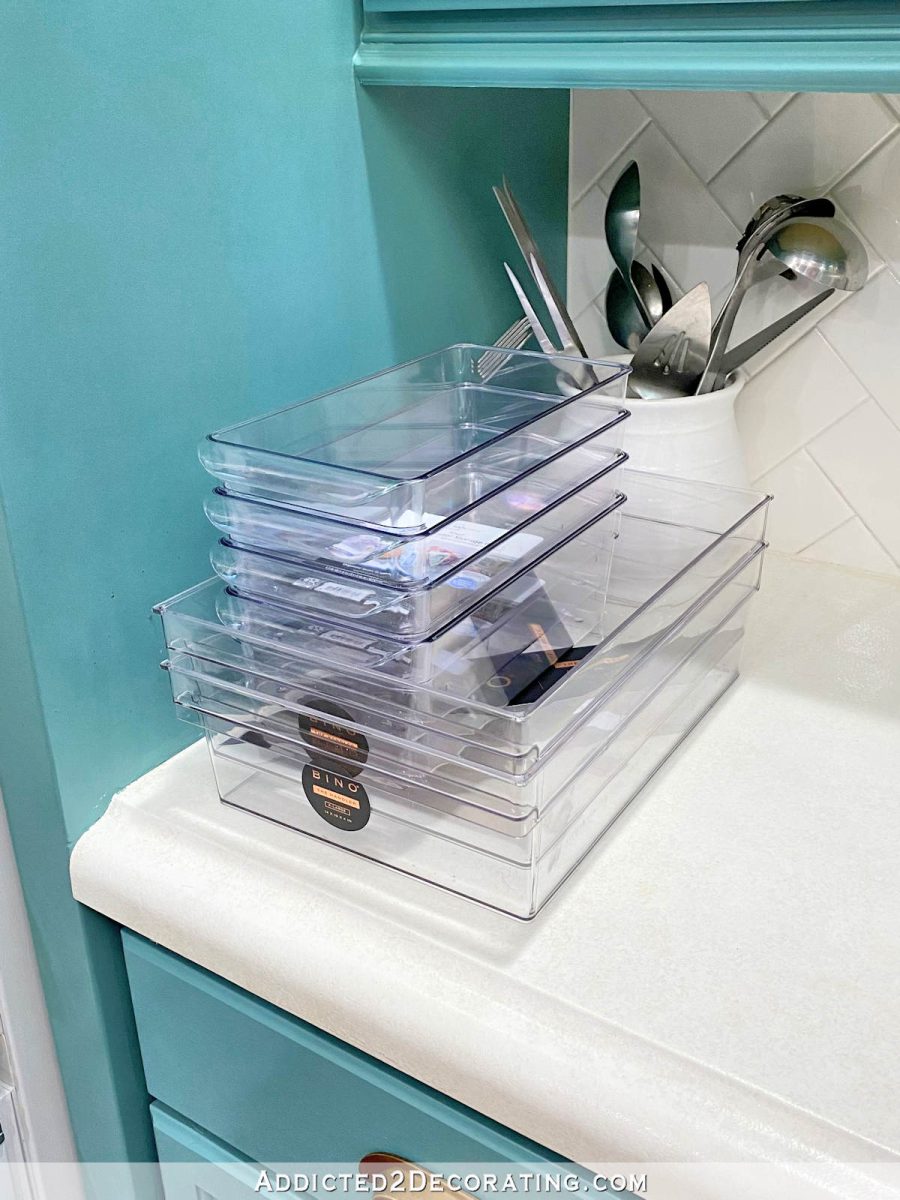
I’ll hold off on showing you how my fridge and freezer look right now until I actually have time to tackle them. I’d hate to leave you with such horrifying pictures as you begin your weekend. It might cause nightmares. ? I’ll wait until I have a nice and organized “after” picture to accompany the horrifying “before” pictures.
But I’m feeling very excited about my kitchen organization, and I have plans for all of the cabinets and drawers that haven’t had a system put in place just yet. And I also have a plan for the dishwasher space (yes, I’m still planning to get rid of the dishwasher that hasn’t been turned on in years). I’ve been getting lots of custom storage ideas from Studio Dearborn on Instagram. If you don’t follow that account, I highly recommend it!

Addicted 2 Decorating is where I share my DIY and decorating journey as I remodel and decorate the 1948 fixer upper that my husband, Matt, and I bought in 2013. Matt has M.S. and is unable to do physical work, so I do the majority of the work on the house by myself. You can learn more about me here.
I hope you’ll join me on my DIY and decorating journey! If you want to follow my projects and progress, you can subscribe below and have each new post delivered to your email inbox. That way you’ll never miss a thing!

