[ad_1]
Disclosure: This post may contain affiliate links. This means, we may receive a small commission if you choose to purchase something from a link we post (including links to amazon.com because we are a participant in the Amazon Services LLC Associates Program.) Don’t worry, it won’t cost you anything.
The holiday season is here and you know what that means: it is time to decorate! Decorating your home is an important Christmas tradition, and you can decorate pretty much any room in your house. Once the inside is looking festive, you might want to move to the front porch with a traditional Christmas wreath or a holiday swag. Christmas swag ideas are so much fun!
What is the difference between a wreath and a swag?

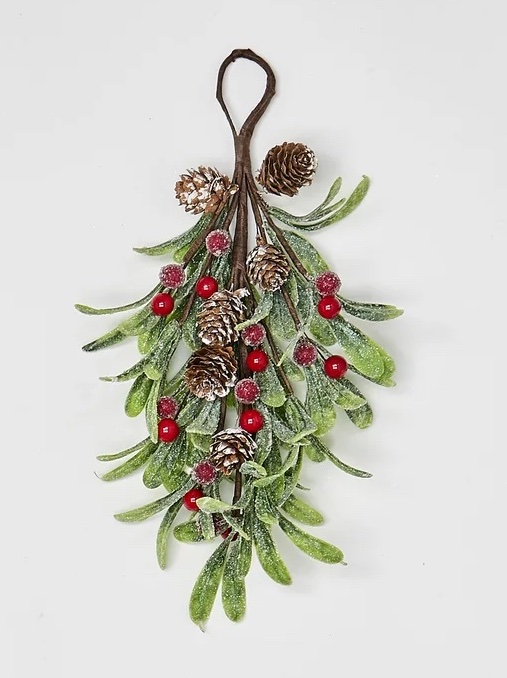
They both hang from the center of your front door, but wreath is a full circular shape while a swag is just a bundle of decorations that hangs straight down, kind of like a teardrop. They are normally made of the same materials — clippings from your Christmas tree and other decorations — and they are both popular craft projects for this time of year. If a DIY Christmas wreath seems too complicated for you, go in the opposite direction and make a Christmas swag. They are simpler to make, so they are perfect for a beginner DIY enthusiast.
You can hang your Christmas swag wreath from your front door, windows, on a pillar or any blank surface, or even from the end of your staircase.

Image source: Wayfair
Supplies:
The first step to making your own Christmas swag is to come up with an idea of what you want to make. Most swags are made up of a combination of natural elements, like branches of your tree, holly berries, or pinecones, and a decorative element such as Christmas ornaments or large ribbon. It is a great way to use up any leftover decorations you have, and that will help ensure that your swags match the rest of your decor for a cohesive look with the rest of your house.
Here are the supplies you will need to create your Christmas door swag. You can find most of them at a hardware store, such as Home Depot, or a craft store.
- A pair of wire cutters or scissors
- A length of floral wire to hold everything together, plus some extra to hang from your wreath hanger (you could also use rubber bands)
- Some fresh greenery, such as a garland or clippings from your Christmas tree
- Ribbons, berries, ornaments (optional, but enough to execute your swag idea)
Once you have all of your materials laid out on your work surface, it is time toget started putting together your swag!
Directions for a Christmas Swag:
Start by trimming your evergreen branches into uniform pieces. Cut them at an angle so that they can be easily inserted into the floral wire. Next, take your berries and thread them onto the wire, spacing them evenly along the length of the branch. Add in the sprig of fragrance, tucking it in among the leaves.
Now it’s time to shape your swag! Gather the branches together in one hand and start twisting the wire around them, working from the bottom up. As you twist, shape the swag into a gentle curve. Once you get to the top, twist the wire several times to secure it in place and snip off any excess. Finally, loop your ribbon around the top of the swag and tie it in a bow. Hang your swag on a door or window — or anywhere else that could use a little holiday cheer!
These are some basic instructions for how to make your swag, but the beauty of a DIY project is that it can be as simple or complicated as you would like. One easy way to make a swag without using wire is to start with a wide, fluffy branch such as a pine spray. Just hot glue all of your decorations along the pine branch and on any of the sprays coming out from the main branch. Pinecones and berries would look really good on the pine, and you can experiment with different sizes to make it look more interesting. Top it off with a big red ribbon and you’re all finished!

Image source: Wayfair
Get Creative
As far as Christmas swag ideas go, once you have mastered the basics and created your first swag, you can move on to more complicated combinations. For a really big, full swag start with a foam block — these are typically used in floral design projects, so they are perfect! Tie some wire around the blog with enough space to insert your greenery. you can even poke some of your decor into the top of the blog so that it’s not all just hanging down. Here is an excellent step by step tutorial on how to make a swag using a foam block and an old wire coat hanger!
Or, if you want to mix lots of different textures, you can try creating multiple swags that you tie together to create one bigger swag wreath. Start with the widest swag first, as a base. Then create two more swags, adding different materials and textures as you go, and making each one smaller than the last. Then stack them on top of each other from biggest to smallest and tie all three of them with some twine or wire. Cut a long length of a really thick ribbon (or two, using the same stacking principle), tie them around the same spot to hide the wire, or tie the bow and hot glue it on top of the twine. Ananda put together a beautiful example on Remodelaholic.

Source: Wayfair
Hanging Your Christmas Swag
After you have made all of the swags you need, it is time to hang them. You can do this with loop of floral wire, twine, or ribbon securely attached to the back of the swag. Hang the loop over a wreath hanger or a Command hook fastened to your door. If you are hanging the swag from something like a pillar or a sconce, you can tie some twine or wire around it and hook the swag onto the twine to anchor it.
Holiday Ready
A Christmas swag will definitely help bring the holiday spirit into your home as you decorate for Christmas. It’s a perfect craft to dip your toe into holiday DIY projects and crafts, and it is a great way to use up any leftover materials or supplies form your other projects. Once you discover how easy it is to execute Christmas swag ideas you will want to decorate your whole house with them. Happy crafting and happy holidays!
Here’s another Christmas DIY you might enjoy:

[ad_2]
Source link


