[ad_1]
I finally made the purchase. I actually clicked the button, made the payment, and completed the order. The cabinets for my studio will be delivered on April 19th. Eeeeekkk!! I’m so excited to finally have that done!
I’ve been putting this off for so long because I just couldn’t seem to make up my mind on exactly what I wanted. I had pretty much set my mind on having white cabinets, but I just couldn’t make that final commitment. I felt like I was settling. I started really paying attention as I’d scroll Instagram, and it became obvious that cabinets that are painted a color always make me stop and look. But I scroll right past white cabinets. I just simply have no interest in them. They may be practical, but they’re just not me.
So I was having a really hard time with the fact that this is my studio, and yet, I was trying to make myself get excited about white cabinets. This is the one room in the entire house that’s all mine. Matt literally has no say (and wants no say) in what I do in my studio. In the rest of the house, I have color. Lots of color. I have teal kitchen cabinets. I have a coral-orange bathroom vanity (that will eventually be more pink than coral). And yet, for my own space, the one space that I don’t have to share with Matt, I was planning to use white cabinets?
No. I just couldn’t get past that hurdle. I couldn’t make myself do it. And when I saw this photo of Lux Skin Lab from StudioTen25 on Instagram, I knew for a fact that I wanted a color on my cabinets.
It’s not that I want hot pink cabinets in my studio. Let me reiterate, I don’t want hot pink cabinets. But after seeing that photo, it was settled in my mind. There will be no white cabinets in my studio. White walls? Yes. White cabinets? Nope.
In the meantime, I was talking to my mom about my cabinet conundrum, and she asked me how I was planning on using these desk areas on the main wall.
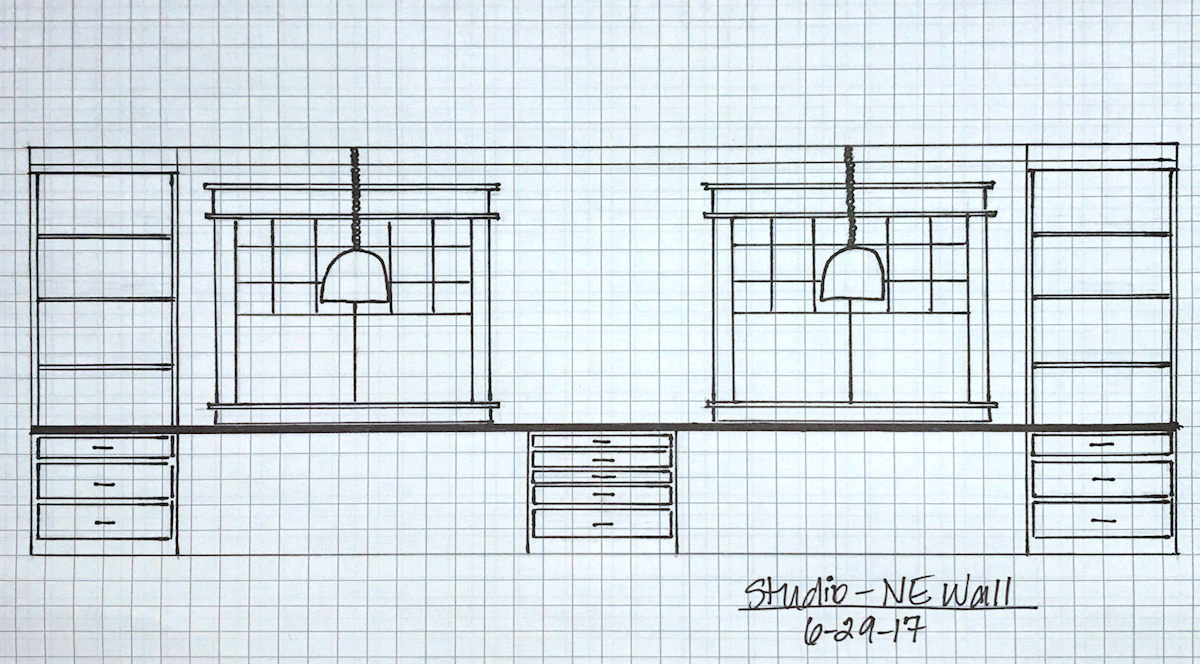
After all, I already have two large worktables that each measure five feet square. I can use them separately, or I can push them together and have a work table that measures 5 feet by 10 feet. And then I have a separate desk in the “office” area of the room. Do I really need two more desk areas on this main wall?
No. No, I do not. So we both agreed that I’d benefit more from wall-to-wall lower storage instead of limited storage and two more desk areas. That’s a whole lot of storage! And with all of that closed storage across the lower section of the entire width of that almost-20-foot wall, that meant that I could go back to my original idea of having open bookcases on the two upper sections.
So with all of that in mind, I continued to keep my eyes peeled any time I’d scroll Instagram. And then I saw it. The perfect inspiration. Take a look at this blue built-in bookcase with gold accents from Kristie McGowan.
I love everything about that, from the color to the molding detail on the doors to the detail on the frame around the open shelves to the gold detail.
With that inspiration in mind, I was finally ready to head back to the IKEA website and make my selections. I don’t know if I’ll be adding molding in that exact design, but I will be adding molding in a design inspired by that on Kristie McGowan’s built-ins. That meant that I could go with the Veddinge white cabinet doors that I had originally selected and then talked myself out of. The Veddinge white doors and drawer fronts are just plain and flat, so I can easily dress them up with molding.
So let me show you what I ended up ordering for the office wall. First, here’s a reminder of what that wall looks like…
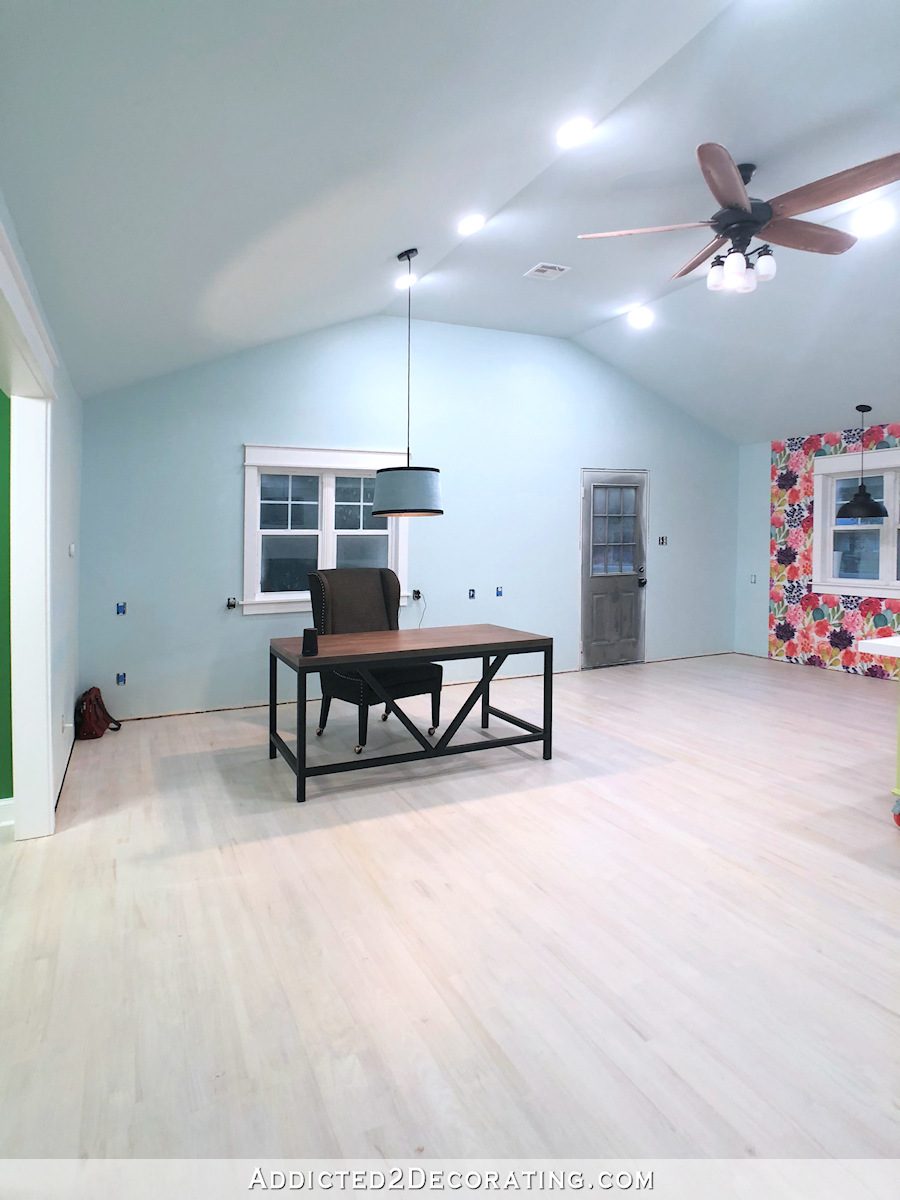
These cabinets will go on the wall behind the desk, and the upper sections will go on either side of the window.
All of the cabinets I ordered are IKEA’s Sektion kitchen cabinets, and the doors and drawer fronts are the Veddinge white. Here’s how the cabinets will be arranged on that wall…
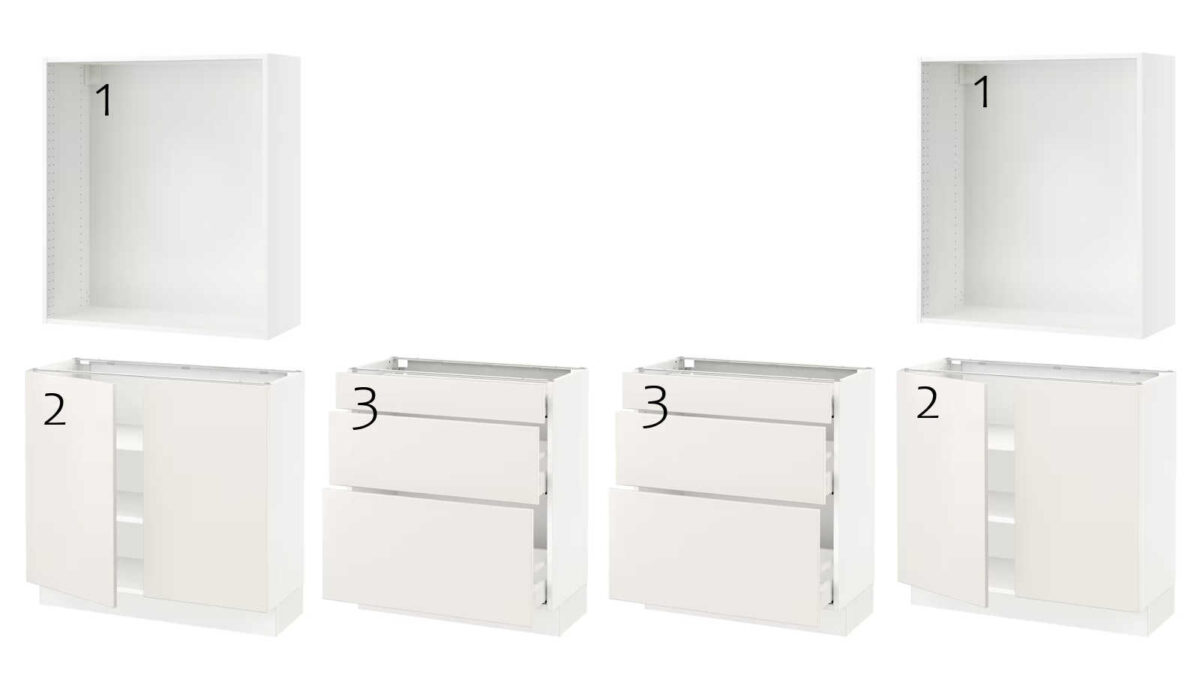
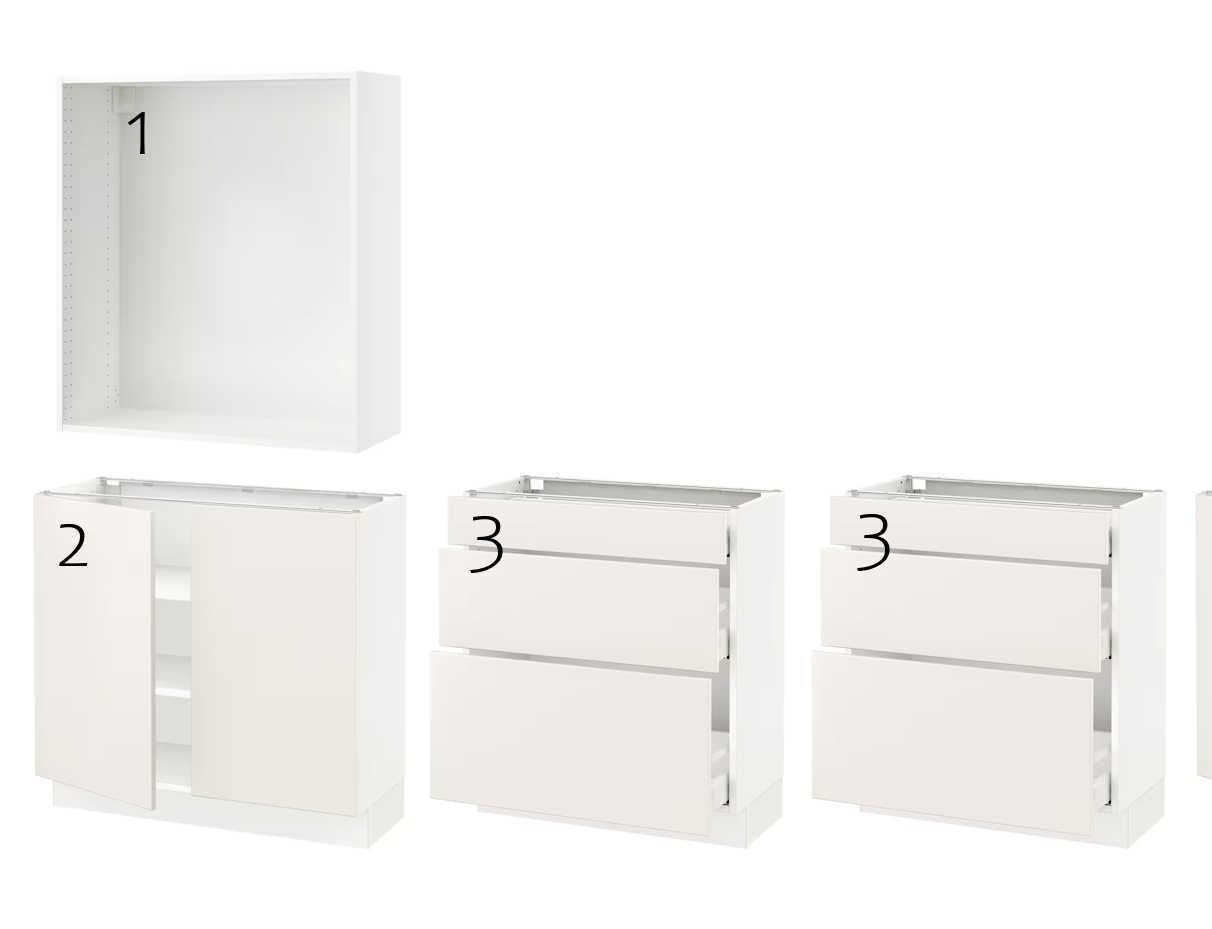
And those cabinets are:
- Cabinet frames with no doors (36x15x40) for the upper outside sections,
- Base cabinets with doors and shelves (36x15x30) for the lower outside sections, and
- Base cabinets with three drawers (30x14x30) for the inside section under the window.
This will be a combo of ready-made and DIY because this combo alone on the outer sections won’t be tall enough, and they were out of the 20-inch-high upper cabinets. That’s no big deal since those sections are just simple boxes, which I can build very quickly and easily myself. I could have built the #1 pieces myself as well, but since these come with all of the holes for adjustable shelving already drilled, it’s so much easier to just buy theirs than to make my own, especially since they sell them for such a reasonable price.
Now on to the main wall of the room. Here’s a reminder of how it looks right now…
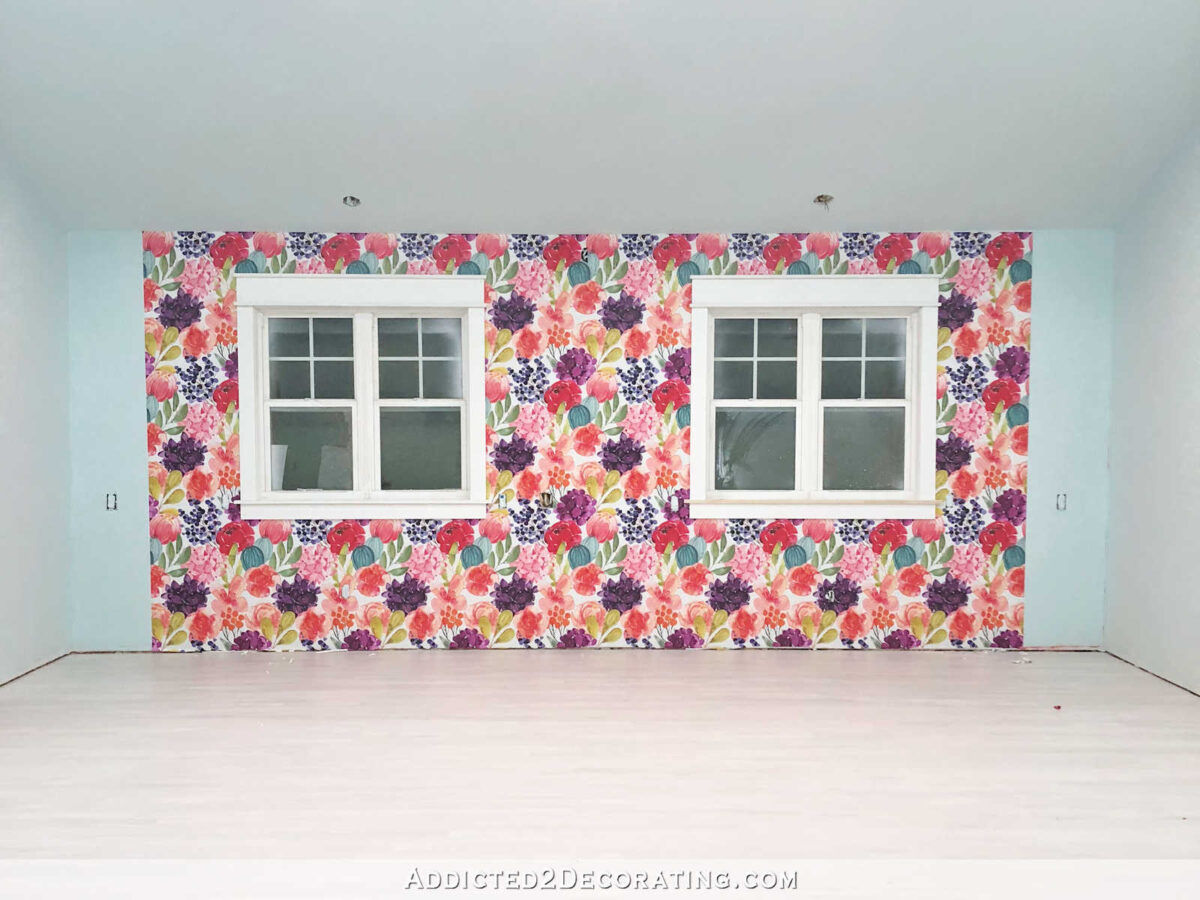
The wallpaper is going to be redone, and since I’m using open bookcases on the top outer sections, the wallpaper will be visible the entire 20-foot span of the wall. In other words, where the inspiration bookcase from Kristie McGowan has mirror on the back of the bookcases, I’ll be continuing the wallpaper on the backs of the open bookcases. At least that’s the plan for now. So this wall will have tall sections on each end, and then the rest will be lower cabinets all the way across.
Here’s how the cabinets for this wall will be arranged…

And those cabinets are:
- Upper cabinet frame with no doors (30x15x40),
- Base cabinet with doors and three shelves (30x24x30),
- Base cabinet with four drawers and three fronts (36x24x30), and
- Base cabinet with six drawers (36x24x30)
In total, including tax and delivery, the cabinets came to $4,259.64. I know I could have saved quite a bit by building them myself from scratch, but the time savings alone is well worth the price. And there will still be a whole lot for me to do! All of the basic, boring, time-consuming stuff will already be done for me — building the cabinet boxes, building the drawers, etc. But as you can see, there will be a lot of DIYing left for me to do in order to turn these plain cabinets into something resembling the inspiration built-ins. But that’s the fun part!
I’m so excited to get started on this!! They’ll be delivered on April 19th, so I need to get busy on the studio floor!

Addicted 2 Decorating is where I share my DIY and decorating journey as I remodel and decorate the 1948 fixer upper that my husband, Matt, and I bought in 2013. Matt has M.S. and is unable to do physical work, so I do the majority of the work on the house by myself. You can learn more about me here.
I hope you’ll join me on my DIY and decorating journey! If you want to follow my projects and progress, you can subscribe below and have each new post delivered to your email inbox. That way you’ll never miss a thing!
[ad_2]
Source link

