

[ad_1]
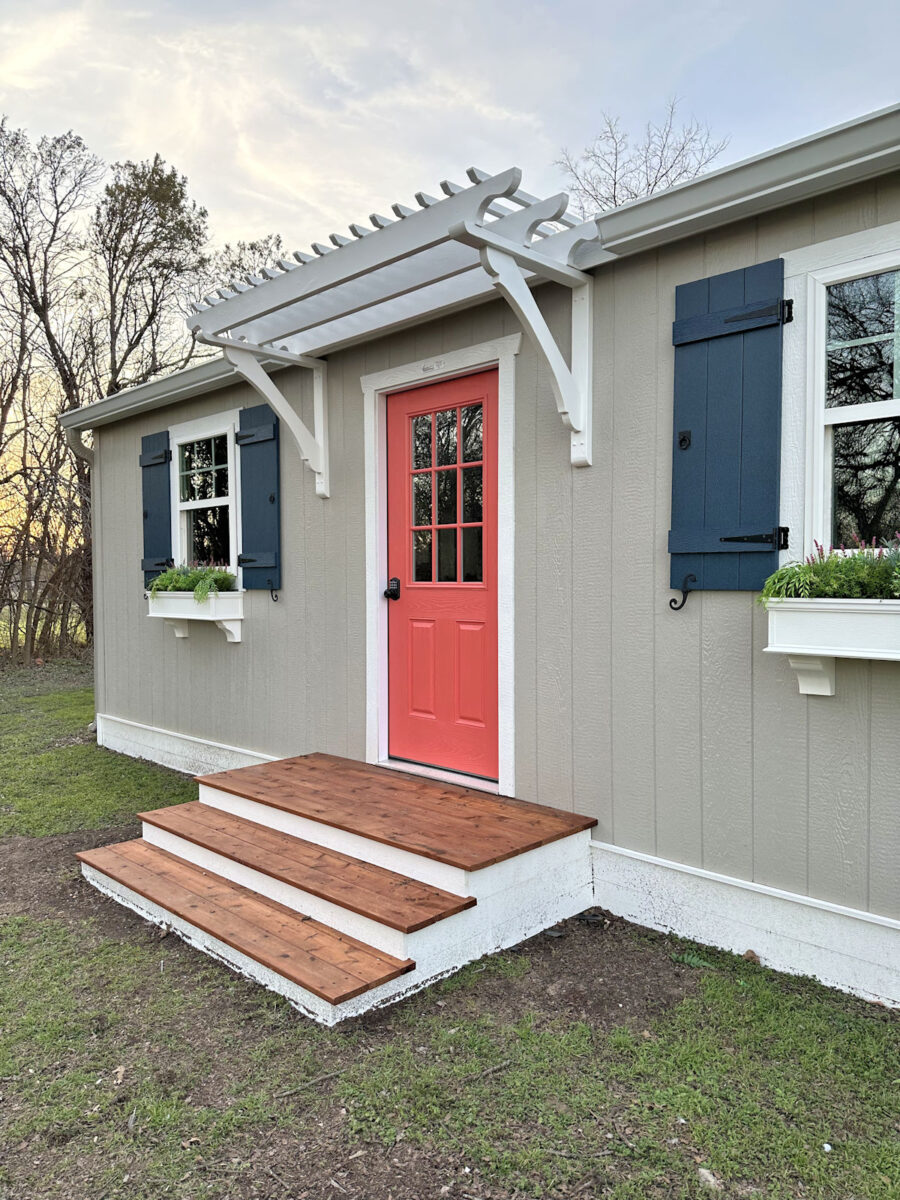
My workshop pergola is finished, and it turned out just like I had envisioned it. I love it when that happens! I couldn’t be happier with this project. It added that much needed depth and dimension to the otherwise very flat front of the workshop, and I think it’s the perfect finishing touch to the front of the building.
Here’s a look at how it turned out.
You can see the whole process, start to finish, here…
When I left off in Part 1, I had finished the brackets and installed them. So then next step was to build and attach the rafters. For my 31-inch pergola, I made three rafters. These are the parts that generally have a decorative design cut in the ends, so to make that decorate end, I used a sanding disc as a pattern. I used a piece of painters tape to mark where I wanted the circle to line up on the edge of the board.

And then I lined that up at the end of the board and traced around it.

Then I moved it to the other side of the board, made it touch the first circle, and traced again.

Once I had erased the extra lines, this is the design that was left.

And once I cut that out using my miter saw, this is the final design.

These boards were very rough, so they needed a great deal of sanding to get them smooth and pretty.

Once they were sanded, I used two coats of Zinsser B-I-N shellac-based primer, followed by two coats of exterior paint from Sherwin Williams.

For the back rafter, I wanted to add something to keep rainwater from coming off of the roof and being funneled directly onto the front porch. So I used some PVC boards that I had leftover from previous projects, and I cut three strips.

And then I glued those together in a stack using PVC glue and 2-inch nails.

And I attached those to the backside of the back rafter so that it formed an angle, peaked in the center and sloping down on the sides.

With that attached, the backside looked like this.

Here’s another view of it from the side.

After it was attached, I caulked where those PVC boards met the board. I did this before painting the boards. Also, this only shows two pieces of the PVC strips, but I did use three strips to get the right depth.

Before attaching that back rafter, I added a thick bead of silicone caulk along the back edge of that PVC strip, and pushed it up against the fascia board really tight to form a seal.
Next, I installed the front rafter, and then I could mark and measure the center between those two to install the center rafter.

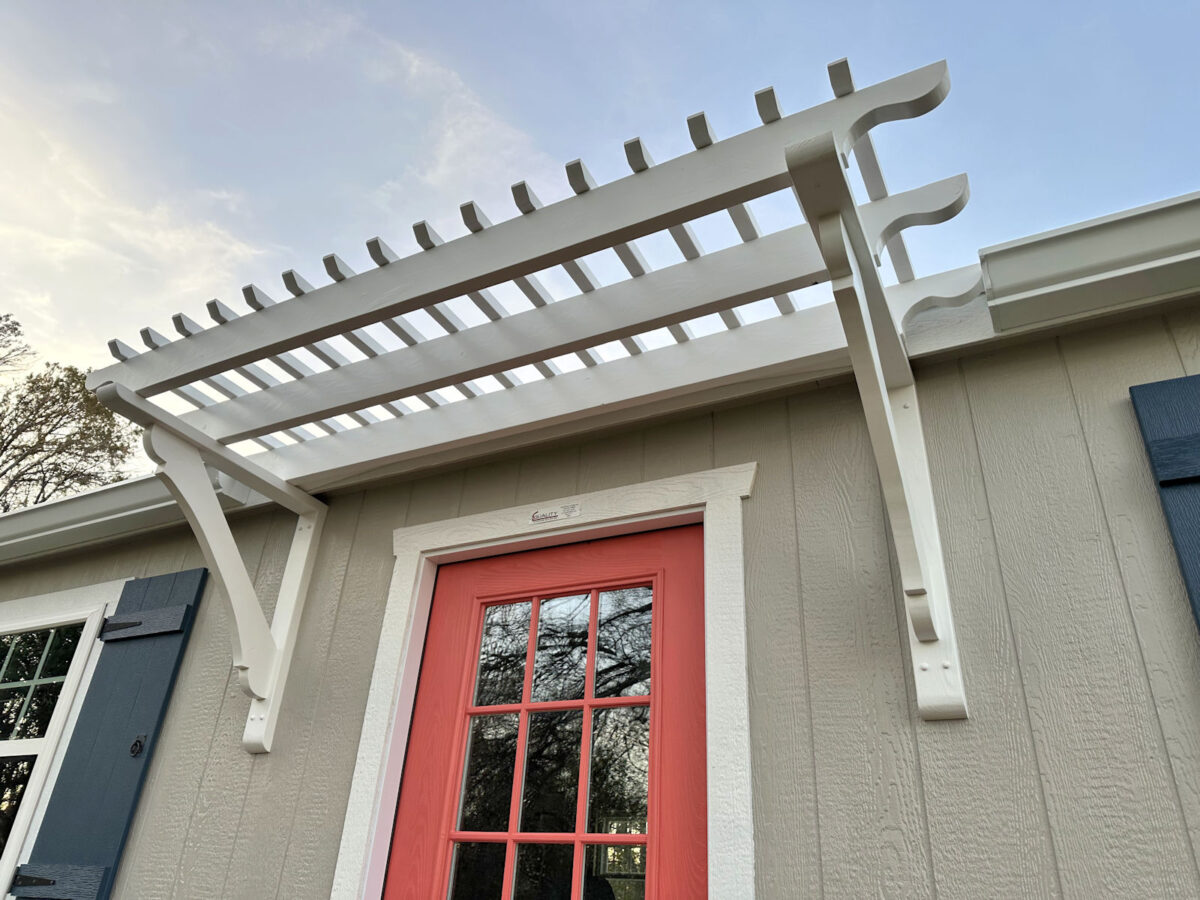
With all three rafters in place, it actually started to look like a pergola!


Here’s a look at how that back PVC extension meets the fascia board. You can see the peak in the center and the slope towards the sides.


The final piece of the pergola was the purlins for the very top. I used 2″x2″ lumber for these, and I wanted to cut a decorate angle on the ends. So I cut the first one, and marked the end of that board on my miter saw to use as a guide for the rest.

Using that mark as a guide, I could quickly cut the other 15 purlins with that same angle.

Here’s what the ends looked like with that angle cut.

I used a 3-inch roller to prime and paint these using the same products I had used on the other pieces.

Before installing these, I went ahead and started the screws on the back side of each purlin.

I also cut a 3.75″ spacer so that I wouldn’t have to measure and mark placement for each purlin while I was up on the scaffolding, and I also marked the center of that spacer so that I could use it to find the placement of the first purlins (since I was using an even number and wouldn’t have a purlin right in the center of the rafters).

Having those screws started in the back side of the purlins saved me so much trouble because this was the hardest part of the whole project. Since I’m so short, I couldn’t reach over the rafters to screw in those back screws. Instead, I had to reach up and through the rafters to get to those back screws.

And once I had that first one on and started working my way towards the left side of the pergola, I was pretty much working blind. I couldn’t see what I was doing at all, so I just had to feel for correct placement. There’s no way I could have done this had I not cut a spacer and started those screws. I wouldn’t have been able to see to mark and measure each one with a tape measure, and I wouldn’t have been able to hold a screw in place while also holding the purlin in the right place and screwing it on.

Once I got the back screws on, I could stand up on my scaffolding and reach over the top to get to the middle and front screws.

This would have been so much easier had I built the pergola first, and then built the steps. But I made it work. But as it was, I had to put my scaffolding upon the top step, so there wasn’t a whole lot of room for moving the scaffolding into the perfect position. I had no option but to be stuck in that one place. And yes, this was very safe. Those wheels are locked and turned perpendicular to the building, and the brackets held the scaffolding very still and sturdy.

I finally managed to get all of the purlins attached, and with that, the pergola was finished!
It’s not often that a finished product looks just like a mock up, but this one does! And I’m just thrilled with how it turned out.

Since this building is basically a big shed built by a shed company, I didn’t really have any options for adding interest to the front of the building. But I think this is the perfect touch.

When it rains, the steps will still get rained on, but that wasn’t a concern that I had. My only concern was that I didn’t want rain pouring directly off of the roof onto the front steps. But with the addition of that PVC extension, that’s no longer an issue.

And yes, it works! We’ve had a downpour since I attached that back rafter, and I went out in the rain specifically to see if it was doing its job. I’m very pleased to say that it worked just as planned.
There are still those 6-ish inches on each side where the rain can come off of the roof and come straight down, but I don’t think that’s a huge issue.

I was already planning to put some potted plants on either side of the steps anyway, so now they’ll get watered each time it rains.

This project would have been so much easier with a helper, but I’m a very independent person. I like the challenge of doing things myself.

That generally means that I have to build things in place, which adds to the challenge. But I’m always up for a challenge. And there’s just something about being able to say that I did a project all by myself.

So with this project done, I’m going to turn my attention to the bedroom suite for now. I want to get the flooring installed and finished, but then I’ll need to give the flooring a few days to cure after it’s stained and sealed before continuing any work on the bedroom suite.

So I might use that time (depending on the weather) to finish up the caulking and painting of all of the PVC projects and get the area around the workshop mulched. But for now, I just love coming outside and seeing my cute little workshop in our back yard.

So just as a reminder, here’s how the workshop looked right after it was built last fall.
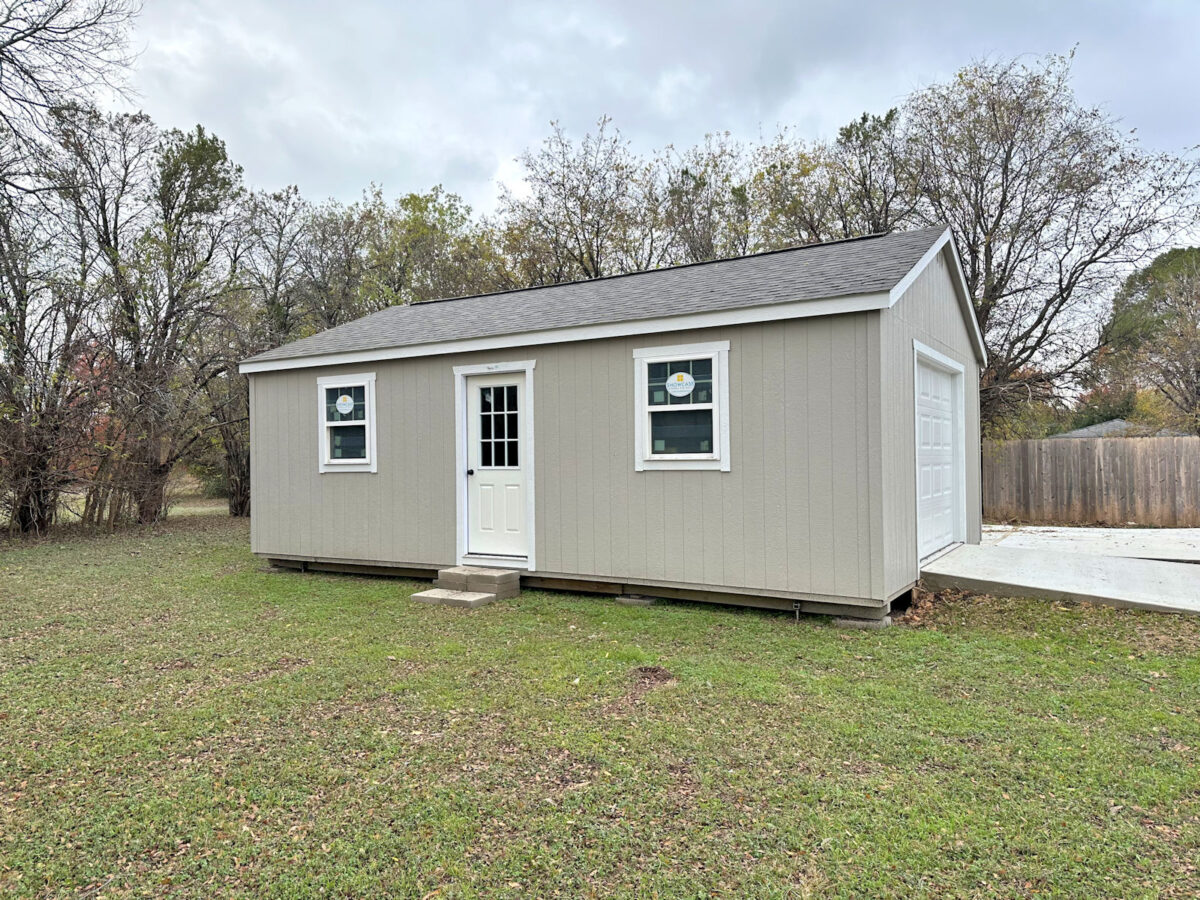
And here’s what it looks like now.
It’s shaping up to be the little backyard cottage workshop of my dreams!
If you want to keep up with my 2025 list of home goals (and my progress with links to finished projects!) you can see that here: 2025 Master List of Home Goals

Addicted 2 Decorating is where I share my DIY and decorating journey as I remodel and decorate the 1948 fixer upper that my husband, Matt, and I bought in 2013. Matt has M.S. and is unable to do physical work, so I do the majority of the work on the house by myself. You can learn more about me here.
[ad_2]
Source link


")


 House Breathes New Life Into a 1970s Classic")
