


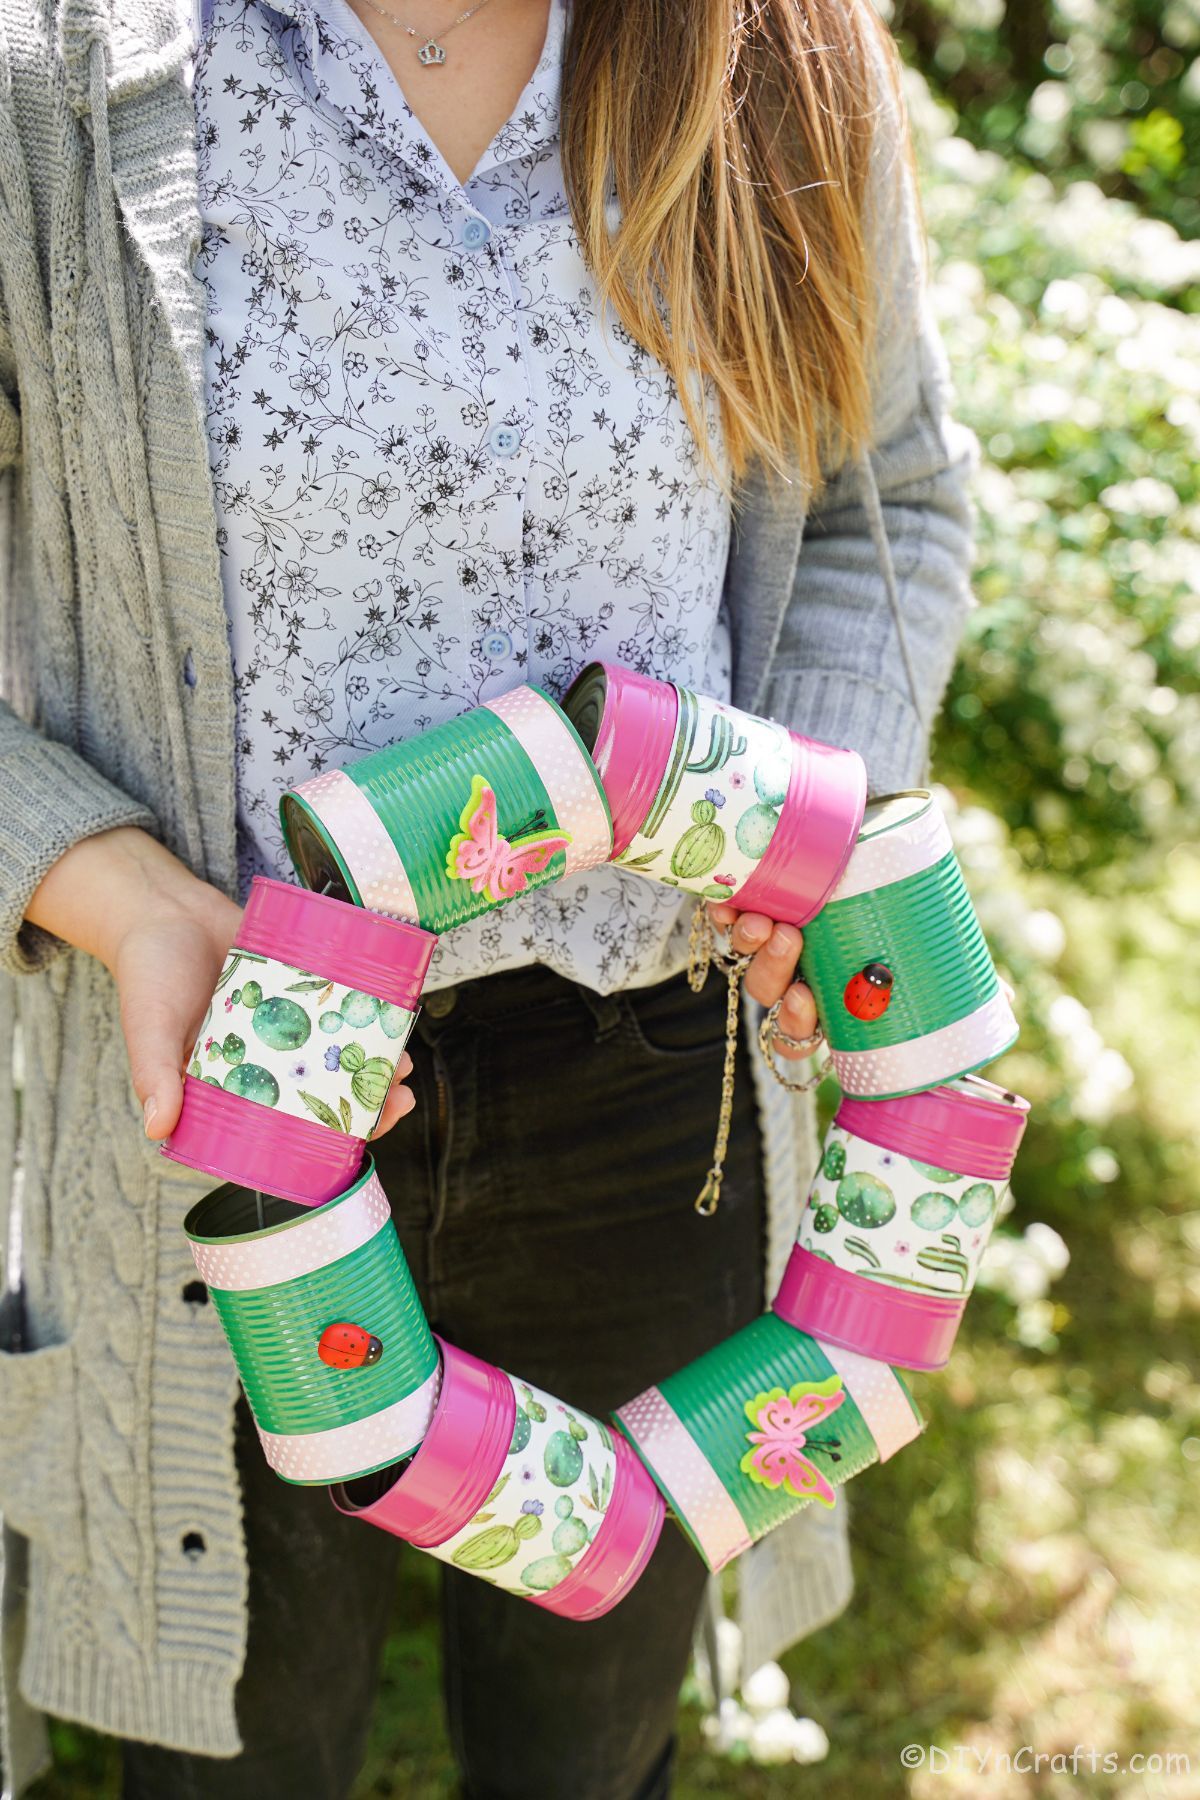
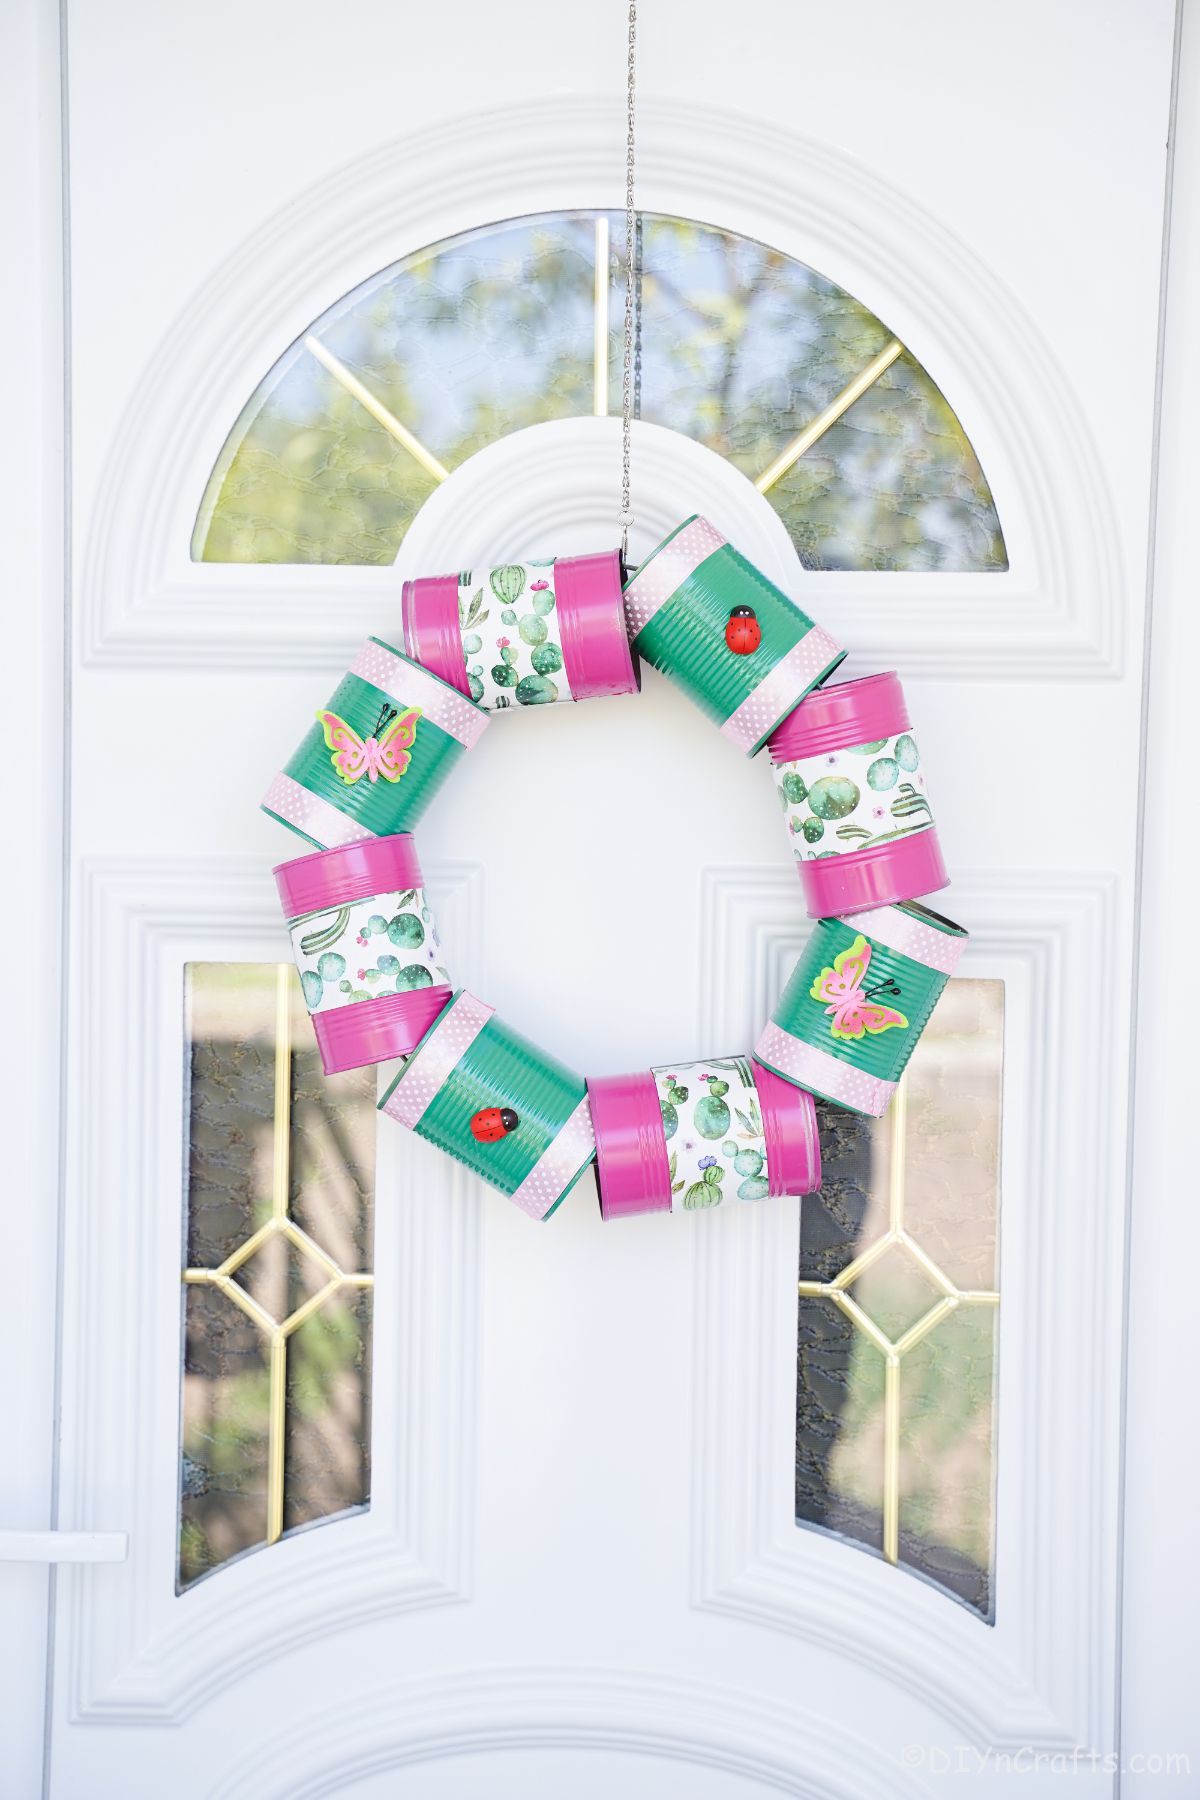
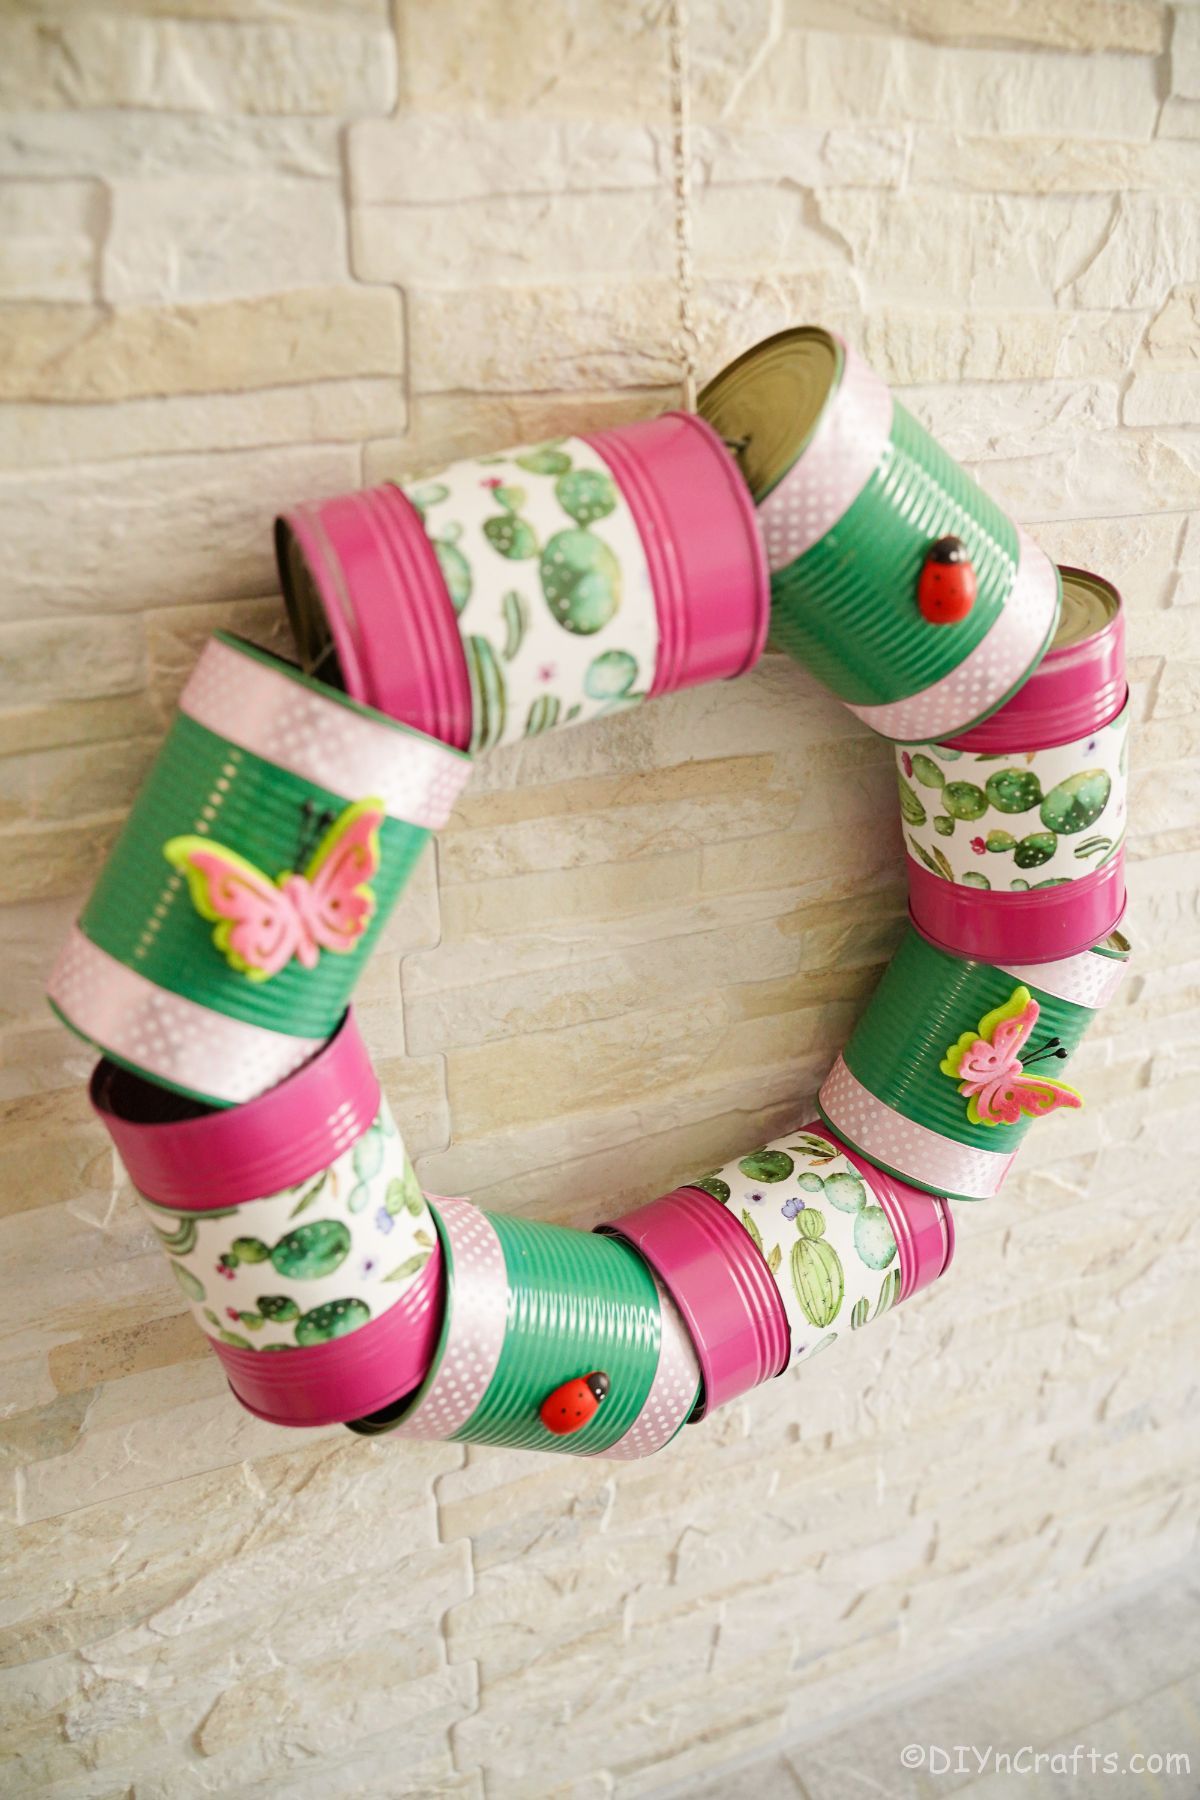
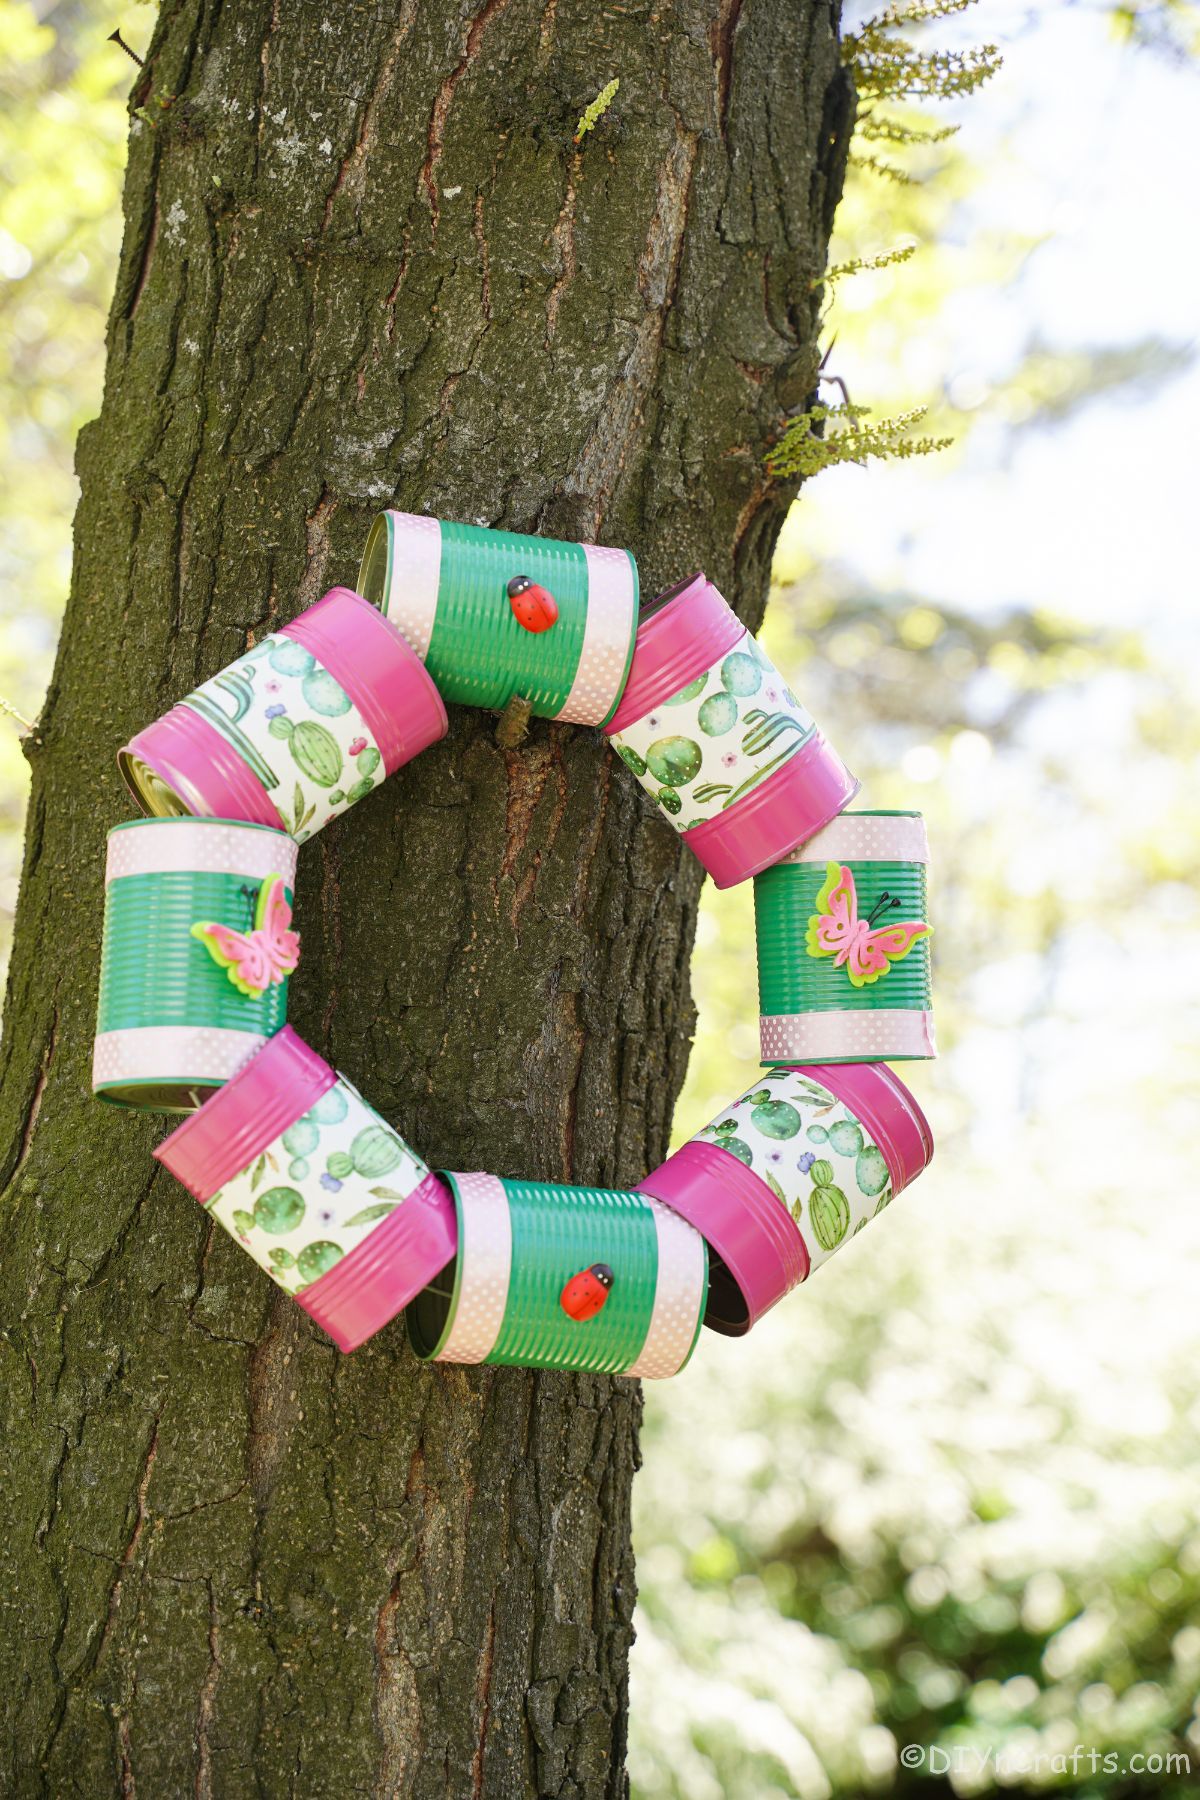
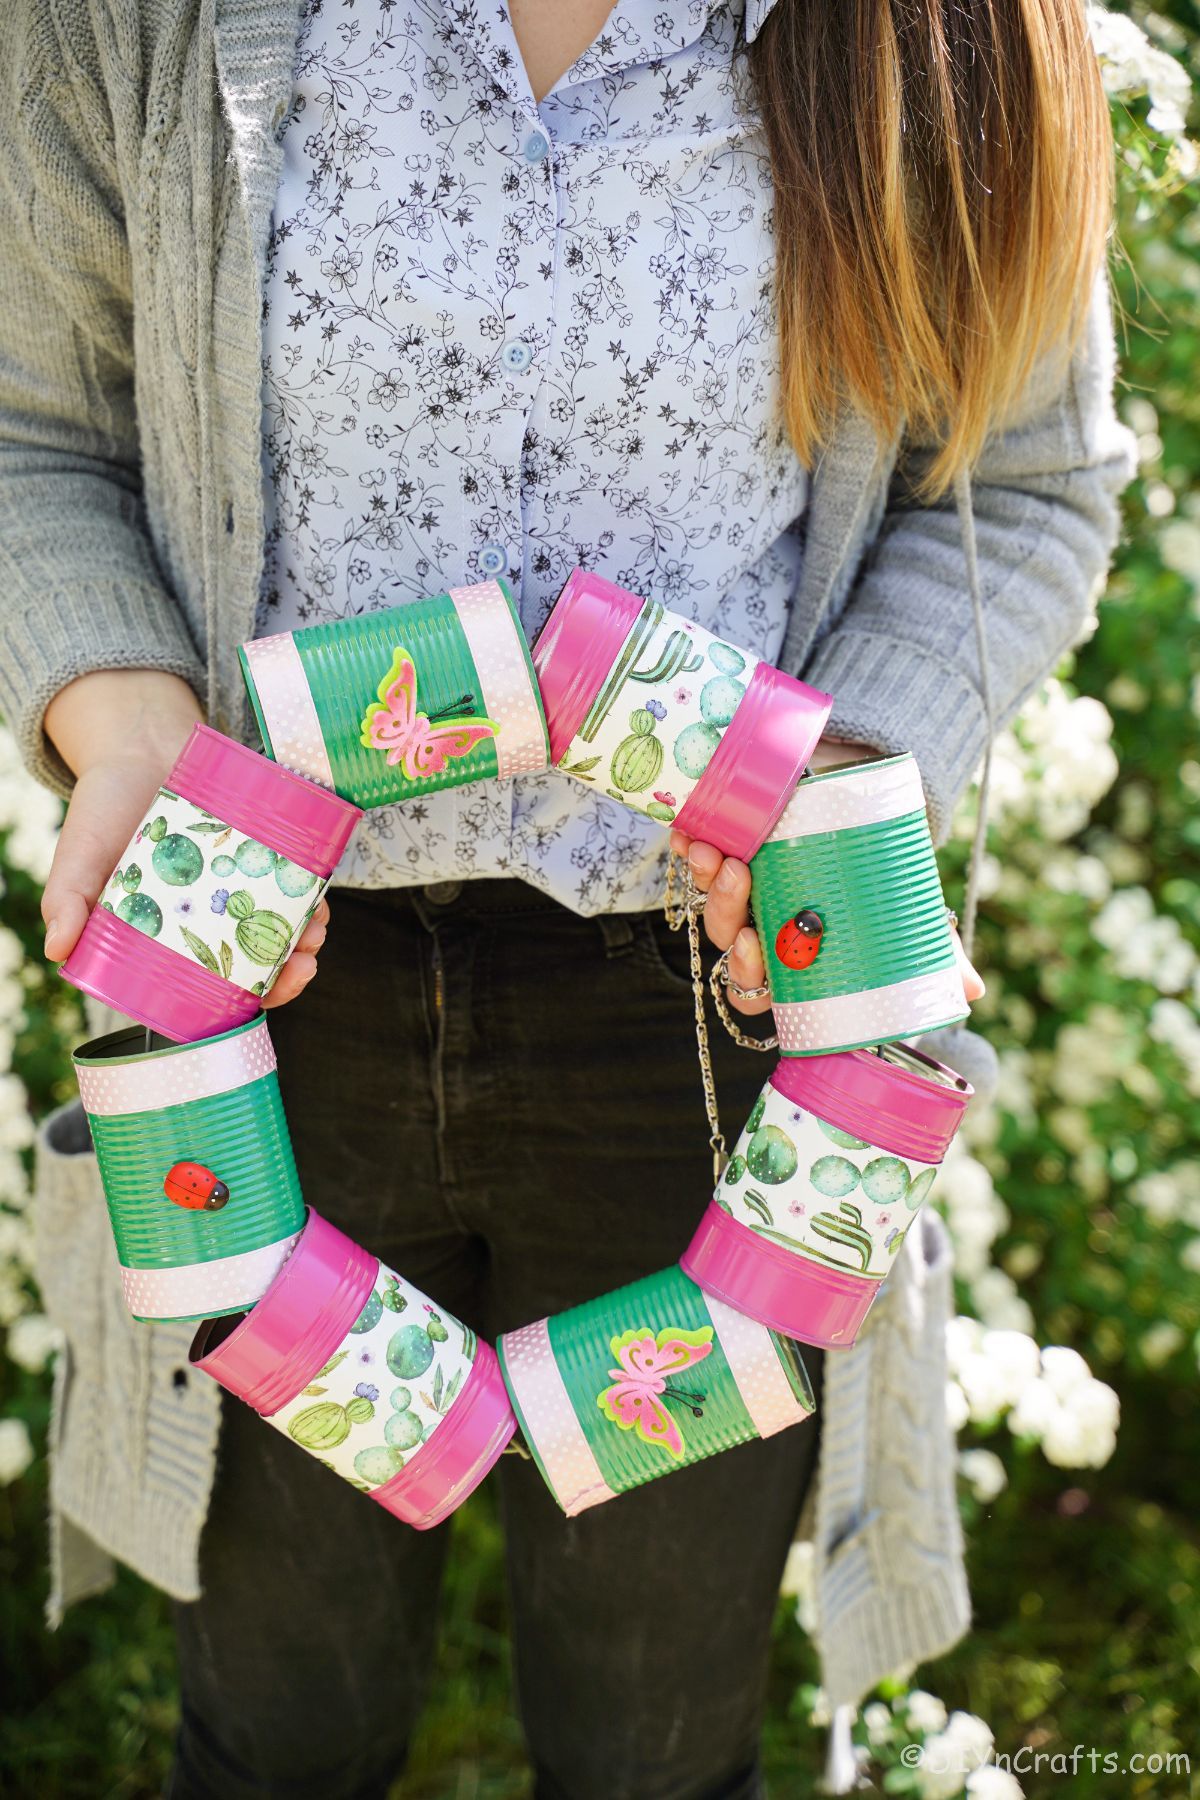
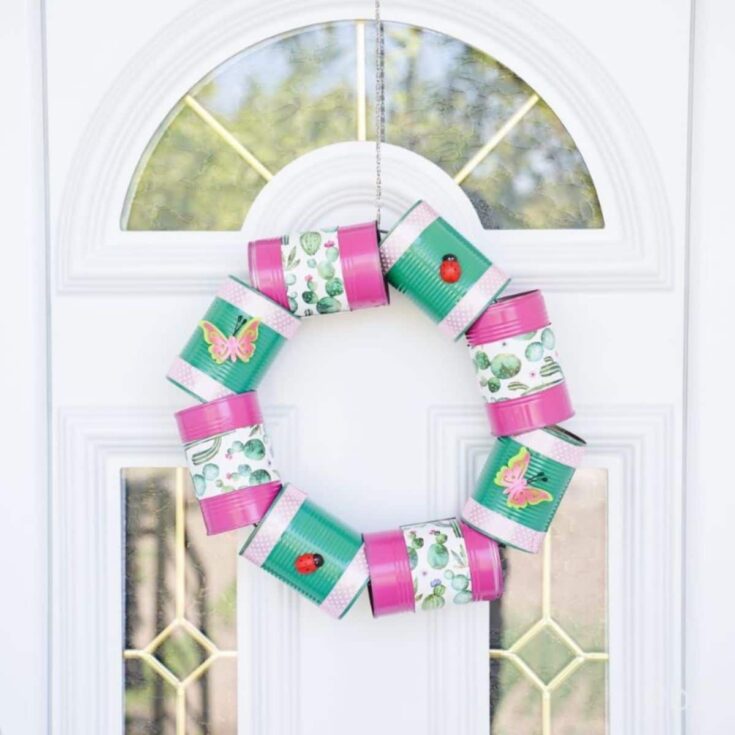
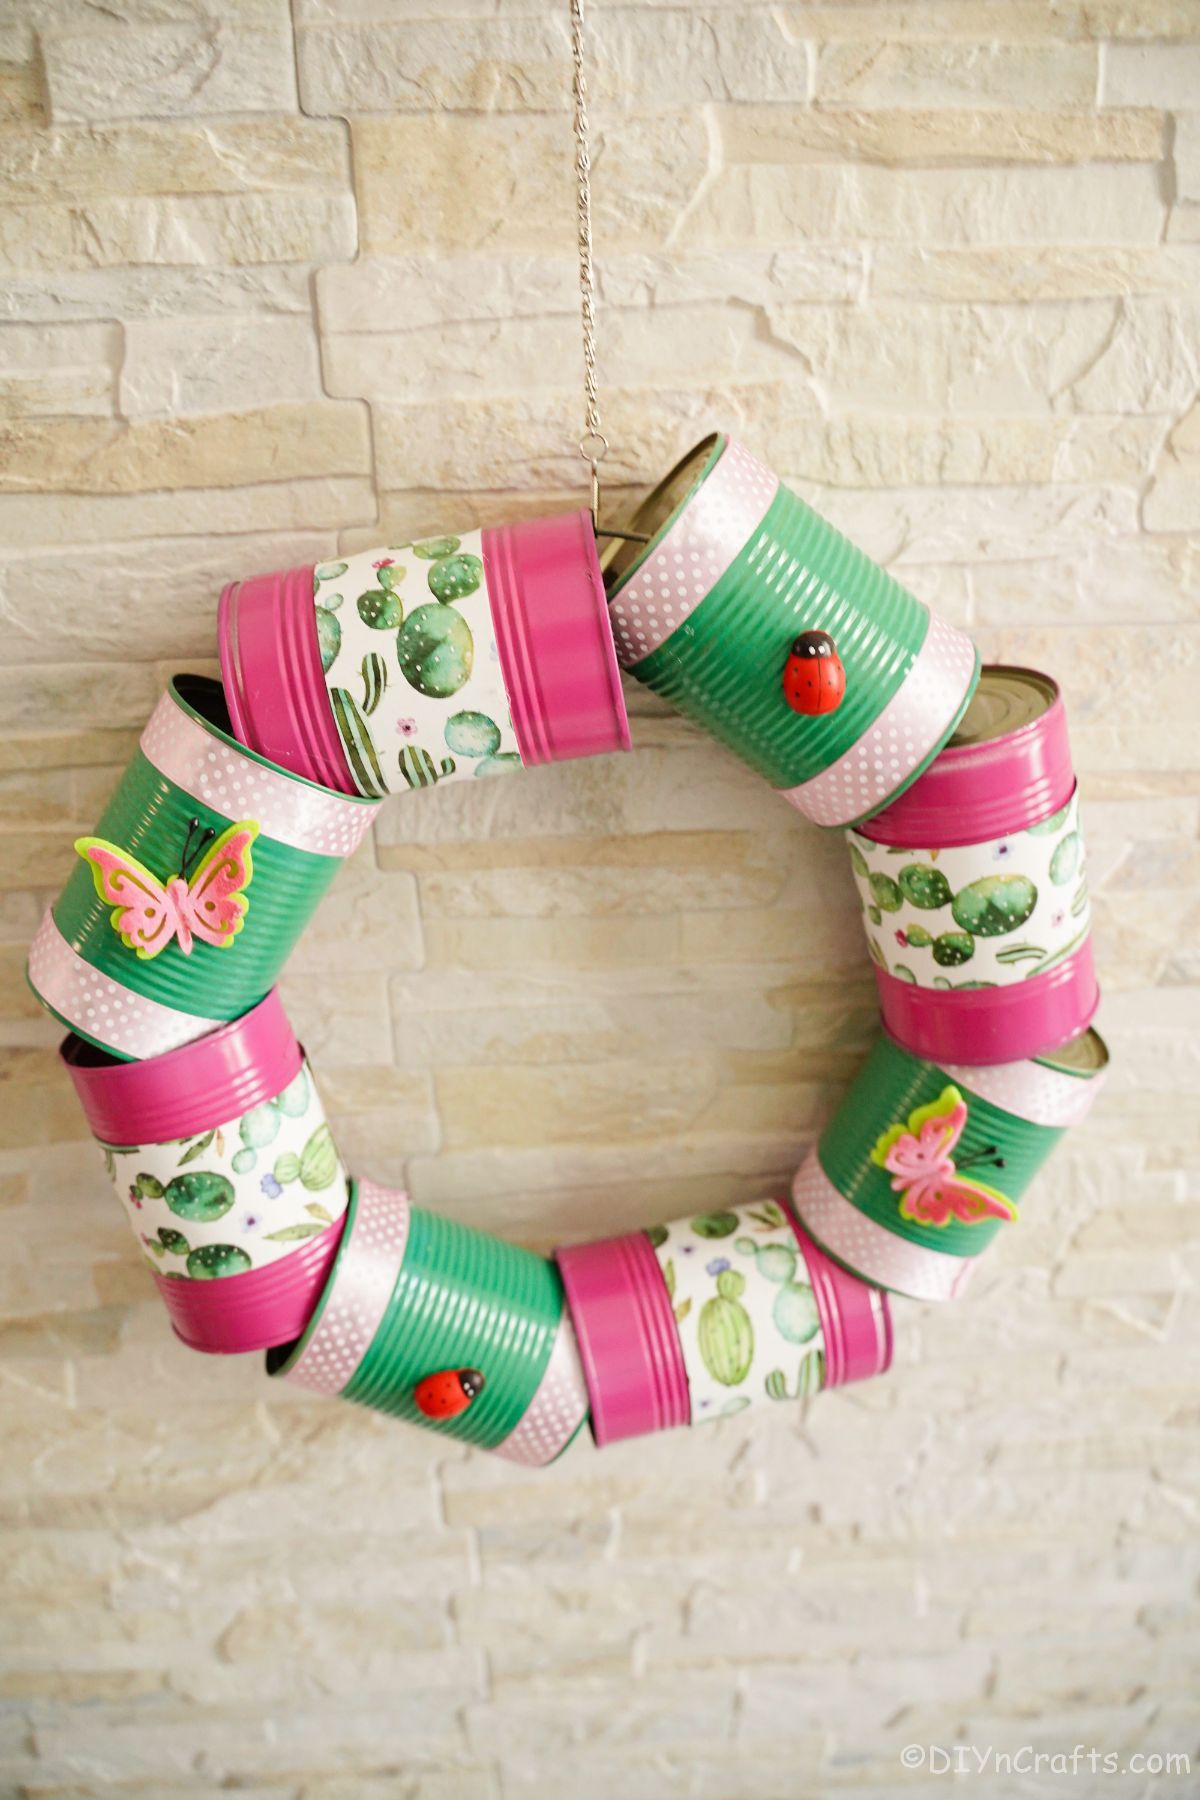
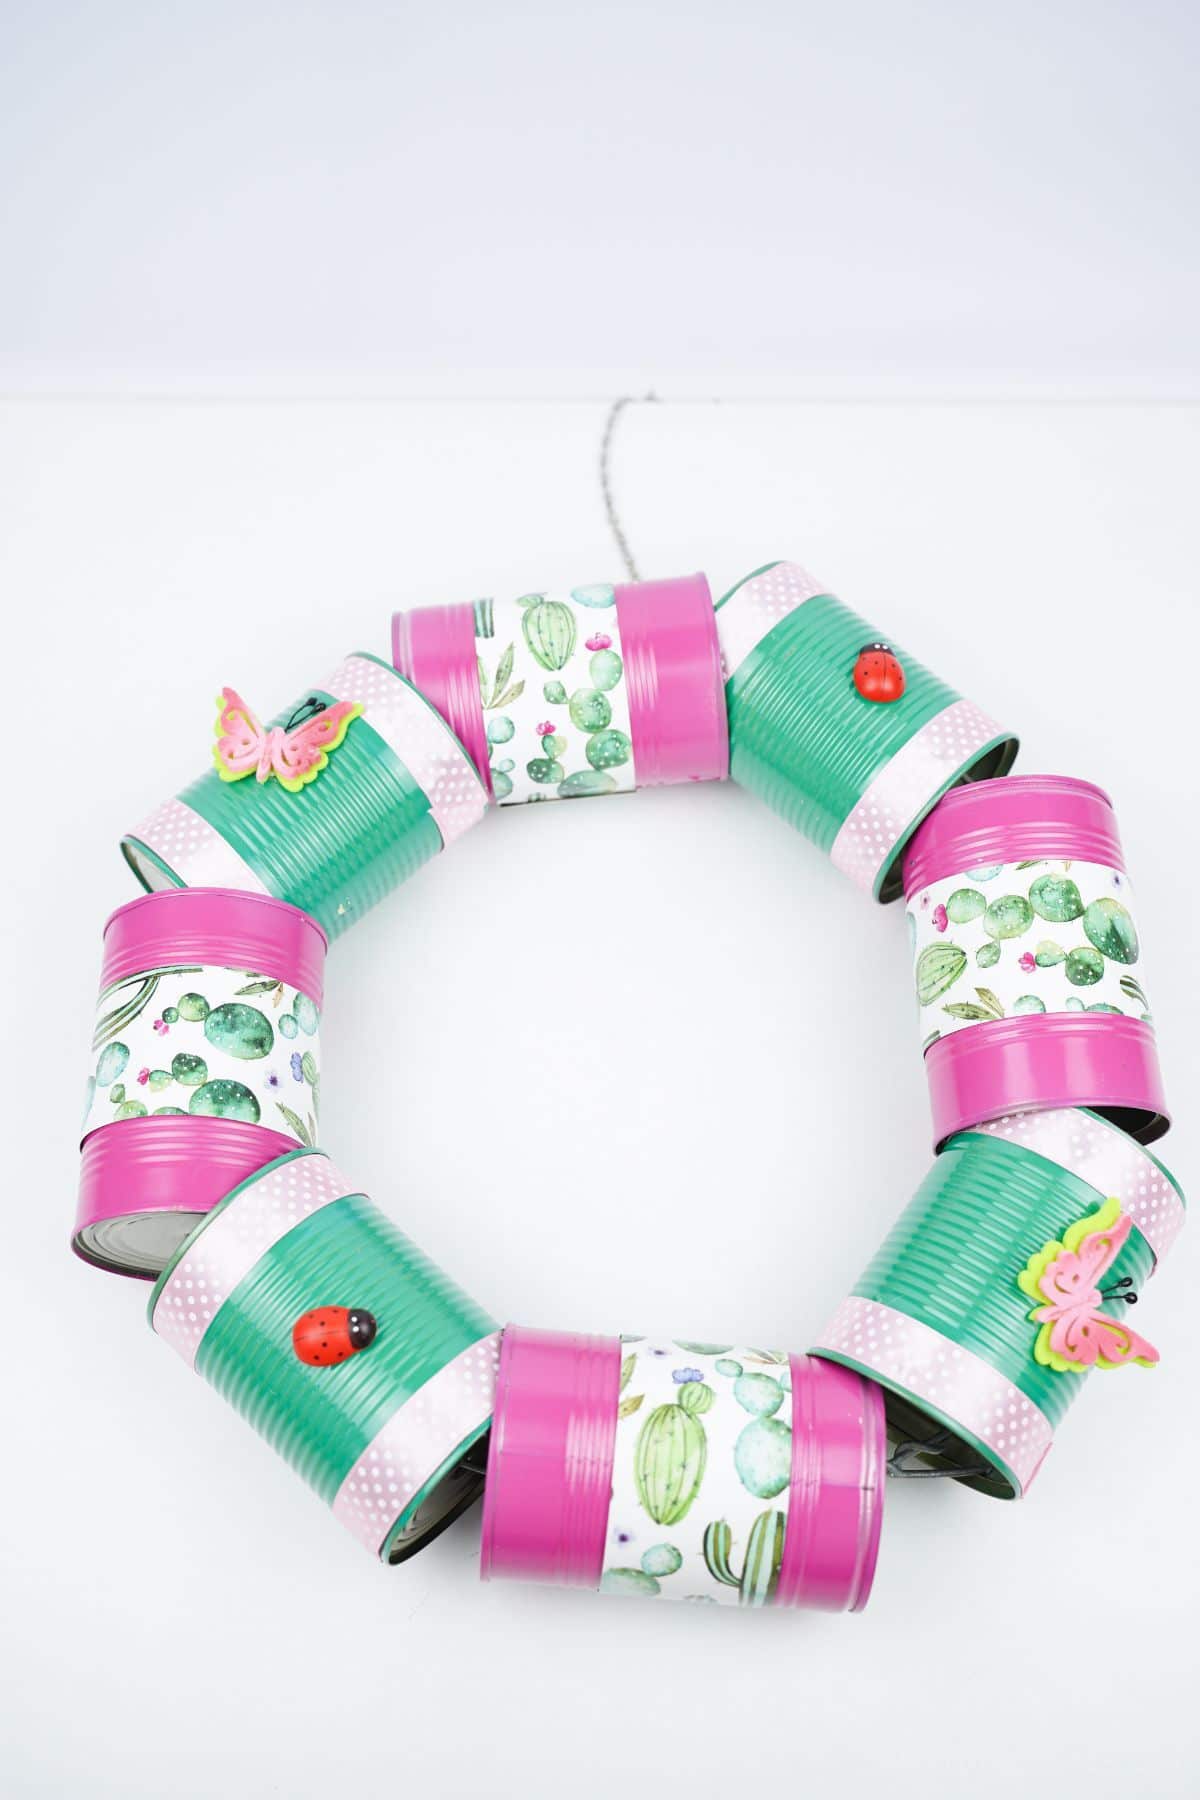
Look no further than this adorable little tin can wreath as the perfect front door decor for spring and summer. When you want a beautiful, colorful way to decorate your front door, all you have to do is to gather a bit of scrap craft supplies and a few tin cans you likely already have on hand. This festive wreath is made entirely from recycled tin cans and is decorated with ribbons and paint in a variety of colors. It’s the perfect way to add some personality to your home.
Tin Can Wreath Front Door Decor
Tin can wreaths are a simple and fun way to add a decorative touch to your front door. They are easy to make, requiring just a few basic supplies and some creativity. It’s a beautiful, colorful addition to your home. I love that you can make this wreath yourself for just $5 or less! All you need are some recycled tin cans, ribbon, and paint. Plus, it’s a great way to reuse old cans instead of throwing them away.
If you want more inspiration for your front door decor, you might want to check out this list of unique summer wreath ideas, or even this fun list of farmhouse-style wreaths. Tons of great ideas here to give you inspiration for decorating your home entry and interior.
How Can I Get The Labels and Glue Off a Tin Can?
The best way to remove labels and glue from a tin can is to soak the can in warm, soapy water. This will loosen the adhesive and make it easier to remove. You can also use a putty knife or other sharp object to scrape off the labels.
Once you have removed the labels and glue, you can rinse the cans with warm water to remove any residue. If that doesn’t remove the residue, you can also try a solvent like acetone or mineral spirits. Just be sure to use these products in a well-ventilated area and with proper personal protective equipment.
Of course, when covering the cans with paper, you can skip this if you don’t want to worry about it and just attach the paper over the top of the can instead. It’s only really important if you are planning to paint and show the entirety of the can on display.
What Should I Do to Make Sure Edges Aren’t Sharp?
You will want to make sure that the edges of your tin cans are not sharp before you start working with them. The best way to do this is to use a can opener to remove both ends of the can. Depending upon the style of the can opener, this may be all you need to do to have a smooth edge that won’t cut you.
You can also use sandpaper to gently smooth any rough edges or sharp points. Just be sure to wear protective gloves when handling the cans, as they can still be quite sharp even after they have been worked with. You want to make sure that they are not going to cut you when you work with them or when you reach for the tin can wreath.
If neither of those methods works for you, then you can also simply apply a layer of washi tape as a cover over the edges of the can.
What Wreath Form Should I Use?
You will want to make sure whatever wreath form you pick will be able to hold the weight of the cans. I like to use something that can hold it like heavier gauge wire or even PVC tubing.
Another option is to use a grapevine wreath. You will need a very sturdy one in order to hold the cans. If it feels too heavy, you can, of course, decrease the number of cans to help make it easier to use a grapevine wreath form.
What Ways Can I Customize My Upcycled Can Wreath?
There are endless ways that you can customize your upcycled can wreath. I love this unique look, but you can easily change things to fit your own preferences or decor. Below are a few others you can choose from.
- Swap the colors of paint and paper you coat the tin cans with.
- Use different styles of embellishments like beads, miniature people, flowers, or animals instead of the butterfly and ladybugs.
- Add glitter so the cans will sparkle.
- Use ribbons or lace around the edges of the can for another unique look.
- Wrap tulle, burlap, or ribbon between the cans to fill out the wreath a bit more.
- Add a bow with dangling ends on the bottom of the wreath.
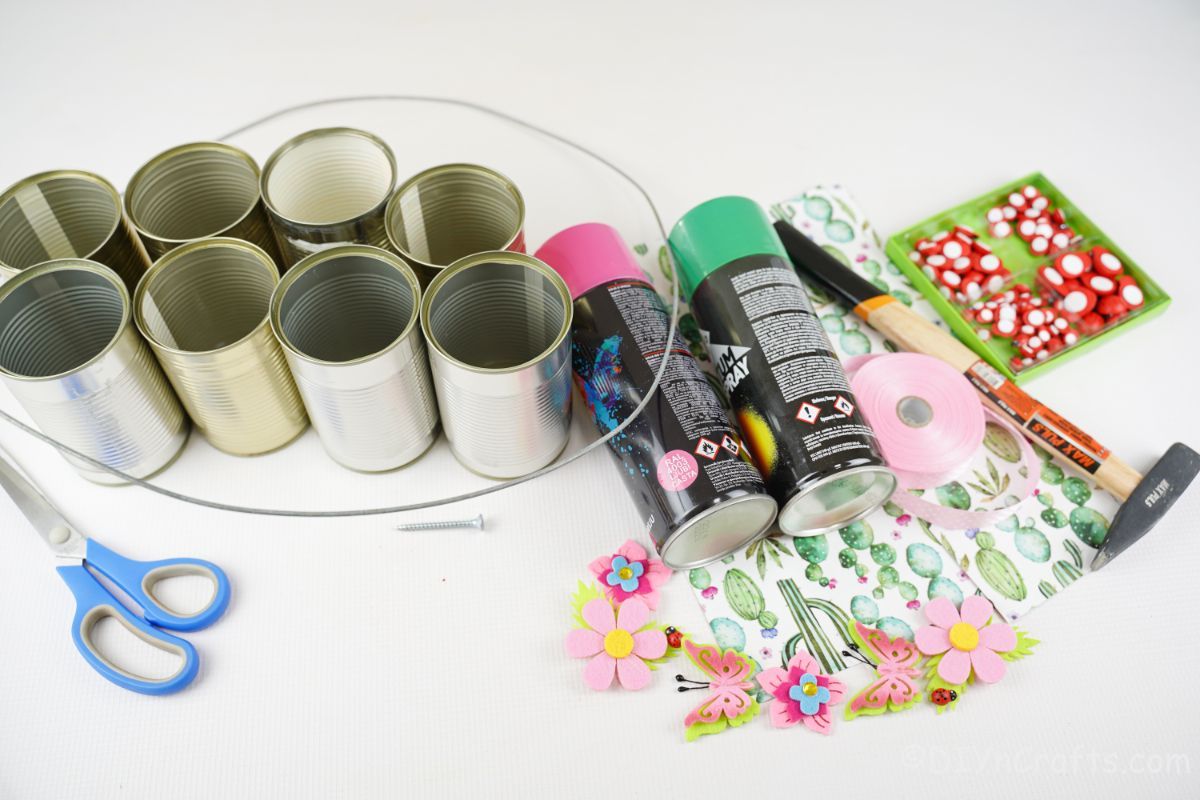
Supplies Needed
How to Make a Tin Can Door Wreath
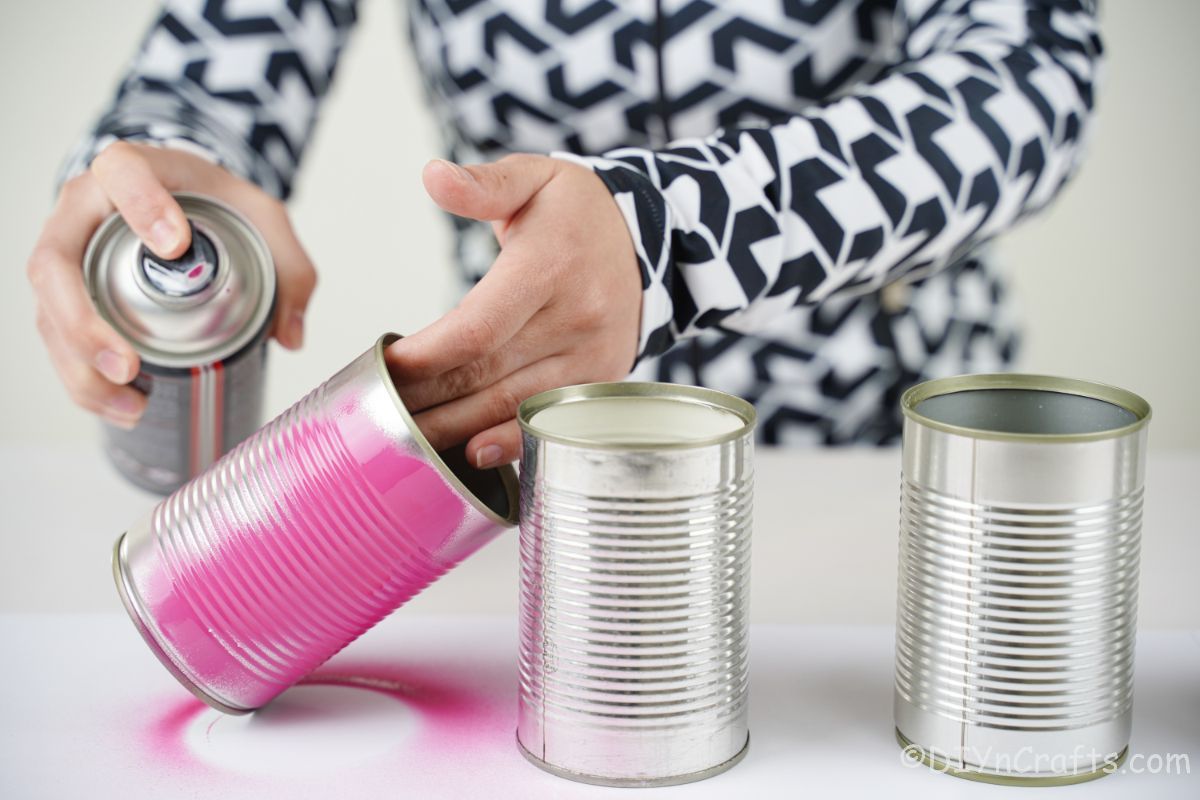
Start by prepping your tin cans. Remove the labels and glue then wash them well and set them aside to dry. Once they are dry, you will spray paint the cans.
Paint half of the cans green.
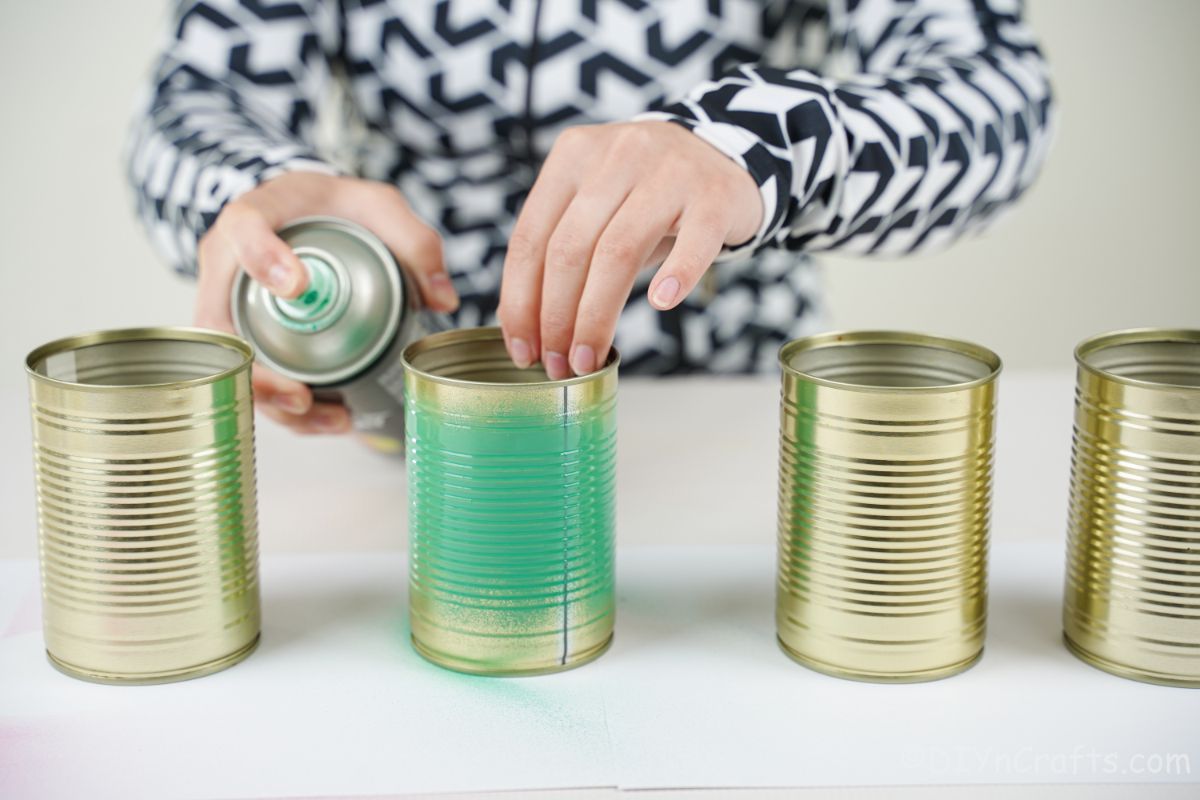
Then paint half of the cans pink. Set them all aside to dry for at least 30 minutes or until no longer tacky.
Measure the width and height of the tin cans. Subtract at least 2″ from the height of the can for your measurements.
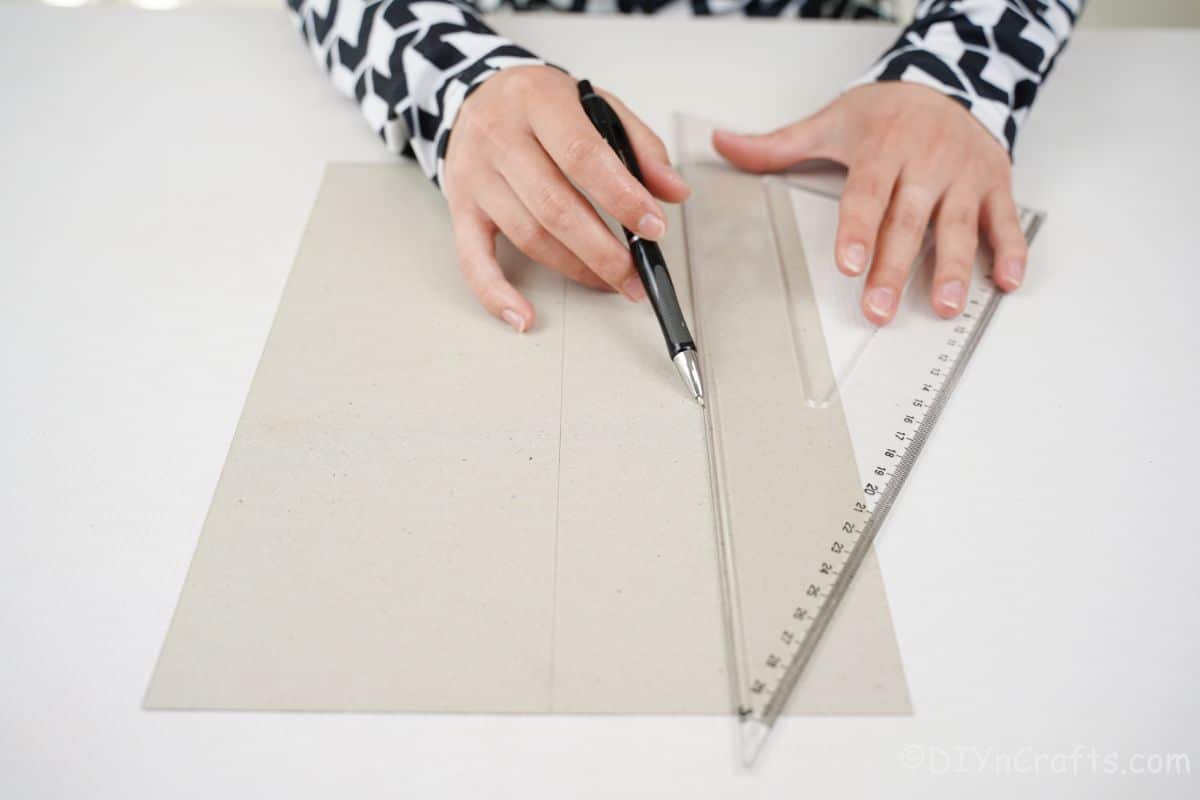
Then cut out 4 strips of scrapbook paper to fit those dimensions.
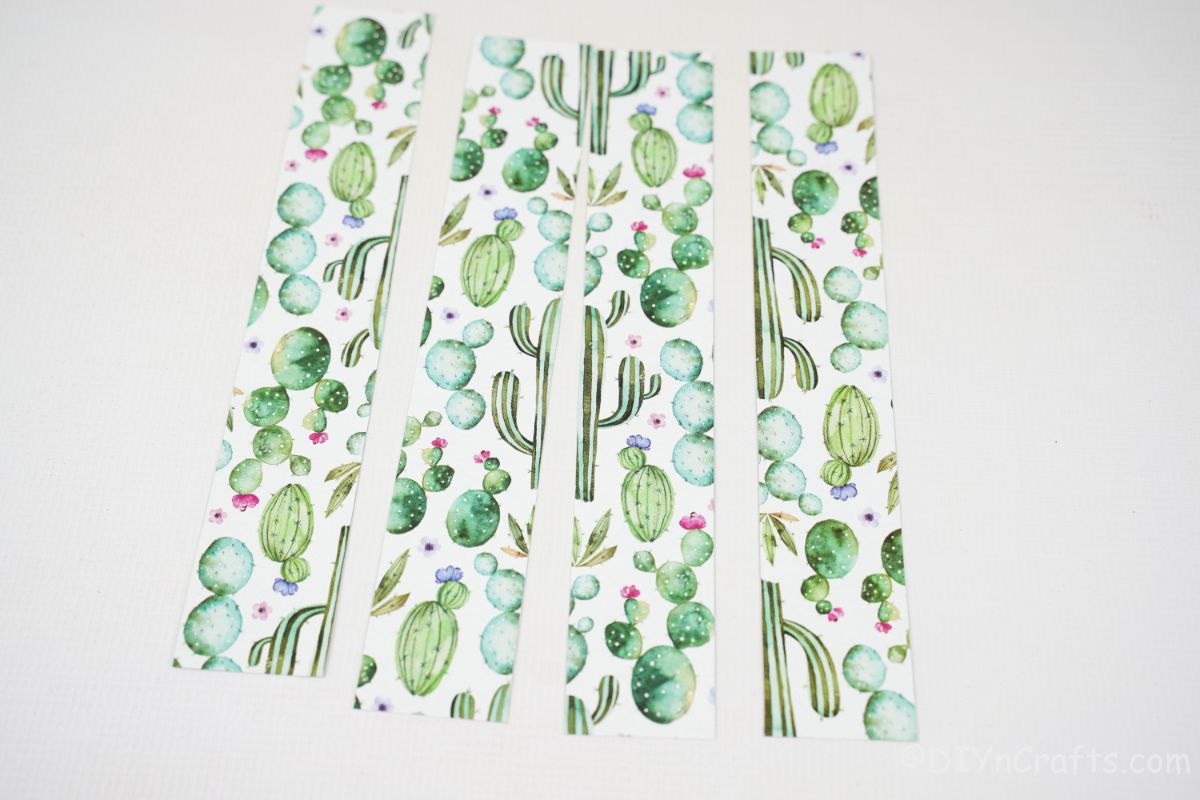
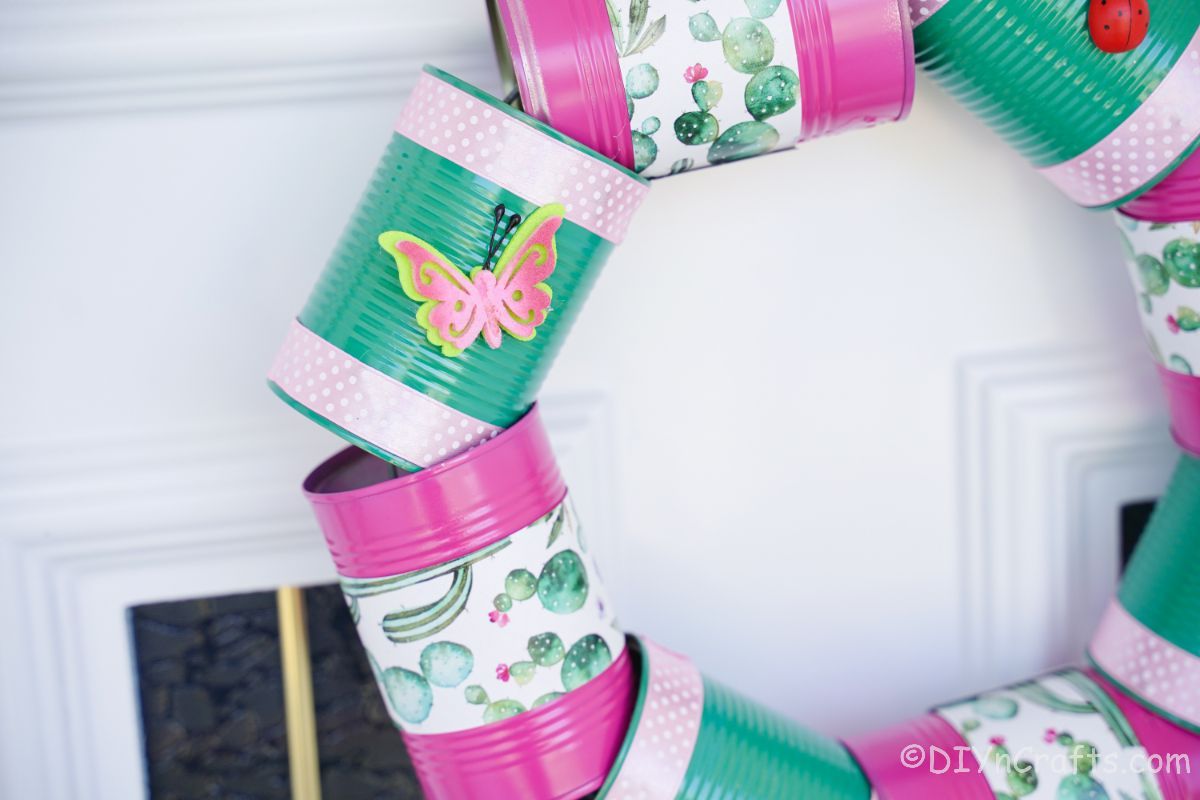
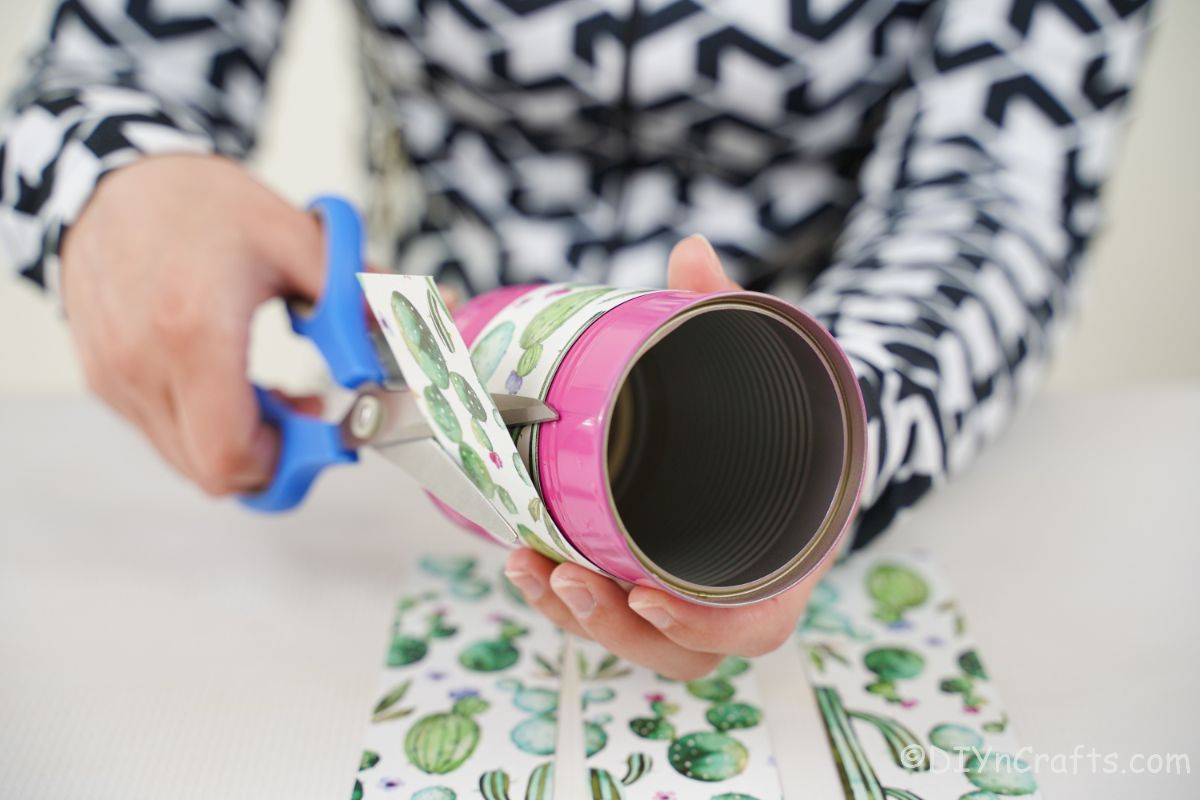
Glue these strips of paper around the center of the pink cans, so that the paper is covering the center but pink shows on both ends.
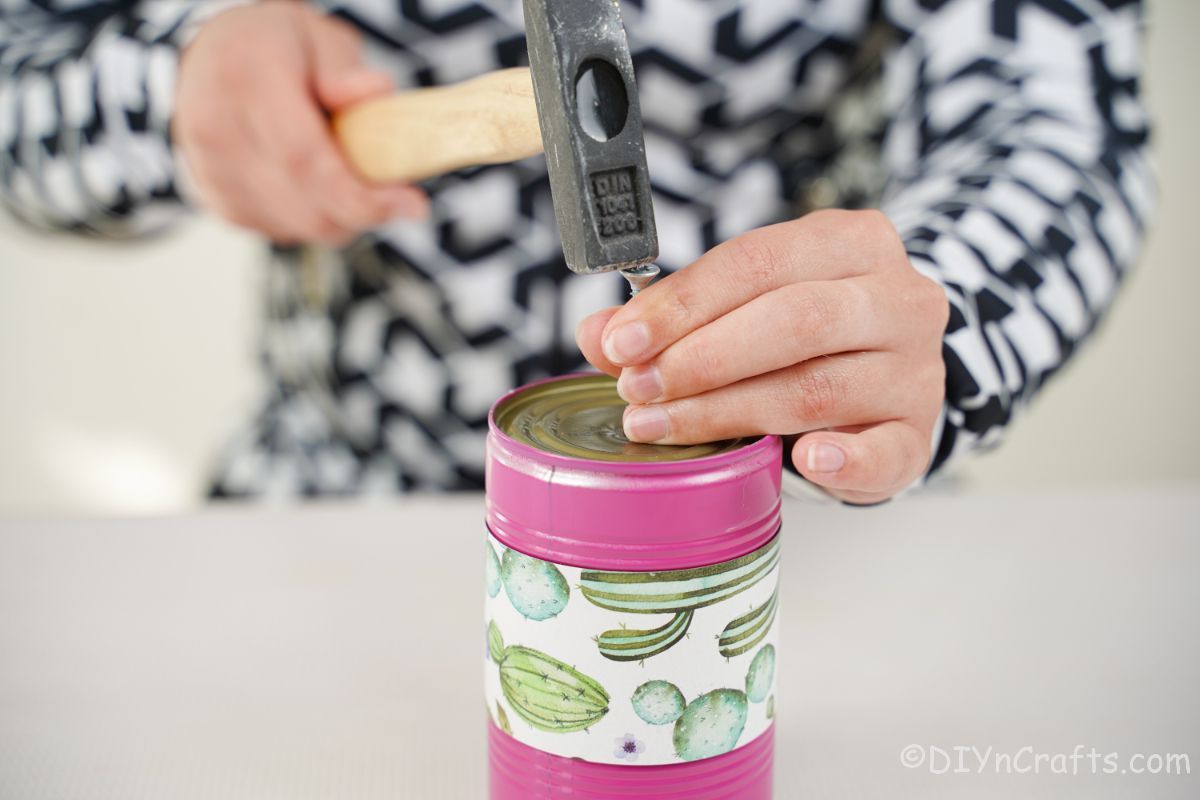
Use a nail or soldering iron and tap a hole through the center of the tin can end that still has a lid. This will need to be large enough for the metal/wire/hanger you will use as a wreath form.
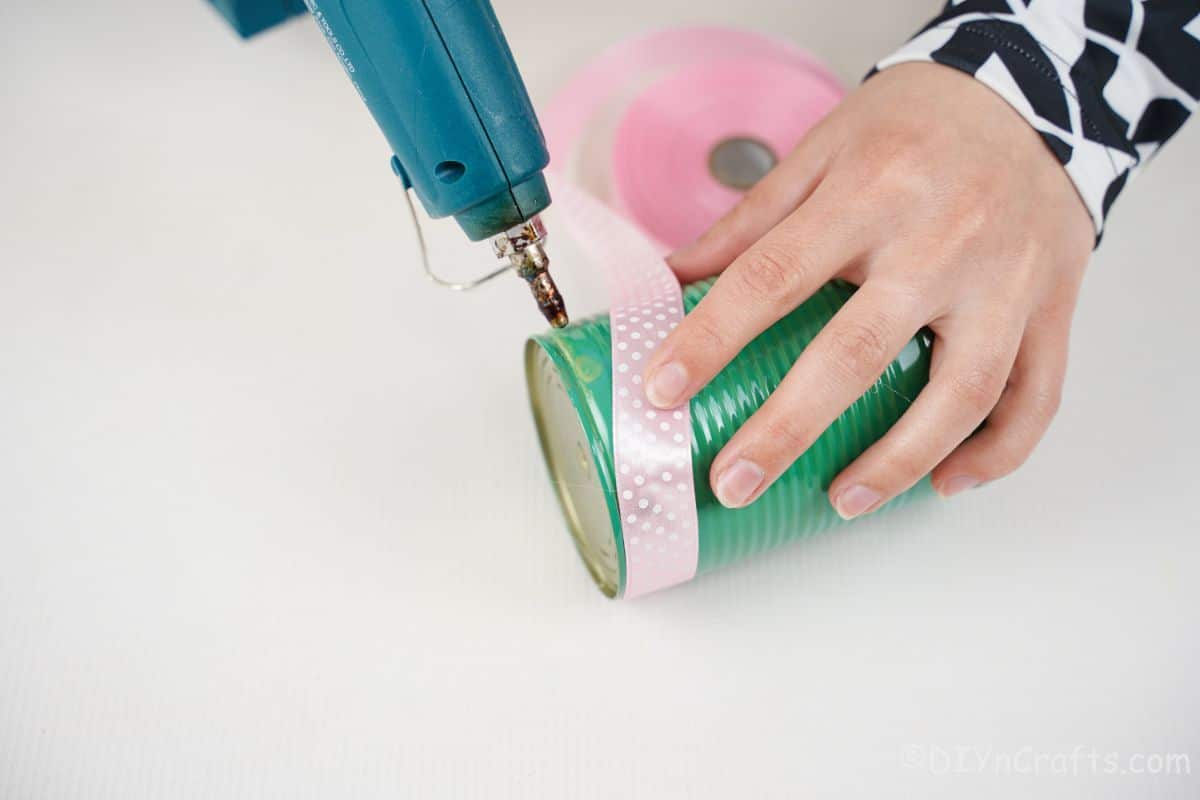
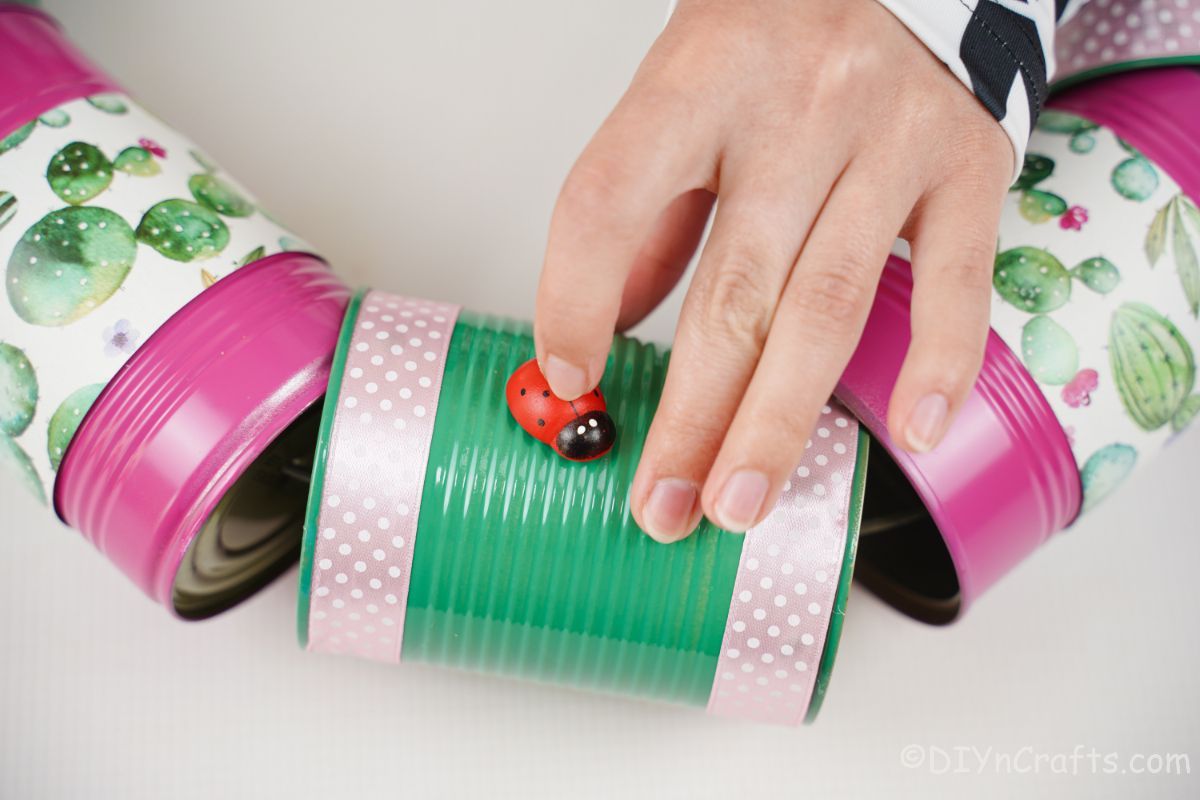
Now, on the ends of the green cans, glue a strip of ribbon. Tuck it against both edges so the bulk of the can that is showing is green.
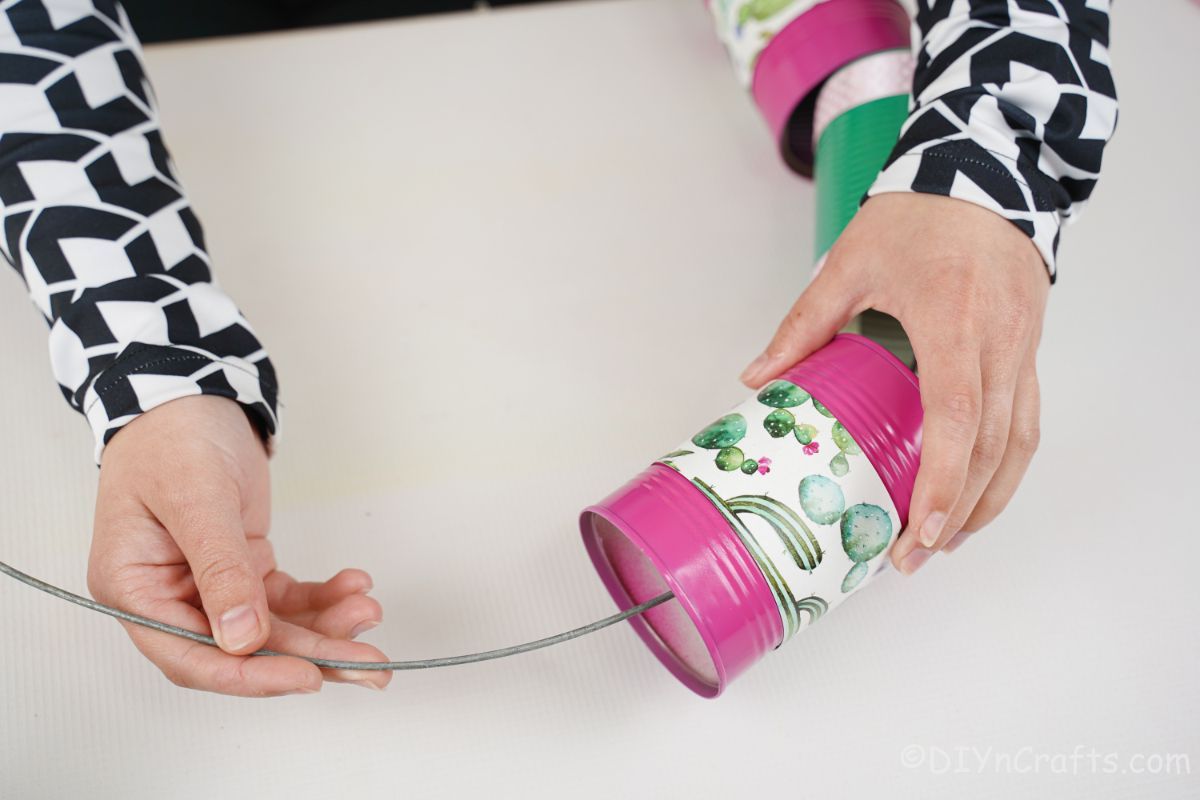
Next, slide the cans through the metal, alternating with a pink can and then a green can until they are all on the length of wire.
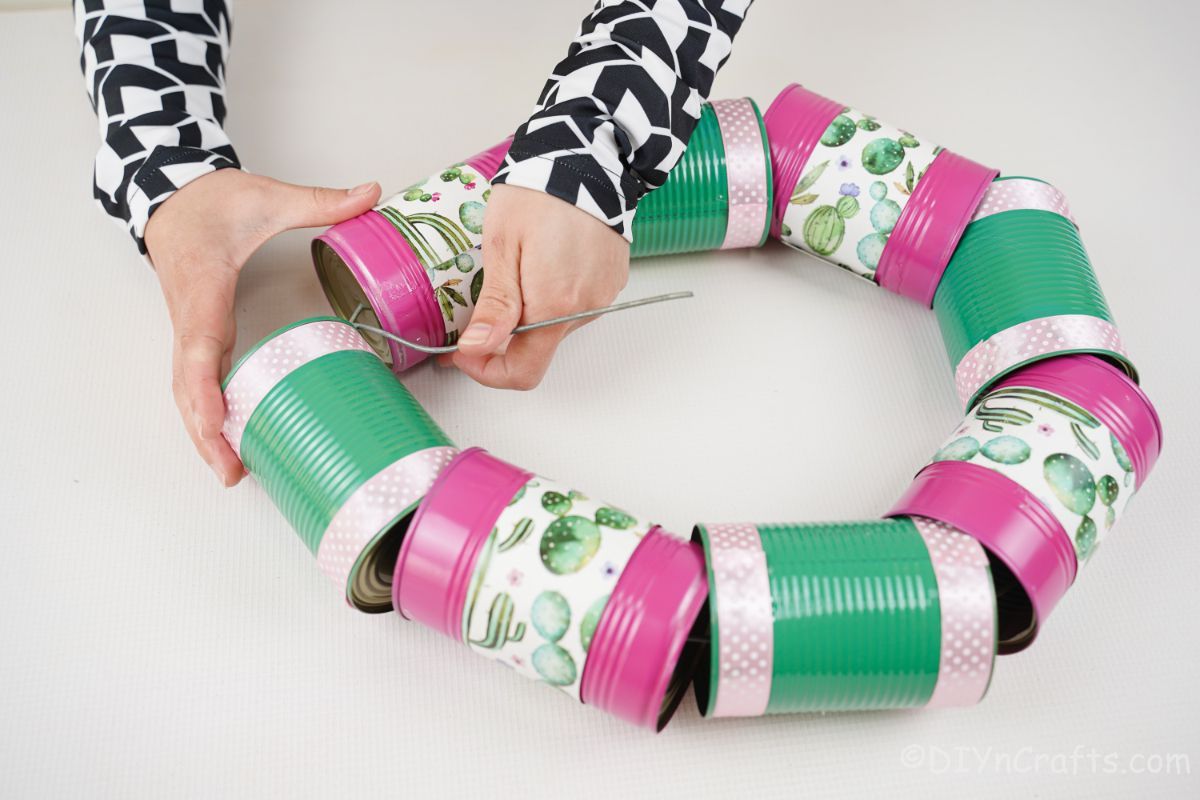
Pull this together into a circle and twist off the ends of the metal and clip so no space remains without a can.
Now, on each of the green cans, add a small embellishment in the center of the side of the wreath that is facing outwards. I added butterflies and ladybugs.
Now you can add a length of ribbon, rope, or twine for hanging or simply hook it onto a wreath hanger on your door!

More Front Porch Decor
If you want more inspiration for your front door, look no further than this list of great ideas to add to your crafting list. I have included some of my favorite wreath ideas here for you to bookmark, print out tutorials, or even just pin to a favorite crafting Pinterest board.
Yield: 1
This whimsical tin can wreath is the perfect front door decor for springtime and summer! Fast, easy, and cheap to make!
Active Time
20 minutes
Additional Time
30 minutes
Total Time
50 minutes
Difficulty
Easy
Estimated Cost
$0
Notes
Paint your cans with any preferred decor for any theme or season.
Recommended Products
As an Amazon Associate and member of other affiliate programs, I earn from qualifying purchases.
Finished Project Gallery
Make this with any color paint or scrapbook paper you prefer. It can even be used for a seasonal holiday theme!


